Whirlpool WGD7300XW Installation Instructions - Page 12
Connect Inlet Hoses
 |
UPC - 883049202334
View all Whirlpool WGD7300XW manuals
Add to My Manuals
Save this manual to your list of manuals |
Page 12 highlights
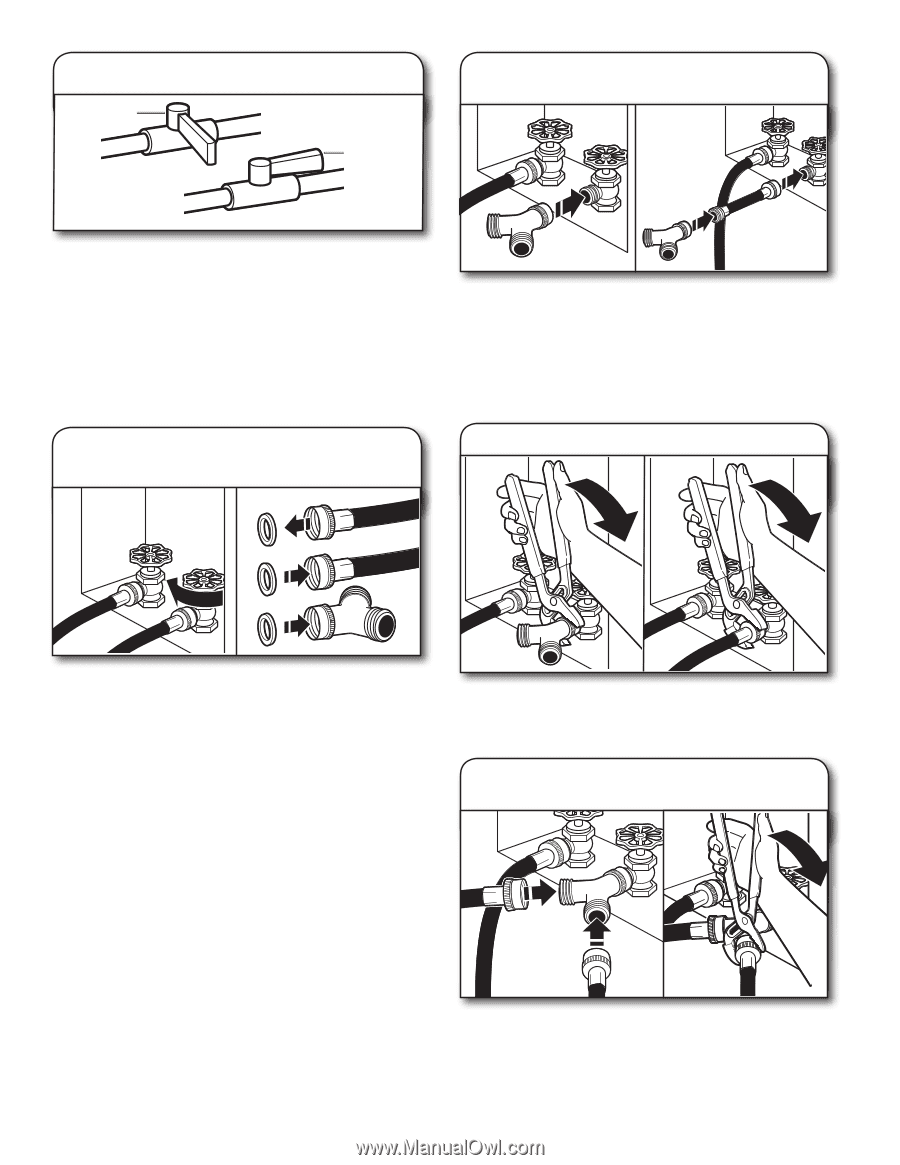
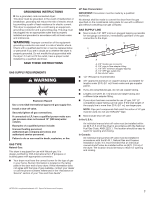
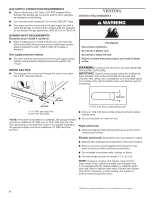
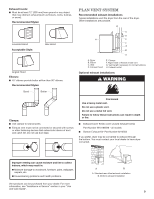
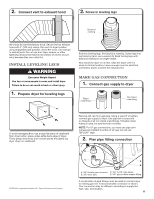
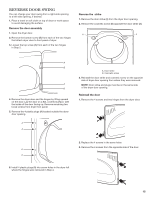
3. Open shut-off valve Closed valvAe BOpen valve 2. Attach short hose and "Y" connector Open shut-off valve in supply line; valve is open when handle is parallel to gas pipe. Then, test all connections by brushing on an approved noncorrosive leak-detection solution. Bubbles will show a leak. Correct any leaks found. Connect Inlet Hoses For non-steam models, skip to "Connect Vent" on page 13. The dryer must be connected to the cold water faucet using the new inlet hoses. Do not use old hoses. 1. Turn cold water off, remove and replace rubber washer Fig. A Fig. B If space permits, attach the brass female end of the "Y" connector to the cold water faucet. See figure A. If "Y" connector cannot be attached directly to the cold water faucet, the short hose must be used. See figure B. Attach short hose to cold water faucet. Screw on coupling by hand until it is seated on faucet. Then attach "Y" connector to brass male end of the short hose. Screw on coupling by hand until it is seated on connector. 3. Tighten couplings Turn cold water faucet off and remove washer inlet hose. Check and see if rubber washer is in the "Y" connector. Remove old rubber washer from inlet hose and replace with new rubber washer provided. Using pliers, tighten the couplings with additional two-thirds turn. NOTE: Do not overtighten. Damage to the coupling can result. 4. Attach long hose to "Y" connector and tighten couplings One end of the long hose has a wire mesh strainer inside the coupling. Attach this end to the "Y" connector. Attach washer cold inlet hose to other side of "Y" connector. Screw on coupling by hand until it is seated on connector. Using pliers, tighten the couplings an additional two-thirds turn. NOTE: Do not overtighten. Damage to the coupling can result. 12
-
 1
1 -
2
-
3
-
4
-
5
-
6
-
 7
7 -
 8
8 -
 9
9 -
 10
10 -
 11
11 -
 12
12 -
 13
13 -
 14
14 -
 15
15 -
 16
16 -
 17
17 -
18
-
19
-
20
-
21
-
22
-
23
-
24
-
25
-
26
-
27
-
28
-
29
-
30
-
31
-
32
-
33
-
34
-
35
-
36
 |
 |