Whirlpool WGD9250WL Installation Guide - Page 14
Tighten couplings - washers
 |
UPC - 883049188164
View all Whirlpool WGD9250WL manuals
Add to My Manuals
Save this manual to your list of manuals |
Page 14 highlights
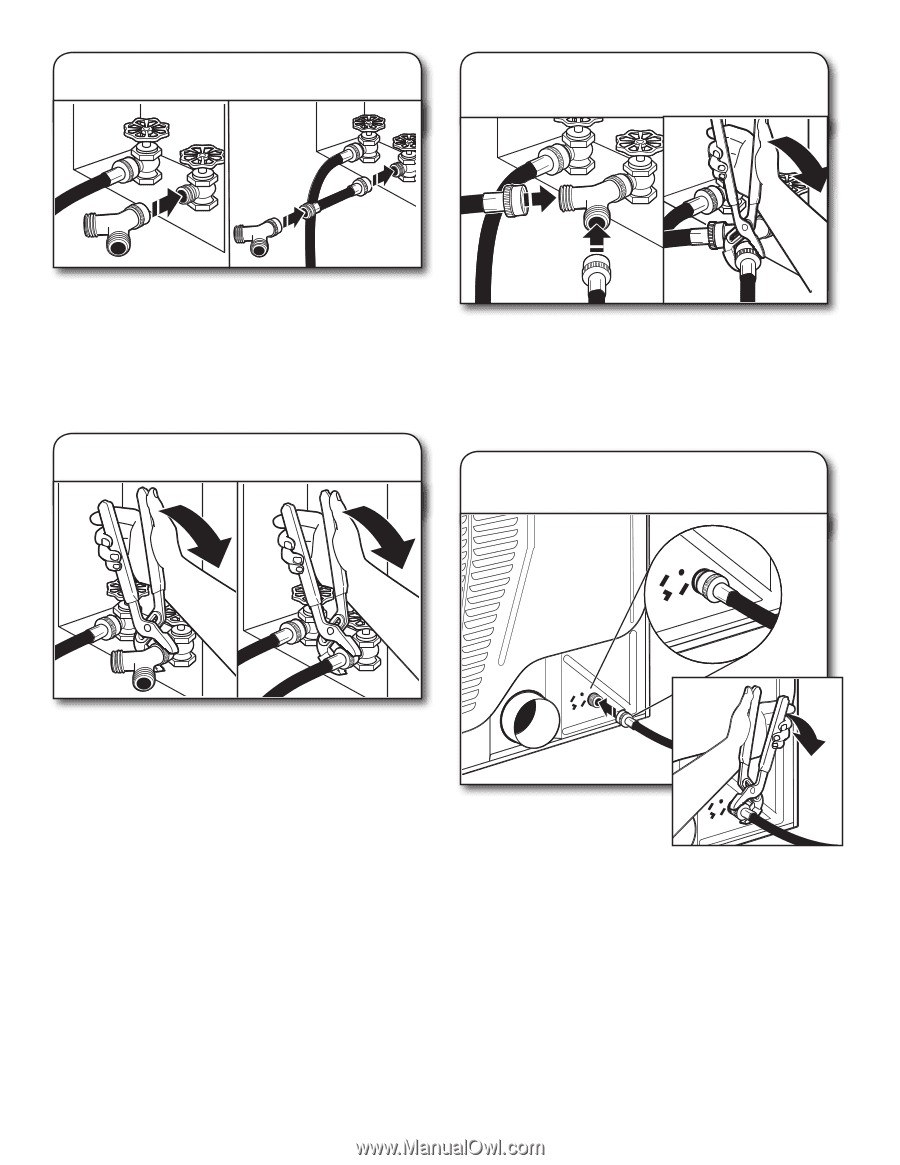
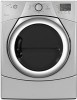
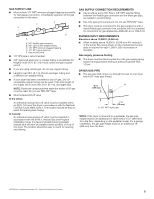
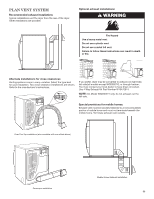
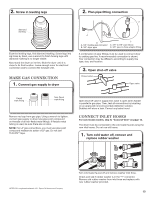
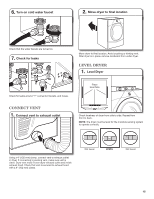
2. Attach short hose and "Y" connector 4. Attach long hose to "Y" connector and tighten couplings Fig. A Fig. B If space permits, attach the brass female end of the "Y" connector to the cold water faucet. See figure A. If "Y" connector cannot be attached directly to the cold water faucet, the short hose must be used. See figure B. Attach short hose to cold water faucet. Screw on coupling by hand until it is seated on faucet. Then attach "Y" connector to brass male end of the short hose. Screw on coupling by hand until it is seated on connector. 3. Tighten couplings One end of the long hose has a wire mesh strainer inside the coupling. Attach this end to the "Y" connector. Attach washer cold inlet hose to other side of "Y" connector. Screw on coupling by hand until it is seated on connector. Using pliers, tighten the couplings an additional two-thirds turn. NOTE: Do not overtighten. Damage to the coupling can result. 5. Attach long hose to dryer fill valve and tighten coupling Using pliers, tighten the couplings with additional two-thirds turn. NOTE: Do not overtighten. Damage to the coupling can result. Attach other end of long hose to fill valve at bottom of dryer back panel. Screw on coupling by hand until it is seated on fill valve connector. Using pliers, tighten the couplings an additional two-thirds turn. NOTE: Do not overtighten. Damage to the coupling can result. 14
-
 1
1 -
2
-
3
-
4
-
5
-
6
-
7
-
8
-
 9
9 -
 10
10 -
 11
11 -
 12
12 -
 13
13 -
 14
14 -
 15
15 -
 16
16 -
 17
17 -
 18
18 -
 19
19 -
20
-
21
-
22
-
23
-
24
-
25
-
26
-
27
-
28
-
29
-
30
-
31
-
32
 |
 |