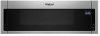
Whirlpool WML75011HZ Owners Manual - Page 4
Features, Cookware and Dinnerware, Microwave Oven Use
 |
View all Whirlpool WML75011HZ manuals
Add to My Manuals
Save this manual to your list of manuals |
Page 4 highlights
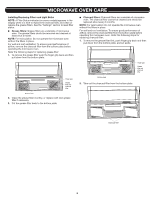
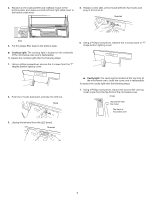
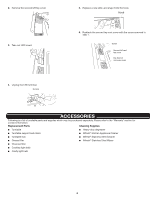
Fan Timer Set vent fan to run for exactly 30 minutes or to run for only 30 minutes more (off after 30 minutes). The vent fan may be turned off at any time using the Vent Fan keypad. Touch CLOCK to reach the Fan Timer submenu and select the setting. Demo Mode Activate to practice using the control without actually turning on the magnetron. Touch CLOCK to reach the Demo mode submenu, then follow the prompts to activate. The Clock or : will light up in the display. Repeat to deactivate. If the microwave oven has not been used for 5 min (no key press for 5min), the display will show "DEMO ON". Features Standby Mode When no functions are working (12-hour clock is displayed or if the clock has not been set), oven will switch to Standby Power mode and dim the LCD brightness after 2 minutes. Press any button or open/close the door, and display will return to the normal brightness. CLEANRELEASE® Cavity Coating (on some models) The durable, nonstick coating resists soil buildup by making cleaning easier. See the "Microwave Oven Care" section. 6th SENSE™ System A sensor in the microwave oven detects moisture released from food as it heats and adjusts the cooking time accordingly. Cookware and Dinnerware Turntable Turntable may be turned off for manual cooking only. This is helpful when cooking with plates that are bigger than the turntable or when cooking with plates that are side by side. Turntable cannot be turned off during preset or sensor (on some models) functions. Microwave-Safe Do Not Use ■■ Browning dish (Follow manufacturer recommendations) ■■ Metal cookware and bakeware ■■ Ceramic glass, glass ■■ Straw or wicker ■■ China, earthenware (Follow manufacturer recommendations) ■■ Gold, silver, or pewter ■■ Melamine (Follow manufacturer recommendations) ■■ Non-approved meat thermometers, skewers ■■ Paper towels, paper plates, napkins (Use non-recycled paper) ■■ Twist ties ■■ Plastic wraps, bags, covers, dinnerware, containers (Follow manufacturer recommendations) ■■ Pottery and clay (Follow manufacturer recommendations) ■■ Silicone bakeware (Follow manufacturer recommendations) ■■ Foil liners, such as sandwich wrappers ■■ Staples ■■ Objects with gold or silver trim or with metallic glaze ■■ Wax paper To Test Cookware/Dinnerware: Place dish in microwave oven with 1 cup (250 mL) of water beside it. Program 1 minute of cook time at 100%. If dish becomes hot and the water stays cool, do not use the dish in the microwave oven. Microwave Oven Use For list of preset programs, see the Quick Reference Guide provided with your model. Manual Cooking Preset Cooking, Reheating, Defrosting Touch number keypads to enter time, touch POWER (if not 100%), touch number keypads to enter power level (10-90), then touch the Start control. Sensor Cooking A sensor in the microwave oven detects moisture released from food as it heats and adjusts the cooking time accordingly. Touch COOK or REHEAT or DEFROST repeatedly to scroll through program options. Rest on desired program options. Follow prompts to select submenu items and/or amounts, then press the Start control. Popcorn Two choices, press Popcorn repeatedly. Make sure microwave oven has been plugged in for at least 1 minute. Use microwave-safe dish with loose-fitting lid or cover microwave-safe dish with plastic wrap, and vent. For optimal performance, wait at least 30 minutes after convection cooking or grilling (on some models) before sensor cooking. Large bag: Senses 3.0-3.5 oz (85-99g) Small bag: 1.75 oz (50g) only Place bag on turntable then touch Start control. Listen for popping to slow to 1 pop every 1 or 2 seconds, then stop the cycle. Cooking results may vary by brand and fat content. For other bag sizes use manual cooking. Preset Steam/Simmer Touch STEAM/SIMMER, repeatedly to scroll through program options. Rest on desired program options. Follow prompts to select submenu items and/or amounts, then press the Start control. 4
-
 1
1 -
 2
2 -
 3
3 -
 4
4 -
 5
5 -
 6
6 -
 7
7 -
 8
8 -
 9
9 -
 10
10 -
11
-
12
 |
 |