Whirlpool WOCA7EC0H Installation Instructions - Page 10
Complete Installation
 |
View all Whirlpool WOCA7EC0H manuals
Add to My Manuals
Save this manual to your list of manuals |
Page 10 highlights
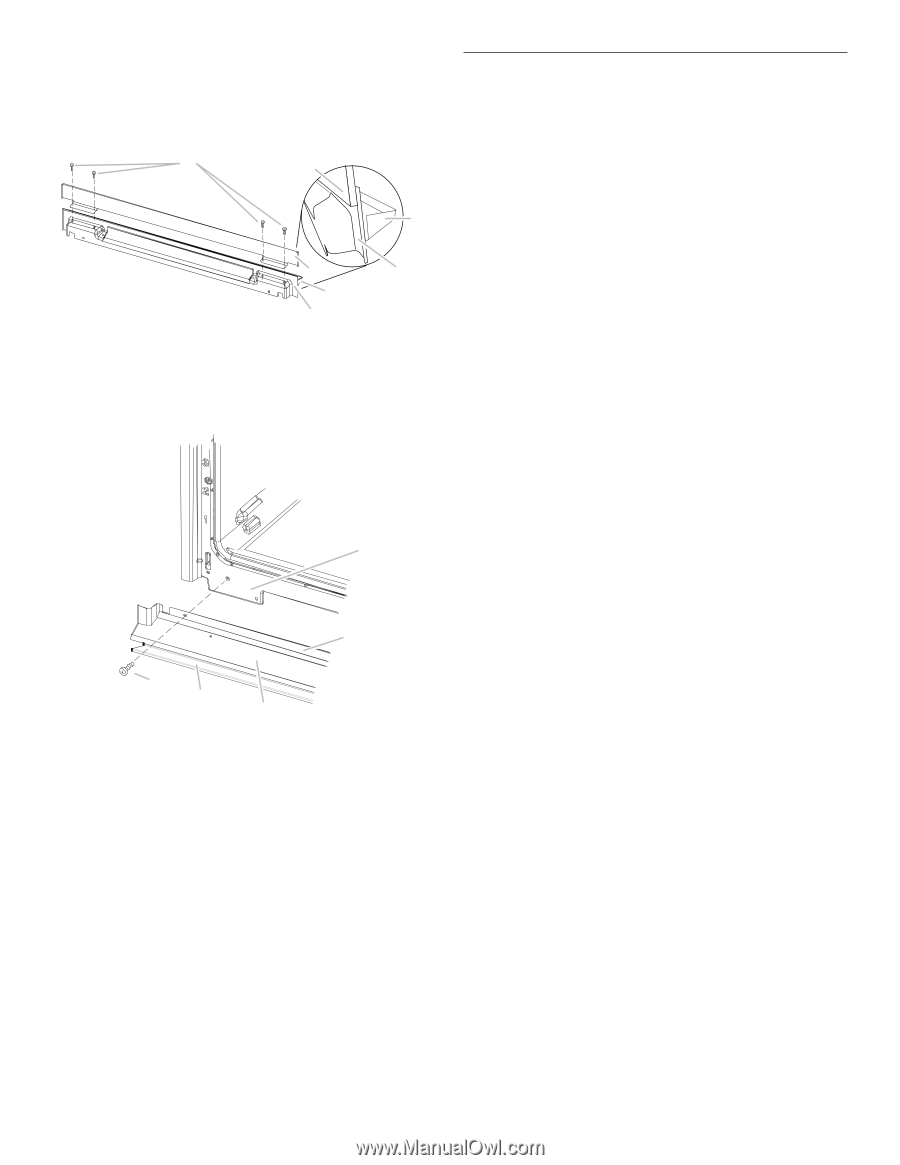
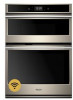
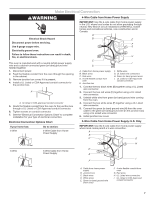
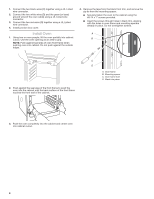
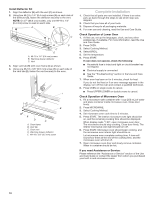
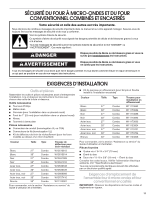
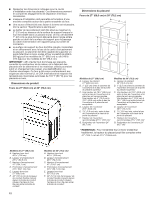
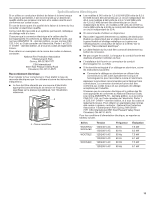
Install Deflector Kit 1. Align the deflector (B) with the vent (C) as shown. 2. Using two #8-18 x 1/4" (6.4 mm) screws (A) on each side of the deflector (B), fasten the deflector securely to the vent. NOTE: On 27" (68.6 cm) models, only one #8-18 x 1/4" (6.4 mm) screw is used on each side. A B C B D C D A. #8-18 x 1/4" (6.4 mm) screws B. Warming drawer deflector C. Vent 3. Align vent tab (B) with oven frame (A) as shown. 4. Using one #8-18 x 3/8" (9.5 mm) screw (E) on each side of the vent tab (B), fasten the vent securely to the oven. A B E D C A. Oven frame B. Vent tab C. Oven vent D. Warming drawer deflector E. #8-18 x 3/8" (9.5 mm) screw Complete Installation 1. Check that all parts are now installed. If there is an extra part, go back through the steps to see which step was skipped. 2. Check that you have all of your tools. 3. Dispose of/recycle all packaging materials. 4. For oven use and cleaning, read the Use and Care Guide. Check Operation of Lower Oven 1. At first use, set up the languages, clock, and any other preferences, if available. For more information, read the Use and Care Guide. 2. Press OVEN. 3. Select Cooking Method. 4. Select BROIL. 5. Set the temperature. 6. Press START. If oven does not operate, check the following: ■■ Household fuse is intact and tight or circuit breaker has not tripped. ■■ Electrical supply is connected. ■■ See the "Troubleshooting" section in the Use and Care Guide. 7. When oven has been on for 5 minutes, check for heat. If you do not feel heat or if an error message appears in the display, turn off the oven and contact a qualified technician. 8. Press OVEN on single ovens to cancel. ■■ Press UPPER/LOWER on double ovens to cancel. Check Operation of Microwave Oven 1. Fill a microwave-safe container with 1 cup (250 mL) of water and place container inside microwave oven. Close door firmly. 2. Press MICROWAVE. 3. Select Cooking Method. 4. Set microwave oven cook time to 2 minutes. 5. Press START. The interior microwave oven light should be on, and the remaining cooking time should be displayed. When display reads "1:00", open microwave oven door. The microwave should stop cooking. Close door firmly. The interior microwave oven light should turn off. 6. Press START. Microwave oven should begin cooking, and the microwave oven interior light should be on. Let microwave oven complete cooking time. A tone will sound four times at the end of the cooking time, and the microwave oven will shut off. 7. Open microwave oven door and slowly remove container. Water in container should be hot. If you need Assistance or Service: Please reference the "Assistance or Service" section of the Use and Care Guide or contact the dealer from whom you purchased your built-in and microwave ovens. 10
-
 1
1 -
2
-
3
-
4
-
 5
5 -
 6
6 -
 7
7 -
 8
8 -
 9
9 -
 10
10 -
 11
11 -
 12
12 -
 13
13 -
 14
14 -
 15
15 -
16
-
17
-
18
-
19
-
20
-
21
-
22
-
23
-
24
-
25
-
26
-
27
-
28
 |
 |