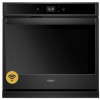
Whirlpool WOS51EC7H Installation Instructions - Page 8
Install Oven
 |
View all Whirlpool WOS51EC7H manuals
Add to My Manuals
Save this manual to your list of manuals |
Page 8 highlights
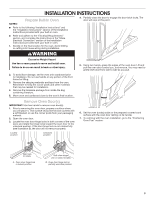
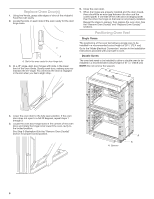
3. In the same manner, remove and replace the plastic spacer on the left side of the oven. New plastic spacer Replace Plastic Spacers on Double Ovens 1. Remove the 2 screws, 1 in each spacer, attaching the 2 plastic spacers (A) to the right side of the oven. 2. Using the 2 screws removed, install 2 new plastic spacers (B) provided with this kit. Install Oven 1. Using 2 or more people, lift the oven partially into the cabinet cutout. Use the oven opening as an area to grip. NOTE: When pushing the microwave oven into the cabinet, open the microwave oven door and push against the seal area on the front frame. Do not push against the outside edges. A 2. Push against the front frame of the microwave oven to push oven into cabinet. Push microwave oven completely into cabinet and center in cabinet cutout. B A A. Plastic spacer B. New plastic spacer 3. In the same manner, remove and replace the 2 plastic spacers on the left side of the oven. 3. Push the oven completely into the cabinet, and center the oven into the cabinet cutout. 4. Remove the tape from the black front trim piece. ■■ Securely fasten the oven to the cabinet using the #8‑14 x 3/4" screws provided. ■■ Insert the screws through the hole in the black trim piece, aligning with the hole in the oven frame. Do not overtighten the screws. A B C A. Oven frame B. Oven frame hole C. Black trim piece 8
-
 1
1 -
2
-
 3
3 -
 4
4 -
 5
5 -
 6
6 -
 7
7 -
 8
8 -
 9
9 -
 10
10 -
 11
11 -
 12
12 -
 13
13 -
14
-
15
-
16
-
17
-
18
-
19
-
20
 |
 |
