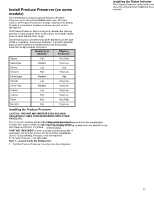
Whirlpool WRFF5333PZ Owners Manual - Page 14
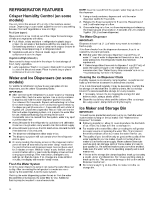
REFRIGERATOR FEATURES, Crisper Humidity Control (on some models)
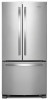 |
View all Whirlpool WRFF5333PZ manuals
Add to My Manuals
Save this manual to your list of manuals |
Page 14 highlights
REFRIGERATOR FEATURES Crisper Humidity Control (on some models) You can control the amount of humidity in the moisture-sealed crisper. Depending on your model, adjust the control to any setting between Fruit and Vegetables or Low and High. Fruit/Low (open): Move control to allow moist air out of the crisper for best storage of fruits and vegetables with skins. � Fruit: Wash, let dry and store in refrigerator in plastic bag or crisper. Do not wash or hull berries until they are ready to use. Sort and keep berries in original container in crisper, or store in a loosely closed paper bag on a refrigerator shelf. � Vegetables with skins: Place in plastic bags or plastic container and store in crisper. Vegetables/High (closed):q Move control to keep moist air in the crisper for best storage of fresh, leafy vegetables. � Leafy vegetables: Wash in cold water, drain and trim or tear off bruised and discolored areas. Place in plastic bag or plastic container and store in crisper. Water and Ice Dispensers (on some models) For additional information on how to use your water and ice dispensers, see the online "Dispensing Guide." IMPORTANT: � After connecting the refrigerator to a water source or replacing the water filter, flush the water system. Use a sturdy container to depress and hold the water dispenser pad for 5 seconds, then release it for 5 seconds. Repeat until water begins to flow. Once water begins to flow, continue depressing and releasing the dispenser pad (5 seconds on, 5 seconds off) until a total of 4 gallon (15 L) has been dispensed. This will flush air from the filter and water dispensing system, and prepare the water filter for use. Additional flushing may be required in some households. As air is cleared from the system, water may spurt out of the dispenser. � Allow 24 hours for the refrigerator to cool down and chill water. Dispense enough water every week to maintain a fresh supply. � Allow 24 hours to produce the first batch of ice. Discard the first three batches of ice produced. � The dispenser will dispense either water or ice. � The dispensing system will not operate when the refrigerator door is open. � On some models, the display screen on the dispenser control panel will turn off automatically and enter "sleep" mode when the control buttons and dispenser levers have not been used for 2 minutes or more. While in "sleep" mode, the first press of a control button will only reactivate the display screen without changing any settings. After reactivation, changes to any settings can then be made. If no changes are made within 2 minutes, the display will re-enter "sleep" mode. Flush the Water System Air in the water dispensing system can cause the water dispenser to drip. After connecting the refrigerator to a water source or replacing the water filter, flush the water system. Flushing the water dispensing system forces air from the water line and filter and prepares the water filter for use. Additional flushing may be required in some households. NOTE: As air is cleared from the system, water may spurt out of the dispenser. 1. Using a sturdy container, depress and hold the water dispenser paddle for 5 seconds. 2. Release the dispenser paddle for 5 seconds. Repeat steps 1 and 2 until water begins to flow. 3. Once water begins to flow, continue depressing and releasing the dispenser pad (5 seconds on, 5 seconds off) until a total of 3 gallon (12 L) has been dispensed. The Water Dispenser IMPORTANT: Dispense at least 1 qt. (1 L) of water every week to maintain a fresh supply. If the flow of water from the dispenser decreases, it could be caused by low water pressure. � With the water filter removed, dispense 1 cup (237 mL) of water. If 1 cup of water is dispensed in 8 seconds or less, the water pressure to the refrigerator meets the minimum requirement. � If it takes longer than 8 seconds to dispense 1 cup (237 mL) of water, the water pressure to the refrigerator is lower than recommended. See "Water Supply Requirements" and online "Troubleshooting" for more information. Cleaning the Ice Dispenser Chute Humidity causes ice to naturally clump together. Ice particles can build up until the ice dispenser chute becomes blocked. If ice is not dispensed regularly, it may be necessary to empty the ice storage bin and clean the ice delivery chute, the ice storage bin and the area beneath the storage bin every 2 weeks. � If necessary, remove the ice clogging the storage bin and delivery chute, using a plastic utensil. � Clean the ice delivery chute and the bottom of the ice storage bin using a warm, damp cloth and dry thoroughly. Ice Maker and Storage Bin IMPORTANT: To avoid low ice production and poor quality ice, flush the water system before turning on the ice maker. See "Water and Ice Dispenser" for details. � Following installation, allow 24 hours to produce the first batch of ice. Allow 2 to 3 days to fill the ice storage bin. � For models with a water filter, after connecting the refrigerator to a water source or replacing the water filter, fill and discard three full containers of ice to prepare the water filter for use. � The quality of your ice will be only as good as the quality of the water supplied to your ice maker. Avoid connecting the ice maker to a softened water supply. Water softener chemicals (such as salt) can damage parts of the ice maker and lead to poor quality ice. If a softened water supply cannot be avoided, make sure the water softener is operating properly and is well maintained. � If the ice in the storage bin clumps together, break up ice using a plastic utensil and discard ice. Do not use anything sharp to break up the ice. This can cause damage to the ice bin and the dispenser mechanism. � Do not store anything on top of the ice maker or in the ice storage bin. 14
-
 1
1 -
2
-
3
-
4
-
5
-
6
-
7
-
8
-
 9
9 -
 10
10 -
 11
11 -
 12
12 -
 13
13 -
 14
14 -
 15
15 -
 16
16 -
 17
17 -
 18
18 -
 19
19 -
20
-
21
-
22
-
23
-
24
-
25
-
26
-
27
-
28
-
29
-
30
-
31
-
32
-
33
-
34
-
35
-
36
-
37
-
38
-
39
-
40
-
41
-
42
-
43
-
44
-
45
-
46
-
47
-
48
-
49
-
50
-
51
-
52
-
53
-
54
-
55
-
56
-
57
-
58
-
59
-
60
-
61
-
62
-
63
-
64
 |
 |
