Whirlpool WRS571CIDM Installation Guide - Page 10
Door Alignment, Install Air Filter
 |
View all Whirlpool WRS571CIDM manuals
Add to My Manuals
Save this manual to your list of manuals |
Page 10 highlights
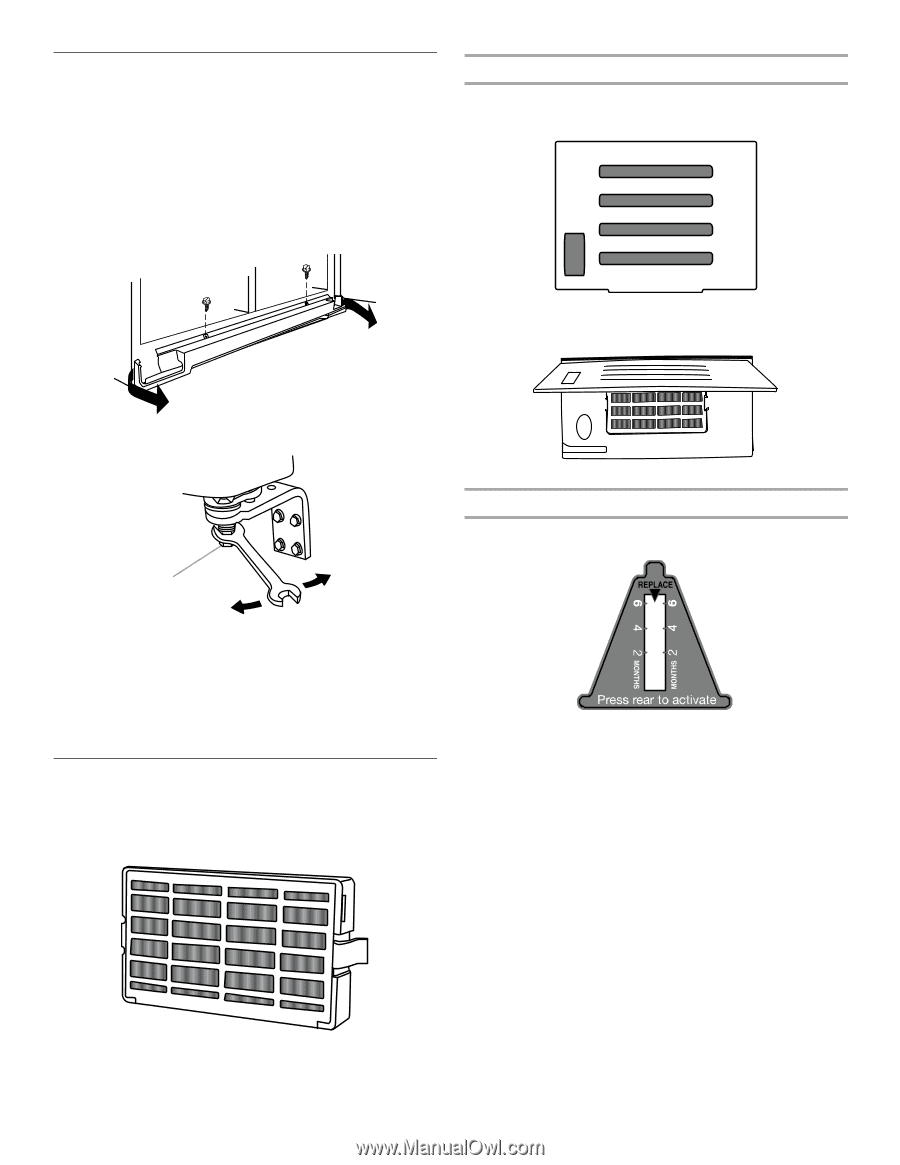
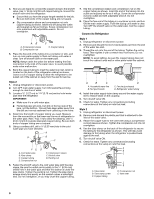
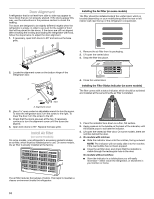
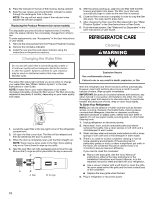
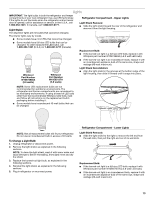
Door Alignment A refrigerator that is not level from side-to-side may appear to have doors that are not properly aligned. If the doors appear this way, use the instructions in the previous section to check the leveling. The doors are designed to be slightly different heights when the refrigerator is empty, in order to account for the weight of food that will be placed on the doors. If the doors are still not aligned after checking the leveling and loading the refrigerator with food, follow the steps below to adjust the door alignment. 1. If necessary, open both doors to 90° and remove the base grille. Installing the Air Filter (on some models) The filter should be installed behind the vented door, which is located (depending on your model) along either the rear or left interior wall near the top of the refrigerator compartment. 1. Remove the air filter from its packaging. 2. Lift open the vented door. 3. Snap the filter into place. 2. Locate the alignment screw on the bottom hinge of the refrigerator door. A Lower Raise A. Alignment screw 3. Use a open-ended or adjustable wrench to turn the screw. To raise the refrigerator door, turn the screw to the right. To lower the door, turn the screw to the left. 4. Check that the doors are even at the top. If necessary, continue to turn the alignment screw until the doors are aligned. 5. Open both doors to 90°. Replace the base grille. Install Air Filter (on some models) On some models, your refrigerator's accessory packet includes an air filter, which must be installed prior to use. On some models, the air filter is already installed at the factory. 4. Close the vented door. Installing the Filter Status Indicator (on some models) The filter comes with a status indicator, which should be activated and installed at the same time the air filter is installed. 1. Place the indicator face-down on a firm, flat surface. 2. Apply pressure to the bubble on the back of the indicator, until the bubble pops to activate the indicator. 3. Lift open the vented air filter door. On some models, there are notches behind the door. 4. On models with notches: ■ Slide the indicator down into the notches, facing outward. NOTE: The indicator will not easily slide into the notches if the rear bubble has not been popped. ■ Close the air filter door, and check that the indicator is visible through the rectangular hole in the door. On models without notches: ■ Store the indicator in a visible place you will easily remember - either inside the refrigerator, or elsewhere in your kitchen or home. The air filter reduces the buildup of odors. This helps to maintain a cleaner environment inside the refrigerator. 10
-
 1
1 -
2
-
3
-
4
-
 5
5 -
 6
6 -
 7
7 -
 8
8 -
 9
9 -
 10
10 -
 11
11 -
 12
12 -
 13
13 -
 14
14 -
 15
15 -
16
-
17
-
18
-
19
-
20
-
21
-
22
-
23
-
24
-
25
-
26
-
27
-
28
-
29
-
30
-
31
-
32
-
33
-
34
-
35
-
36
-
37
-
38
-
39
-
40
-
41
-
42
-
43
-
44
-
45
-
46
-
47
-
48
-
49
-
50
-
51
-
52
-
53
-
54
-
55
-
56
-
57
-
58
-
59
-
60
-
61
-
62
-
63
-
64
 |
 |