Xerox 2006NPC DocuColor 2006 Performing Setup from the Printer Control Panel - Page 13
Bindery Setup, Offline, Item/Enter, down arrow buttons, Change, Remove Fserver
 |
UPC - 042215475440
View all Xerox 2006NPC manuals
Add to My Manuals
Save this manual to your list of manuals |
Page 13 highlights
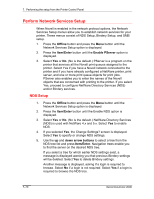
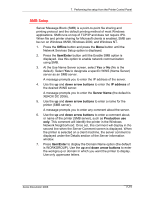
7. Performing the setup from the Printer Control Panel Bindery Setup The following screens are used for Bindery setup. Ensure that the printer is connected to the network and you have already configured one or more NetWare 3.x file servers with a print server and a print queue for print jobs. You can also configure NetWare 4.x and 5.x servers to run in Bindery emulation mode, but you cannot add a 4.x or 5.x server running in emulation mode that is on the tree you selected in NS Setup. The NetWare server must be running. You need a login name and a password, if one has been set. Refer to the chapter Setting up the network server for more information about setting up printing using Novell NetWare. 1. Press the Offline button and press the Menu button until the Network Services Setup option is displayed. 2. Press the Item/Enter button until the Enable Bindery option is displayed. Use this option to enable bindery emulation services. The Bindery Settings screens displays. 3. Use the up and down arrow buttons to scroll through the menu options. Select one of the following options: • View displays a list of Novell file servers already connected to the printer. • Change displays a list of all available servers in order to add one or change the print server setting. • Remove Fserver displays a list of connected servers that you can disconnect. • Skip disregards bindery options and advances to the Polling Int screen. Use the up and down arrow buttons to view the list of servers. Press Item/Enter to skip the remaining options and advance to the Polling Int screen. Xerox DocuColor 2006 7-13
-
 1
1 -
2
-
3
-
4
-
5
-
6
-
7
-
 8
8 -
 9
9 -
 10
10 -
 11
11 -
 12
12 -
 13
13 -
 14
14 -
 15
15 -
 16
16
 |
 |