Xerox 4260X System Administration Guide - Page 155
Enable the IIO, Test Immediate Image Overwrite, Immediate Image Overwrite Error
 |
UPC - 095205743005
View all Xerox 4260X manuals
Add to My Manuals
Save this manual to your list of manuals |
Page 155 highlights
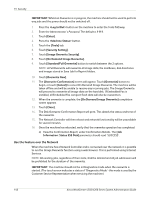
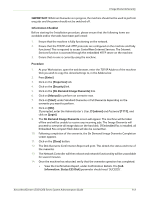
Image Overwrite Security 1. Ensure that the machine is fully functioning in its existing configuration before you enable Immediate Image Overwrite. Enable the IIO By default, this security feature is disabled. 1. Press the button on the machine to enter the Tools Pathway. 2. Enter the Administrator's Password. The default is 1111. 3. Touch [Enter]. 4. Press the button. 5. Touch the [Tools] tab. 6. Touch [Security Setting]. 7. Touch [Image Overwrite Security]. 8. Touch [Immediate Overwrite]. 9. Touch [Enable]. 10. Touch [Save]. 11. Press the button. 12. Touch [Confirm] to exit the Tools Pathway. NOTE: When IIO is enabled, the feature becomes immediately operational and requires no further configuration by the System Administrator. Test Immediate Image Overwrite When Immediate Image Overwrite is configured on the machine any job that is overwritten will have its overwrite status displayed in the Completed Jobs queue details window. 1. Ensure a job is created in the queue after you have installed Immediate Image Overwrite by using either the E-mail or Network Scanning features. Alternatively, send a print job to the machine. 2. Press . 3. Touch a job in the queue. 4. View the Job Overwrite Status. The Job Overwrite Status will show 'Successful' if Immediate Image Overwrite is enabled. 5. Touch [Close]. Immediate Image Overwrite Error If a failure occurs when Immediate Image Overwrite is performed, the machine will display an [Immediate Image Overwrite Error] message. 1. Perform an On Demand Image Overwrite to ensure that the residual image data is overwritten from the machine. View the instructions in the On Demand Image Overwrite (ODIO) on page 138 to complete this task. Xerox WorkCentre 4250/4260 Series System Administration Guide 143
-
 1
1 -
2
-
3
-
4
-
5
-
6
-
7
-
8
-
9
-
10
-
11
-
12
-
13
-
14
-
15
-
16
-
17
-
18
-
19
-
20
-
21
-
22
-
23
-
24
-
25
-
26
-
27
-
28
-
29
-
30
-
31
-
32
-
33
-
34
-
35
-
36
-
37
-
38
-
39
-
40
-
41
-
42
-
43
-
44
-
45
-
46
-
47
-
48
-
49
-
50
-
51
-
52
-
53
-
54
-
55
-
56
-
57
-
58
-
59
-
60
-
61
-
62
-
63
-
64
-
65
-
66
-
67
-
68
-
69
-
70
-
71
-
72
-
73
-
74
-
75
-
76
-
77
-
78
-
79
-
80
-
81
-
82
-
83
-
84
-
85
-
86
-
87
-
88
-
89
-
90
-
91
-
92
-
93
-
94
-
95
-
96
-
97
-
98
-
99
-
100
-
101
-
102
-
103
-
104
-
105
-
106
-
107
-
108
-
109
-
110
-
111
-
112
-
113
-
114
-
115
-
116
-
117
-
118
-
119
-
120
-
121
-
122
-
123
-
124
-
125
-
126
-
127
-
128
-
129
-
130
-
131
-
132
-
133
-
134
-
135
-
136
-
137
-
138
-
139
-
140
-
141
-
142
-
143
-
144
-
145
-
146
-
147
-
148
-
149
-
 150
150 -
 151
151 -
 152
152 -
 153
153 -
 154
154 -
 155
155 -
 156
156 -
 157
157 -
 158
158 -
 159
159 -
 160
160 -
161
-
162
-
163
-
164
-
165
-
166
-
167
-
168
-
169
-
170
-
171
-
172
-
173
-
174
-
175
-
176
-
177
-
178
-
179
-
180
-
181
-
182
-
183
-
184
-
185
-
186
-
187
-
188
-
189
-
190
-
191
-
192
-
193
-
194
-
195
-
196
-
197
-
198
-
199
-
200
-
201
-
202
-
203
-
204
-
205
-
206
-
207
-
208
-
209
-
210
 |
 |