Xerox 4510DT Advanced Features Guide - Page 53
Controlling Print Density, Address, Properties, General, Printer Defaults, Print Density, Save Changes
 |
UPC - 095205431100
View all Xerox 4510DT manuals
Add to My Manuals
Save this manual to your list of manuals |
Page 53 highlights
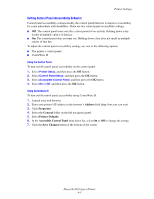
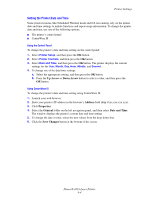
Printer Settings Controlling Print Density The Print Density setting controls the darkness of your prints. The Print Density range is 0 to 15, with 15 printing the darkest. The default value is 8. To specify the Print Density setting, use one of the following options: ■ The printer's control panel ■ CentreWare IS Using the Control Panel To specify the Print Density setting on the control panel: 1. Select Printer Setup, and then press the OK button. 2. Select General Setup, and then press the OK button. 3. Select Print Density, and then press the OK button. 4. Press the Up Arrow or Down Arrow button to select the desired value, and then press the OK button. Using CentreWare IS To specify the Print Density setting using CentreWare IS: 1. Launch your web browser. 2. Enter the printer's IP address in the browser's Address field (http://xxx.xxx.xxx.xxx). 3. Click Properties. 4. Select the General folder on the left navigation panel, and then select Printer Defaults. 5. Change the setting in the Print Density field. 6. Click the Save Changes button at the bottom of the page. Controlling Print Quantity The Print Quantity setting controls the number of copies the printer prints for each print job. To specify the Print Quantity setting, use one of the following options: ■ The printer's control panel ■ CentreWare IS Using the Control Panel To specify the Print Quantity setting on the control panel: 1. Select Printer Setup, and then press the OK button. 2. Select General Setup, and then press the OK button. 3. Select Print Quantity, and then press the OK button. 4. Press the Up Arrow or Down Arrow button to set the value from 1 to 999, and then press the OK button. Phaser® 4510 Laser Printer 4-8
-
 1
1 -
2
-
3
-
4
-
5
-
6
-
7
-
8
-
9
-
10
-
11
-
12
-
13
-
14
-
15
-
16
-
17
-
18
-
19
-
20
-
21
-
22
-
23
-
24
-
25
-
26
-
27
-
28
-
29
-
30
-
31
-
32
-
33
-
34
-
35
-
36
-
37
-
38
-
39
-
40
-
41
-
42
-
43
-
44
-
45
-
46
-
47
-
 48
48 -
 49
49 -
 50
50 -
 51
51 -
 52
52 -
 53
53 -
 54
54 -
 55
55 -
 56
56 -
 57
57 -
 58
58 -
59
-
60
-
61
-
62
-
63
-
64
-
65
-
66
-
67
-
68
-
69
-
70
-
71
-
72
-
73
-
74
-
75
-
76
-
77
-
78
-
79
-
80
 |
 |