Xerox 6180MFP Features Setup Guide - Page 9
Step 3: Setting Up the SMTP Server - phaser default password
 |
UPC - 095205733839
View all Xerox 6180MFP manuals
Add to My Manuals
Save this manual to your list of manuals |
Page 9 highlights
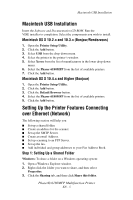
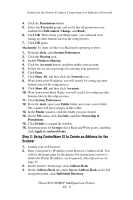
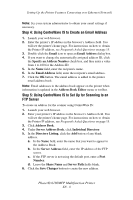
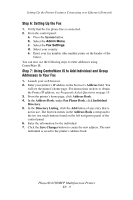
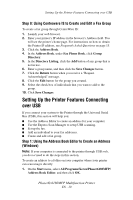
Setting Up the Printer Features Connecting over Ethernet (Network) 5. In the Directory Listing, click the Add button for any unused address. 6. Fill in the information for your computer: a. In the Name field, enter the name that you want to appear in the Address Book. b. Select SMB on the Server Type drop-down list. c. In the Server Address field, enter the IP address of your computer. Windows: To get the IP address of your computer, open a DOS Command Prompt window, type ipconfig, and then press the Enter key. Macintosh: To get the IP address of your computer, open System Preferences and click on Network. d. If the server is not using the default port, enter a Port Number. e. In the login fields, enter the name and password that you use to log in. f. Windows: In the Share Name field, type the share name of the folder that you shared previously. Macintosh: In the Share Name field, type your short name. g. Windows: The Server Path field is used to specify subfolders of your shared folder. For example, if you have a shared Scans folder that has a ColorScans subfolder. Enter \ColorScans in the Server Path field. Macintosh: In the Server Path field, type Public\foldername where foldername is the folder that you created earlier. 7. Click the Save Changes button to create the new address. Step 3: Setting Up the SMTP Server To use the Scan to Email feature, you first need to set up your SMTP server information. SMTP (Simple Mail Transfer Protocol) is a protocol for sending email. 1. Launch your web browser. 2. Enter the printer's IP address in the browser's Address field. You will see the printer's home page. For instructions on how to obtain the Printer IP address, see Frequently Asked Questions on page 15. 3. From the printer's home page, click Properties, and select SNMP from the Protocols list. 4. Select the Enable SNMP check box, and then click Save Changes. 5. Select Email Server from the Protocols list. 6. Enter your email settings, and then click Save Changes. Phaser® 6180MFP Multifunction Printer EN - 7
-
 1
1 -
2
-
3
-
 4
4 -
 5
5 -
 6
6 -
 7
7 -
 8
8 -
 9
9 -
 10
10 -
 11
11 -
 12
12 -
 13
13 -
 14
14 -
15
-
16
-
17
-
18
-
19
-
20
-
21
-
22
-
23
-
24
-
25
-
26
-
27
-
28
-
29
-
30
-
31
-
32
-
33
-
34
-
35
-
36
-
37
-
38
-
39
-
40
-
41
-
42
-
43
-
44
-
45
-
46
-
47
-
48
-
49
-
50
-
51
-
52
-
53
-
54
-
55
-
56
-
57
-
58
-
59
-
60
-
61
-
62
-
63
-
64
-
65
-
66
-
67
-
68
-
69
-
70
-
71
-
72
-
73
-
74
-
75
-
76
-
77
-
78
-
79
-
80
-
81
-
82
-
83
-
84
-
85
-
86
-
87
-
88
-
89
-
90
-
91
-
92
-
93
-
94
-
95
-
96
-
97
-
98
-
99
-
100
-
101
-
102
-
103
 |
 |