Xerox 850DP AccXES Client Tools User's Guide version 10.0 (English) - Page 7
Overview
 |
UPC - 042215454858
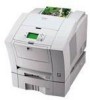
View all Xerox 850DP manuals
Add to My Manuals
Save this manual to your list of manuals |
Page 7 highlights
Overview The AccXES Client Tools (ACT) application runs on your PC or Solaris workstation. The tools are used to scan and print document sets using an AccXES supported printer and scanner. The tools include Document Submit, the Printer Queue, Document Retrieve, and the Device Manager. The Accounting Tab functionality is available only if the printer with which the AccXES Client Tools are interacting is using an AccXES firmware version less than 7.0. See the NOTES below. All of the tools are installed at the same time, using the Install Anywhere software. The individual tools can be accessed after installation by selecting one of the individual tabs, which are shown here. On each tab page, the user can select toolbar buttons, menus, and dialog screen options to customize how documents should be submitted to and retrieved from the printer. The printer queue can be viewed through the Printer Queue Tab. NOTES: For AccXES firmware version 7.0 and greater, the AccXES Account Management Tool (AMT) will be keeping track of multiple printers' scanned and printed media usage. The AMT is loaded on only one computer. Throughout the rest of this user guide, the AccXES Account Management Tool will be listed as the example of an External Accounting Server. For AccXES firmware versions before 7.0 the media usage can be viewed on the Accounting Tab. If you want to access only some of the tools, you can go to the View menu and select only which tabs you want to see on your screen. The view chosen will impact the options available in the Device Manager Tab. The View selected, and many other settings that the user selects, will remain from session to session until changed. Examples are the device setup settings on AccXES Client Tools User Guide the Device Manager Tab, Document Retrieve preferences, and Accounting tab preferences. NOTE: Many of the AccXES Client Tool (ACT) options can also be chosen in the Web PMT. Examples are page composition, plot nesting, and stamps or labels. Whatever ACT option choices that you make will override the Web PMT option selections if the two are different. The Device Manager Tab lists all of the devices that are available to the user for communicating from the local PC to the AccXES compliant scanner and printer. The acceptable devices for the Document Submit Tool are the network, serial ports, parallel ports, and Print to File. The Document Retrieve Tool, the Printer Queue and Accounting use the network. The user can add, modify, or remove devices from the list. The Device Manager is where the user indicates which of the listed devices are to be used as the default printer and scanner. The Document Retrieve Tab provides the user with options for previewing and retrieving scanned images (TIF, CALS, JPEG, or PDF files) from the AccXES controller, adding them to a document set, and saving them on the user's file system. If you wish to only use the Document Retrieve Tool, on the View menu select Document Retrieve. NOTE: The preview file, while it is still in the scanner's memory, is a JPG file. When it is saved to your file system, it becomes a PJPG file. The Document Submit Tab is where the user creates a document set by adding document files to the Document Submit window. The user may edit default document options, the job options associated with the entire set, or an individual document's printing options. The document set is sent to the printer from the Document Submit window. Document sets can be saved as a single file. If you wish to only use the Document Submit Tool, on the View menu select Document Submit. NOTE: The AccXES printers support the following types of files: CalComp, Cals1, Cals2, NIRS, HPGL, HPGL/2, CGM, TIFF, JPEG, PDF (optional), PostScript (optional). These file types are also listed on the Setup Tab > File Format section of individual document and default document options. 7
-
 1
1 -
 2
2 -
 3
3 -
 4
4 -
 5
5 -
 6
6 -
 7
7 -
 8
8 -
 9
9 -
 10
10 -
 11
11 -
 12
12 -
13
-
14
-
15
-
16
-
17
-
18
-
19
-
20
-
21
-
22
-
23
-
24
-
25
-
26
-
27
-
28
-
29
-
30
-
31
-
32
-
33
-
34
-
35
-
36
-
37
-
38
-
39
-
40
-
41
-
42
-
43
-
44
-
45
-
46
-
47
-
48
-
49
-
50
-
51
-
52
-
53
-
54
-
55
-
56
-
57
-
58
-
59
-
60
-
61
-
62
-
63
-
64
-
65
-
66
-
67
-
68
-
69
-
70
-
71
-
72
-
73
-
74
-
75
-
76
-
77
-
78
-
79
-
80
-
81
-
82
-
83
-
84
-
85
-
86
-
87
-
88
-
89
-
90
-
91
-
92
-
93
-
94
-
95
-
96
-
97
-
98
-
99
-
100
-
101
-
102
-
103
-
104
-
105
-
106
 |
 |
