Yamaha BD-S2900 Owners Manual - Page 12
Easy Setting - remote
 |
UPC - 027108930657
View all Yamaha BD-S2900 manuals
Add to My Manuals
Save this manual to your list of manuals |
Page 12 highlights
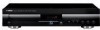
GETTING STARTED 1 STANDBY/ON button (] 8) Press to switch the unit from on to standby mode or vice versa. In standby mode, the unit is still consuming a small amount of power. 2 Disc tray (] 9) 3 Display Disc indicator SD card indicator The indicator blinks when reading data from a disc or card. 4 SD Card LED • It is possible to set the LED to turn on/off. (] 20, SD Card LED Control) 5 SD card slot (] 9) 6 Remote control signal sensor (] 1) 7 Open or close the disc tray (] 9) 8 Search/Slow-motion/Skip (] 10) Search: Press and hold (During play) Slow-motion: Press and hold (During pause) Skip: Press 9 Start play (] 9) 0 Pause (] 10) q Stop (] 10) Rear panel terminals (] 4-6) EASY SETTING After connecting your new player and pressing the standby/on button, a screen for the basic settings will appear. Preparation Turn on the television and select the appropriate video input on the television. 1 Press [ STANDBY/ON]. ➜ Setup screen appears. 2 Follow the on-screen instructions and make the settings with [ , ] and [OK]. ➜ "On-screen Language" and "TV Aspect" (] 20) are set. Tips • You can perform this setup anytime by selecting "Easy Setting" in the Setup menu. (] 18) • You can also change these settings individually. (] 18) • If this unit is connected to a Panasonic TV (VIERA) supporting HDAVI Control 2 via an HDMI cable, then the "On-screen Language" and "TV Aspect" setting information on the TV are captured from the TV. 8 En
-
 1
1 -
2
-
3
-
4
-
5
-
6
-
 7
7 -
 8
8 -
 9
9 -
 10
10 -
 11
11 -
 12
12 -
 13
13 -
 14
14 -
 15
15 -
 16
16 -
 17
17 -
18
-
19
-
20
-
21
-
22
-
23
-
24
-
25
-
26
-
27
-
28
-
29
-
30
-
31
-
32
-
33
-
34
-
35
-
36
-
37
-
38
-
39
-
40
-
41
-
42
-
43
-
44
-
45
-
46
-
47
-
48
-
49
-
50
-
51
-
52
-
53
-
54
-
55
-
56
-
57
-
58
-
59
-
60
-
61
-
62
-
63
-
64
-
65
-
66
-
67
-
68
 |
 |
