Yamaha DGX-630 Owner's Manual - Page 11
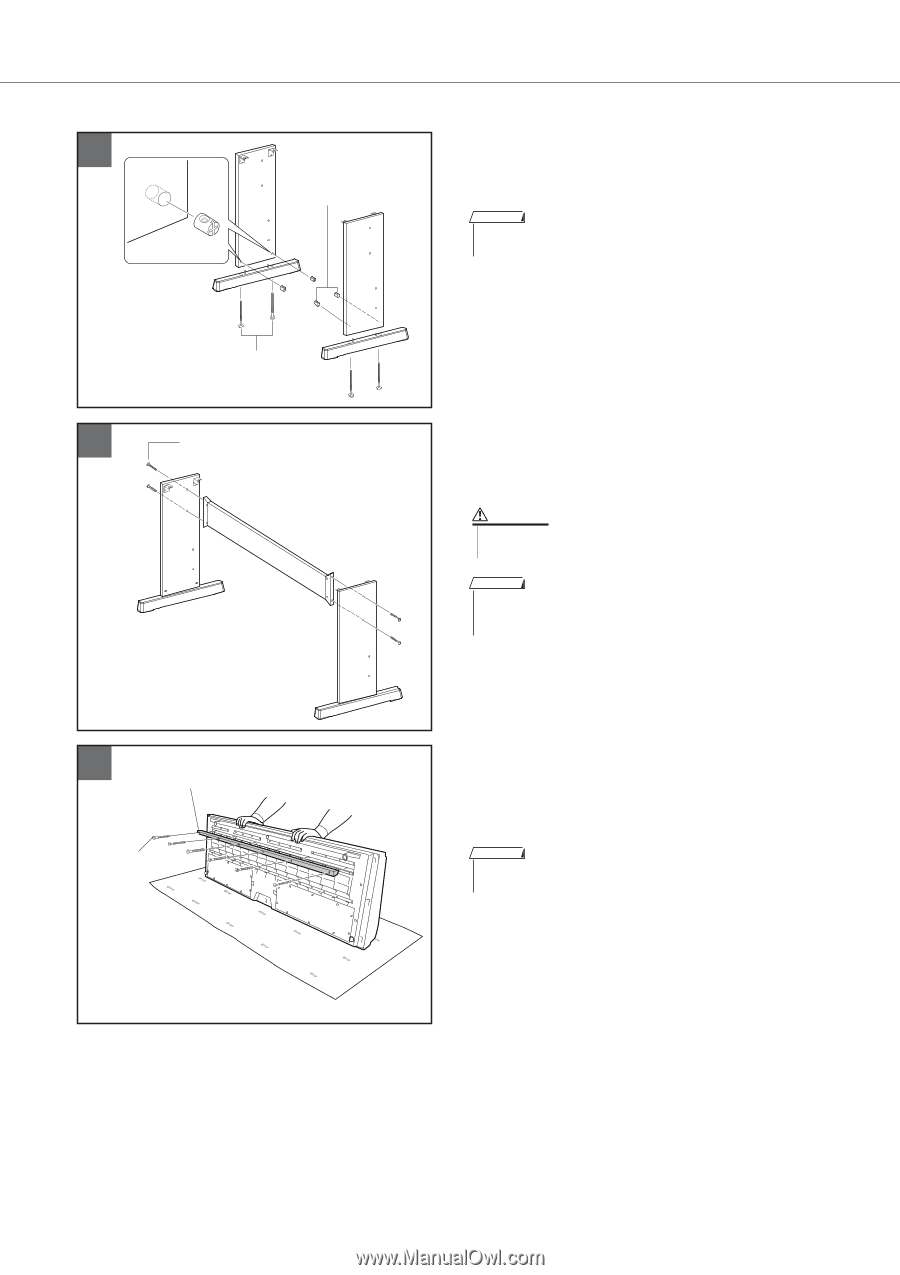
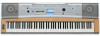
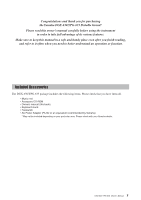
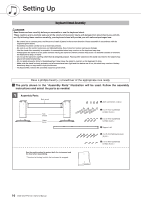
Attach the stand bases., Attach the back board., Attach the support rail.
 |
View all Yamaha DGX-630 manuals
Add to My Manuals
Save this manual to your list of manuals |
Page 11 highlights
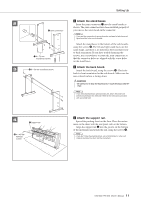
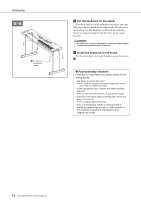
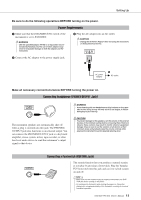
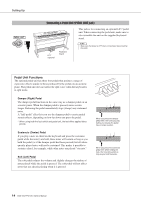
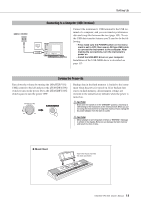
Setting Up x Attach the stand bases. 2 Insert the joint connectors q into the stand boards as shown. The joint connectors have been installed properly if q Joint connectors you can see the screw head on the connector. NOTE • If you put the connectors in wrong direction and want to take them out, tap around the holes on the boards. w 6 x 70 mm roundhead screws 3 e 6 x 30 mm roundhead screw Attach the stand bases to the bottom of the side boards, using the screws w. The left and right stand bases are the same shape, and there is no difference between their frontto-back orientation. If you have trouble fastening the screws, use a screwdriver to rotate the joint connectors so that the connector holes are aligned with the screw holes on the stand bases. c Attach the back board. Attach the back board, using the screws e. Check the back-to-front orientation for the side boards. Make sure the non-colored surface is facing down. CAUTION • Be careful not to drop the back board or touch the sharp metal fit- tings. NOTE • If you have purchased an optional pedal unit, attach the pedal unit before proceeding to the next step. Refer to the instructions provided with your pedal unit. 4 r Support rail t 4 x 45 mm flathead screws v Attach the support rail. Spread the packing sheet on the floor. Place the instrument on the sheet with the rear panel side on the bottom. Align the support rail r into the groove on the bottom of the instrument and attach the rail, using the screws t. NOTE • If you don't have the packing sheet, use a thick blanket or other soft material to protect the floor and the instrument. DGX-630/YPG-635 Owner's Manual 11
-
 1
1 -
2
-
3
-
4
-
5
-
 6
6 -
 7
7 -
 8
8 -
 9
9 -
 10
10 -
 11
11 -
 12
12 -
 13
13 -
 14
14 -
 15
15 -
 16
16 -
17
-
18
-
19
-
20
-
21
-
22
-
23
-
24
-
25
-
26
-
27
-
28
-
29
-
30
-
31
-
32
-
33
-
34
-
35
-
36
-
37
-
38
-
39
-
40
-
41
-
42
-
43
-
44
-
45
-
46
-
47
-
48
-
49
-
50
-
51
-
52
-
53
-
54
-
55
-
56
-
57
-
58
-
59
-
60
-
61
-
62
-
63
-
64
-
65
-
66
-
67
-
68
-
69
-
70
-
71
-
72
-
73
-
74
-
75
-
76
-
77
-
78
-
79
-
80
-
81
-
82
-
83
-
84
-
85
-
86
-
87
-
88
-
89
-
90
-
91
-
92
-
93
-
94
-
95
-
96
-
97
-
98
-
99
-
100
-
101
-
102
-
103
-
104
-
105
-
106
-
107
-
108
-
109
-
110
-
111
-
112
-
113
-
114
-
115
-
116
-
117
-
118
-
119
-
120
-
121
-
122
-
123
-
124
-
125
-
126
-
127
-
128
-
129
-
130
-
131
-
132
-
133
-
134
-
135
-
136
-
137
-
138
-
139
-
140
-
141
-
142
-
143
-
144
-
145
-
146
-
147
-
148
-
149
-
150
-
151
-
152
-
153
-
154
 |
 |