Yamaha EZ-EG Owner's Manual - Page 2

Play Along With the Songs, Connecting To MIDI Devices

Page 2 highlights

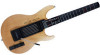
Play Along With the Songs Try playing along with the songs using the EZ-EG's three play modes: STRUM (right hand), CHORD (left hand), and BOTH (both hands). PLAY 1: STRUM Play using only your right hand. Great for rhythm practice. 1 Press the [SONG] button and use the [+] and [-] buttons to select the song you want to play. The song number will appear on the display. 10 PLAY 2: CHORD Play using only your left hand. Great for chord practice. 1 Press the [SONG] button and use the [+] and [-] buttons to select the song you want to play. 2 Press the [CHORD] button to begin playback in the PLAY 2: CHORD mode. PLAY 3: BOTH Once you've mastered the left and right-hand techniques using play modes 1 and 2, try playing using both hands. 1 Press the [SONG] button and use the [+] and [-] buttons to select the song you want to play. 2 Press the [BOTH] button to begin playback in the PLAY 3: BOTH mode. 2 Press the [STRUM] button to begin playback in the PLAY 1: STRUM mode. .10 The song will begin after a one-measure countin. Strum the EZ-EG strings with your right hand and the appropriate chords for the song will sound. In this mode the fret buttons have no effect on playback, so you can play anywhere with your left hand without changing the playback sound. Press the [STRUM] button again to stop playback. If you want the frets to glow to indicate the fingerings of the chords being played, press the [STRUM] button while simultaneously holding the [SOUND] and [SONG] buttons. .10 The song will begin after a one-measure countin. Finger the chords indicated by the glowing fret buttons. Playback will only proceed when you press all of the glowing fret buttons. Playing the EZ-EG strings in this mode has no effect on playback. Press the [CHORD] button again to stop playback. .10 The song will begin after a one-measure countin. Play with both your right and left hands in the same way you did in the STRUM and CHORD play modes to play the entire song as smoothly as possible. Press the [BOTH] button again to stop playback. Connecting To MIDI Devices The EZ-EG features MIDI IN and OUT connectors that can be used to connect to other MIDI devices for expanded musical capabilities. It is also possible to load additional songs downloaded from the internet (URL provided below) into the EZ-EG via these connectors. What is MIDI? MIDI (Musical Instrument Digital Interface) is an international standard system that allows electronic musical instruments and related devices to communicate with and control one another. By connecting MIDI-compatible devices via standard MIDI cables, it becomes possible to transfer a variety of performance and setup data between devices for enhanced musical capabilities. MIDI IN Connector Receives MIDI data from external MIDI devices. MIDI OUT Connector Transmits MIDI data to external MIDI devices. • MIDI cables are sold separately and are available from most musical instrument stores that handle electronic music gear. • Excessively long MIDI cables can cause data errors. Use MIDI cables that are no longer than 15 meters. • Make sure the power to external devices is turned off when connecting the EZ-EG. Then, when the required connections have been made, turn on the external device first and then the EZ-EG. Some Example MIDI Applications Using the EZ-EG's MIDI capabilities you can, for example, transfer performance data between two EZ-EGs, or between an EZ-EG and a MIDIequipped personal computer to load songs into the EZ-EG. Song data cannot be transmitted by the EZ-EG. G Performance data transferred between two EZ-EGs. MIDI OUT MIDI IN EZ-EG MIDI IN MIDI OUT EZ-EG G Song data downloaded from the internet can be loaded into the EZ-EG via computer. \ EZ-EG MIDI OUT MIDI IN MIDI IN MIDI OUT Computer Connecting To a Computer The EZ-EG can be connected to a computer via MIDI. G To connect the EZ-EG to a computer that is equipped with USB connectors use a USB-MIDI interface such as the Yamaha UX16, as shown in the diagram below. EZ-EG To the EZ-EG MIDI IN connector. To the EZ-EG MIDI OUT connector. MIDI OUT MIDI IN USB-MIDI Interface USB UX16 Computer I Using the Song Filer After installing the Song Filer, connect the EZ-EG to your computer. After making the required connections and turning the EZ-EG on it will be possible to transfer song data from the computer to the EZ-EG. Refer to the EZ-EG home page (URL listed above) for online instructions on using the Song Filer. G Loading Data Into the EZ-EG The song file data must be transmitted to the EZ-EG from the computer. Loaded song data will be stored in memory numbers "F-1, F-2, etc." following the pre-programmed song data (1 - 18). • If you use the Yamaha UX16, be sure to install the supplied driver on your computer. G The EZ-EG can be directly connected to a computer that has built-in MIDI connectors via standard MIDI cables, as shown in the diagram below. EZ-EG To the EZ-EG MIDI IN connector. To the EZ-EG MIDI OUT connector. MIDI OUT MIDI IN USB-MIDI Interface USB Computer EZ-EG MIDI IN MIDI OUT MIDI OUT MIDI IN Computer G To connect the EZ-EG to a Macintosh computer that has RS-422 ports (the serial Printer and Modem ports) use a MIDI interface as shown in the diagram below. MIDI IN EZ-EG MIDI OUT MIDI Interface MIDI OUT MIDI IN Modem Port Macintosh • When using a separate MIDI interface with a Macintosh computer as in this example, be sure to set the clock speed of the interface from the computer using the appropriate application software. See your software manual for details. Loading Song Data Into the EZ-EG Using the Song Filer Application In order to perform the operations described in this section you will need to use a computer connected to the internet to download the free Song Filer application from the URL listed below. Song data can be downloaded from the EZ-EG home page for a small fee. Songs downloaded from the internet can be used in the same way as the pre-programmed EZ-EG songs. G Deleting Loaded Songs From the EZ-EG Songs can be deleted from the EZ-EG memory from the Song Filer application on the computer. • Song data cannot be transferred from the EZ-EG to a computer. Be sure to save all song data you want to keep on your computer. Turning Local Control On or Off Local Control determines whether the EZ-EG plays its own internal tone generator (Local Control = ON), or whether performance data is transmitted via the MIDI OUT connector only, without playing the internal tone generator (Local Control = OFF). Local Control ON This is the normal setting. In this state the EZ-EG's internal tone generator will play whatever is played on the strings and frets, as well as any MIDI data received via the MIDI IN connector. Local Control OFF In this state the internal tone generator will not sound in response to playing the strings and frets, but the performance data will be transmitted via the MIDI OUT connector. The internal tone generator will play any MIDI data received via the MIDI IN connector. 1 Simultaneously press the [CAPO] and [TUNING] buttons. • Local control is always ON when the EZ-EG power is initially turned on. Data Specifications For the EZ-EG Play Modes Number of Songs 99 max. Data 480 kilobytes total. Data Format XF File Format. The total number of songs that can be loaded will depend on the data size of the songs. As an example, about four 100-kilobyte songs can be loaded. • If SMF (Standard MIDI File) data is loaded it can be played back, but cannot be used in the PLAY modes. I Install the Song Filer Access the following web page using a computer connected to the internet and, after reading the online instructions, install the Song Filer application. EZ-EG Home Page Address http://www.yamahamusicsoft.com/ez-eg/ 2 Set local control as required. Use the [+] and [-] buttons to turn local control on or off as required. [+] turns local control on, while [-] turns it off. Setting the MIDI Clock Normally EZ-EG song playback is synchronized to its own internal clock. Use this function when you want to synchronize EZ-EG playback to a MIDI clock signal from an external device. Internal Clock (Int) This is the normal setting: EZ-EG song playback is synchronized to its own internal clock. External Clock (Etr) The EZ-EG will be synchronized to a MIDI clock signal from a connected external device. Song and demo playback will not start if an appropriate external clock signal is not being received. System requirements for using the Song Filer are as follows: [Windows] OS Windows 95/98/2000/Me/XP CPU Pentium/100 MHz or higher RAM 8 MB or more Hard Disk 2 MB or more free Display 800 x 600, 256 colors or more [Macintosh] OS Mac OS 7.5 through 9.2.2 (OS X not supported) CPU Power PC or greater RAM 8 MB or more Hard Disk 2 MB or more free Display 800 x 600, 256 colors or more Requirements as of November 2002. 1 Simultaneously press the [TEMPO] and [BALANCE] but- tons. • The clock is always set to "Int" when the EZ-EG power is initially turned on. 2 Set the clock as required. Use the [+] and [-] buttons to set the clock mode as required. [+] selects "Int", while [-] selects "Etr". MIDI YAMAHA [ Easy Guitar ] Model EZ-EG MIDI Implementation Chart Date:26-Nov-2002 Version : 1.0 Function... Transmitted Recognized Remarks Basic Default Channel Changed 1 - 6 x 1 - 16 *1 1 - 16 *1 Mode Default Messages Altered 3 x Note 28 - 88 Number : True voice Velocity Note ON Note OFF o 9nH,v=1-127 o 9nH,v=0 After Key's x Touch Ch's x 3 x x 0 - 127 0 - 127 o 9nH,v=1-127 o 9nH,v=0 or 8nH x x Pitch Bend o o Control Change 0,32 o 1x 6,38 x 7o 10 o 11 x 64 x 71 x 72 x 73 x 74 x 84 o 91,93,94 x 96,97 x 100,101 x Prog Change : True # o 0 - 127 o o o o o o o o o o o o x o o o 0 - 127 Bank Select Modulation wheel Data Entry Part Volume Pan Expression Sustain Harmonic Content Release Time Attack Time Brightness Portamento Cntrl Effect Depth RPN Inc,Dec RPN LSB,MSB System Exclusive o *2 o *2 : Song Pos. x x Common : Song Sel. x x : Tune x x System : Clock o Real Time: Commands o Aux :All Sound OFF x :Reset All Cntrls x :Local ON/OFF x :All Notes OFF x Mes- :Active Sense o sages:Reset x Mode 1 : OMNI ON , POLY Mode 3 : OMNI OFF, POLY o *3 o *3 o(120,126,127) o(121) o(122) o(123-125) o x Mode 2 : OMNI ON ,MONO Mode 4 : OMNI OFF,MONO o : Yes x : No *1 EZ-EG functions as a 16-channel multi-timbral tone generator, and incoming data does not affect the panel voices or panel settings. However, the MIDI messages listed below do affect the panel voices and songs. • MIDI Master Tuning *2 Exclusive F0H, 7EH, 7FH, 09H, 01H, F7H • This message automatically restores all default settings for the instrument, with the exception of MIDI Master Tuning. F0H, 7FH, 7FH, 04H, 01H, ll, mm, F7H • This message allows the volume of all channels to be changed simultaneously (Universal System Exclusive). • The values of "mm" is used for MIDI Master Tuning. (Values for "ll" are ignored.) F0H, 43H, 1nH, 27H, 30H, 00H, 00H, mm, ll, cc, F7H • This message simultaneously changes the tuning value of all channels. • The values of "mm" and "ll" are used for MIDI Master Tuning. • The default value of "mm" and "ll" are 08H and 00H, respectively. Any values can be used for "cc." F0H, 43H, 7FH, 00H, 00H, ll, mm, nn, F7H • The value which ll, mm and nn is Fuction ID, ctr 1 and ctr 2, respectively. Trans- Recogmitted nized X O Clock Fret Switch on O X Fret Switch off Fret LED on O O Fret LED off O X String Data Switch Data (Control) O X Switch Data (Enter) O X Internal Clock External Clock [+]ON [+]OFF [-]ON [-]OFF [SOUND]ON [SOUND]OFF [SONG]ON [SONG]OFF Function ID 00 00 01 02 03 04 05 06 06 06 06 07 07 07 07 ctr 1 01 01 str str str str str 00 00 01 01 00 00 01 01 ctr 2 00 7F kno kno kno kno vel 7F 00 7F 00 7F 00 7F 00 Note str : string number(see below) vel : velocity of played note(00 is muted) kno: MIDI note number(see below) The value which is function ID, ctr 1, ctr 2, str and kno are hexadecimal form. str (String number) and kno (Note number) Fret 0 1 2 3 4 5 6 7 8 9 10 11 12 String (str) 1 01 40 41 42 43 44 45 46 47 48 49 4A 4B 4C 2 02 3B 3C 3D 3E 3F 40 41 42 43 44 45 46 47 3 03 37 38 39 3A 3B 3C 3D 3E 3F 40 41 42 43 4 04 32 33 34 35 36 37 38 39 3A 3B 3C 3D 3E 5 05 2D 2E 2F 30 31 32 33 34 35 36 37 38 39 6 06 28 29 2A 2B 2C 2D 2E 2F 30 31 32 33 34 *3 When the song is started, an FAH message is transmitted. When song is stopped, an FCH message is transmitted. When the clock is set to External, both FAH (song start) and FCH(song stop) are recognized. *4 Local ON/OFF Bn, 7A, 7F Bn, 7A, 00 • Value for "n" is ignored *5 Song data is not transmitted. • *1 - *3, see notes bellow. Troubleshooting Problem: No sound. Check: Are the batteries properly installed? Are they run down? Is the VOLUME control turned down? Is a plug plugged into the PHONES/OUTPUT jack? Speaker output is automatically cut off when a plug is inserted into the PHONES/ OUTPUT jack. Is Local Control turned OFF? The EZ-EG will not produce any sound unless Local Control is turned ON. Problem: The displays flicker on and off and don't function normally. Check: Are the batteries run down? Problem: Song playback will not start. Check: Is the MIDI clock set to "Etr". Try setting it to "Int". Problem: The EZ-EG is picking up noise. Check: Are you using the EZ-EG near a mobile phone? Try turning the mo- bile phone off or moving it further away from the EZ-EG. Specifications Strings Frets Displays Voices Play Modes Controls Songs 6 12 Numeric LED display, 6 x 12 fret LEDs 9 guitar, 8 bass, 3 others STRUM (right hand), CHORD (left hand), BOTH (both hands) [STANDBY/ON] switch, [VOLUME] control, tremolo arm, [STRUM] button, [CHORD] button, [BOTH] button, [DEMO] button, [SOUND] button, [SONG] button, [TEMPO] button, [BALANCE] button, [CAPO] button, [TUNING] button, VALUE [+]/[-] buttons 18 (additional songs can be loaded into internal memory from a computer) Tremolo Arm Range Tempo Range Balance Range Capo Range Tuning Connectors Maximum Output Power PHONES/OUTPUT Speaker Power Supply Power Consumption Dimensions (w x d x h) Weight Supplied Accessories -300 - +300 cents 32 - 280 0 - 127 0 - 10 28 tuning settings in addition to normal DC IN 9V, PHONES/OUTPUT (mini stereo jack), MIDI IN and MIDI OUT 0.7 W (batteries or AC adaptor) Output impedance: 50Ω 5 cm PA-D09 AC Power Adaptor (supplied) Six 1.5V "AA" size, R6P or equivalent batteries 6.5 W (using the PA-D09 AC Power Adaptor) 809 x 300 x 72 mm (32" x 11-3/4" x 3") 1.6 kg (3 lbs. 8oz.) (w/o batteries) Tremolo Arm, Strap, C-Clip x 2, Pick, AC Power Adaptor, USB-MIDI Interface UX16, Safety Precautions Document, EZ-EG Song Chord Chart, Warranty Card * Specifications and descriptions in this owner's manual are for information purposes only. Yamaha Corp. reserves the right to change or modify products or specifications at any time without prior notice. Since specifications, equipment or options may not be the same in every locale, please check with your Yamaha dealer. Trademarks • Apple and Macintosh are trademarks of Apple Computer, Inc., registered in the U.S. and other countries. • Windows is the registered trademark of Microsoft®Corporation. All other trademarks are the property of their respective holders. M.D.G., Pro Audio & Digital Musical Instrument Division, Yamaha Corporation © 2002 Yamaha Corporation WA80680 ???PO???.?-02B0 Printed in Taiwan

  • 1
  • 2

WA80680
???PO???.?-02B0
Printed in Taiwan
Play using only your right hand. Great for rhythm
practice.
1
Press the [SONG] button and use the
[+] and [-] buttons to select the song
you want to play.
2
Press the [STRUM] button to begin
playback in the PLAY 1: STRUM
mode.
The song will begin after a one-measure count-
in. Strum the EZ-EG strings with your right hand
and the appropriate chords for the song will
sound. In this mode the fret buttons have no
effect on playback, so you can play anywhere
with your left hand without changing the playback
sound.
Press the
[STRUM]
button again to stop playback.
If you want the frets to glow to indicate the
nger-
ings of the chords being played, press the
[STRUM]
button while simultaneously holding the
[SOUND]
and
[SONG]
buttons.
Play using only your left hand. Great for chord
practice.
1
Press the [SONG] button and use the
[+] and [-] buttons to select the song
you want to play.
2
Press the [CHORD] button to begin
playback in the PLAY 2: CHORD
mode.
The song will begin after a one-measure count-
in. Finger the chords indicated by the glowing fret
buttons. Playback will only proceed when you
press all of the glowing fret buttons. Playing the
EZ-EG strings in this mode has no effect on play-
back.
Press the
[CHORD]
button again to stop play-
back.
Once you
ve mastered the left and right-hand
techniques using play modes 1 and 2, try playing
using both hands.
1
Press the [SONG] button and use the
[+] and [-] buttons to select the song
you want to play.
2
Press the [BOTH] button to begin
playback in the PLAY 3: BOTH mode.
The song will begin after a one-measure count-
in. Play with both your right and left hands in the
same way you did in the STRUM and CHORD
play modes to play the entire song as smoothly
as possible.
Press the
[BOTH]
button again to stop playback.
PLAY 1
: STRUM
10
The song number will appear on the display.
.
10
PLAY 2
: CHORD
.
10
PLAY 3
: BOTH
.
10
• *1 – *3, see notes bellow.
YAMAHA
[ Easy Guitar ]
Date:
26-Nov-2002
Model
EZ-EG
MIDI Implementation Chart
Version : 1.0
Transmitted
Recognized
Remarks
Function...
Basic
Default
1 - 6
1 - 16
*1
Channel
Changed
x
1 - 16
*1
Default
3
3
Mode
Messages
x
x
Altered
**************
x
Note
28 - 88
0 - 127
Number
: True voice
**************
0 - 127
Velocity
Note ON
o 9nH,v=1-127
o 9nH,v=1-127
Note OFF
o 9nH,v=0
o 9nH,v=0 or 8nH
After
Key's
x
x
Touch
Ch's
x
x
Pitch Bend
o
o
0,32
o
o
Bank Select
1x
o
Modulation wheel
6,38
x
o
Data Entry
7o
o
Part Volume
Control
10 o
o
Pan
11 x
o
Expression
Change
64 x
o
Sustain
71 x
o
Harmonic Content
72 x
o
Release Time
73 x
o
Attack Time
74 x
o
Brightness
91,93,94
x
x
Effect Depth
96,97
x
o
RPN Inc,Dec
100,101
x
o
RPN LSB,MSB
84
o
o
Portamento Cntrl
Prog
o 0 - 127
o 0 - 127
Change
: True #
**************
System Exclusive
o
*2
o
*2
: Song Pos.
x
x
Common
: Song Sel.
x
x
: Tune
x
x
System
:Clock
o
o
Real Time:Commands
o
*3
o
*3
Aux
:All Sound OFF
x
o(120,126,127)
:Reset All Cntrls x
o(121)
:Local ON/OFF
x
o(122)
:All Notes OFF
x
o(123-125)
Mes- :Active Sense
o
o
sages:Reset
x
x
Mode 1 : OMNI ON , POLY
Mode 2 : OMNI ON ,MONO
o : Yes
Mode 3 : OMNI OFF, POLY
Mode 4 : OMNI OFF,MONO
x : No
Play Along With the Songs
Try playing along with the songs using the EZ-EG
s three play modes: STRUM (right hand), CHORD (left hand), and
BOTH (both hands).
Trademarks
Apple and Macintosh are trademarks of Apple Computer, Inc., registered in the U.S. and other countries.
Windows is the registered trademark of Microsoft
®
Corporation.
All other trademarks are the property of their respective holders.
*1
EZ-EG functions as a 16-channel multi-timbral tone generator, and incoming data does not affect the
panel voices or panel settings. However, the MIDI messages listed below do affect the panel voices
and songs.
MIDI Master Tuning
*2
Exclusive
<GM System ON>
F0H, 7EH, 7FH, 09H, 01H, F7H
This message automatically restores all default settings for the instrument, with the exception of
MIDI Master Tuning.
<MIDI Master Volume>
F0H, 7FH, 7FH, 04H, 01H, ll, mm, F7H
This message allows the volume of all channels to be changed simultaneously
(Universal System Exclusive).
The values of
mm
is used for MIDI Master Tuning. (Values for
ll
are ignored.)
<MIDI Master Tuning>
F0H, 43H, 1nH, 27H, 30H, 00H, 00H, mm, ll, cc, F7H
This message simultaneously changes the tuning value of all channels.
The values of
mm
and
ll
are used for MIDI Master Tuning.
The default value of
mm
and
ll
are 08H and 00H, respectively. Any values can be used for
cc.
<EZ-EG Native Parameter Change>
F0H, 43H, 7FH, 00H, 00H, ll, mm, nn, F7H
The value which ll, mm and nn is Fuction ID, ctr 1 and ctr 2, respectively.
Note
str :
string number(see below)
vel :
velocity of played note(00 is muted)
kno:
MIDI note number(see below)
The value which is
function ID, ctr 1, ctr 2, str
and
kno
are hexadecimal form.
str (String number) and kno (Note number)
*3
When the song is started, an FAH message is transmitted.
When song is stopped, an FCH message is transmitted. When the clock is set to External, both FAH
(song start) and FCH(song stop) are recognized.
*4
Local ON/OFF
<Local ON> Bn, 7A, 7F
<Local OFF> Bn, 7A, 00
Value for
n
is ignored
*5
Song data is not transmitted.
Trans-
mitted
Recog-
nized
Function
ID
ctr 1
ctr 2
X
O
Clock
Internal Clock
00
01
00
External Clock
00
01
7F
O
X
Fret Switch on
01
str
kno
Fret Switch off
02
str
kno
O
O
Fret LED on
03
str
kno
Fret LED off
04
str
kno
O
X
String Data
05
str
vel
O
X
Switch Data
[+]ON
06
00
7F
(Control)
[+]OFF
06
00
00
[-]ON
06
01
7F
[-]OFF
06
01
00
O
X
Switch Data
[SOUND]ON
07
00
7F
(Enter)
[SOUND]OFF
07
00
00
[SONG]ON
07
01
7F
[SONG]OFF
07
01
00
Fret
0
1
2
3
4
5
6
7
8
9
10
11
12
String (str)
1
01
40
41
42
43
44
45
46
47
48
49
4A
4B
4C
2
02
3B
3C
3D
3E
3F
40
41
42
43
44
45
46
47
3
03
37
38
39
3A
3B
3C
3D
3E
3F
40
41
42
43
4
04
32
33
34
35
36
37
38
39
3A
3B
3C
3D
3E
5
05
2D
2E
2F
30
31
32
33
34
35
36
37
38
39
6
06
28
29
2A
2B
2C
2D
2E
2F
30
31
32
33
34
MIDI
M.D.G., Pro Audio & Digital Musical Instrument Division, Yamaha Corporation
© 2002 Yamaha Corporation
Connecting To MIDI Devices
The EZ-EG features MIDI IN and OUT connectors that can be used to connect to other MIDI devices for expanded
musical capabilities. It is also possible to load additional songs downloaded from the internet (URL provided below)
into the EZ-EG via these connectors.
MIDI (Musical Instrument Digital Interface) is an international standard sys-
tem that allows electronic musical instruments and related devices to com-
municate with and control one another. By connecting MIDI-compatible
devices via standard MIDI cables, it becomes possible to transfer a variety
of performance and setup data between devices for enhanced musical
capabilities.
MIDI IN Connector
Receives MIDI data from external MIDI devices.
MIDI OUT Connector
Transmits MIDI data to external MIDI devices.
• MIDI cables are sold separately and are available from most musi-
cal instrument stores that handle electronic music gear.
• Excessively long MIDI cables can cause data errors. Use MIDI
cables that are no longer than 15 meters.
• Make sure the power to external devices is turned off when con-
necting the EZ-EG. Then, when the required connections have
been made, turn on the external device first and then the EZ-EG.
Using the EZ-EG
s MIDI capabilities you can, for example, transfer perfor-
mance data between two EZ-EGs, or between an EZ-EG and a MIDI-
equipped personal computer to load songs into the EZ-EG.
Song data cannot be transmitted by the EZ-EG.
Performance data transferred between two EZ-EGs.
Song data downloaded from the internet can be loaded into the EZ-EG via com-
puter.
\
What is MIDI?
Some Example MIDI Applications
EZ-EG
MIDI IN
MIDI OUT
MIDI OUT
MIDI IN
EZ-EG
EZ-EG
MIDI IN
MIDI OUT
MIDI OUT
Computer
MIDI IN
The EZ-EG can be connected to a computer via MIDI.
To connect the EZ-EG to a computer that is equipped with USB connectors use a
USB-MIDI interface
such as the Yamaha UX16, as shown in the diagram below.
• If you use the Yamaha UX16, be sure to install the supplied driver on your
computer.
The EZ-EG can be directly connected to a computer that has built-in MIDI connectors
via standard MIDI cables, as shown in the diagram below.
To connect the EZ-EG to a Macintosh computer that has
RS-422 ports (the serial
Printer and Modem ports)
use a MIDI interface as shown in the diagram below.
• When using a separate MIDI interface with a Macintosh computer as in
this example, be sure to set the clock speed of the interface from the
computer using the appropriate application software. See your software
manual for details.
In order to perform the operations described in this section you will need to
use a computer connected to the internet to download the free Song Filer
application from the URL listed below.
Song data can be downloaded from the EZ-EG home page for a small fee.
Songs downloaded from the internet can be used in the same way as the
pre-programmed EZ-EG songs.
Data Speci
cations For the EZ-EG Play Modes
Number of Songs
..................
99 max.
Data
........................................
480 kilobytes total.
Data Format
...........................
XF File Format.
The total number of songs that can be loaded will depend on the data size
of the songs. As an example, about four 100-kilobyte songs can be loaded.
• If SMF (Standard MIDI File) data is loaded it can be played back, but
cannot be used in the PLAY modes.
Install the Song Filer
Access the following web page using a computer connected to the internet
and, after reading the online instructions, install the Song Filer application.
EZ-EG Home Page Address
System requirements for using the Song Filer are as follows:
[Windows]
OS
.............................
Windows 95/98/2000/Me/XP
CPU
..........................
Pentium/100 MHz or higher
RAM
..........................
8 MB or more
Hard Disk
.................
2 MB or more free
Display
.....................
800 x 600, 256 colors or more
[Macintosh]
OS
.............................
Mac OS 7.5 through 9.2.2 (OS X not supported)
CPU
..........................
Power PC or greater
RAM
..........................
8 MB or more
Hard Disk
.................
2 MB or more free
Display
.....................
800 x 600, 256 colors or more
Requirements as of November 2002.
Using the Song Filer
After installing the Song Filer, connect the EZ-EG to your computer. After
making the required connections and turning the EZ-EG on it will be possi-
ble to transfer song data from the computer to the EZ-EG.
Refer to the EZ-EG home page (URL listed above) for online instructions on
using the Song Filer.
Loading Data Into the EZ-EG
The song
le data must be transmitted to the EZ-EG from the com-
puter. Loaded song data will be stored in memory numbers
F-1, F-2,
etc.
following the pre-programmed song data (1
18).
Deleting Loaded Songs From the EZ-EG
Songs can be deleted from the EZ-EG memory from the Song Filer
application on the computer.
• Song data cannot be transferred from the EZ-EG to a computer. Be sure
to save all song data you want to keep on your computer.
Local Control determines whether the EZ-EG plays its own internal tone
generator (Local Control = ON), or whether performance data is transmitted
via the MIDI OUT connector only, without playing the internal tone generator
(Local Control = OFF).
Local Control ON
This is the normal setting. In this state the EZ-EG
s internal tone genera-
tor will play whatever is played on the strings and frets, as well as any
MIDI data received via the MIDI IN connector.
Local Control OFF
In this state the internal tone generator will not sound in response to
playing the strings and frets, but the performance data will be transmitted
via the MIDI OUT connector. The internal tone generator will play any
MIDI data received via the MIDI IN connector.
1
Simultaneously press the [CAPO] and [TUNING] buttons.
• Local control is always ON when the EZ-EG power is initially turned on.
2
Set local control as required.
Use the
[+]
and
[-]
buttons to turn local control on or off as required.
[+]
turns local control on, while
[-]
turns it off.
Normally EZ-EG song playback is synchronized to its own internal clock.
Use this function when you want to synchronize EZ-EG playback to a MIDI
clock signal from an external device.
Internal Clock (Int)
This is the normal setting: EZ-EG song playback is synchronized to its
own internal clock.
External Clock (Etr)
The EZ-EG will be synchronized to a MIDI clock signal from a connected
external device. Song and demo playback will not start if an appropriate
external clock signal is not being received.
1
Simultaneously press the [TEMPO] and [BALANCE] but-
tons.
• The clock is always set to “Int” when the EZ-EG power is initially turned
on.
2
Set the clock as required.
Use the
[+]
and
[-]
buttons to set the clock mode as required.
[+]
selects
Int
, while
[-]
selects
Etr
.
Connecting To a Computer
Loading Song Data Into the EZ-EG Using the Song Filer Application
EZ-EG
MIDI IN
MIDI OUT
UX16
USB
To the EZ-EG
MIDI IN connector.
To the EZ-EG
MIDI OUT connector.
USB-MIDI
Interface
Computer
MIDI IN
MIDI OUT
MIDI OUT
MIDI IN
Computer
EZ-EG
EZ-EG
MIDI IN
MIDI OUT
MIDI OUT
MIDI IN
Macintosh
MIDI Interface
Modem Port
Turning Local Control On or Off
Setting the MIDI Clock
EZ-EG
USB
MIDI IN
MIDI OUT
To the EZ-EG
MIDI IN connector.
To the EZ-EG
MIDI OUT connector.
USB-MIDI
Interface
Computer
Troubleshooting
Problem:
No sound.
Check:
Are the batteries properly installed? Are they run down?
Is the VOLUME control turned down?
Is a plug plugged into the PHONES/OUTPUT jack? Speaker output
is automatically cut off when a plug is inserted into the PHONES/
OUTPUT jack.
Is Local Control turned OFF? The EZ-EG will not produce any sound
unless Local Control is turned ON.
Problem:
The displays
icker on and off and don
t function normally.
Check:
Are the batteries run down?
Problem:
Song playback will not start.
Check:
Is the MIDI clock set to
Etr
. Try setting it to
Int
.
Problem:
The EZ-EG is picking up noise.
Check:
Are you using the EZ-EG near a mobile phone? Try turning the mo-
bile phone off or moving it further away from the EZ-EG.
Specifications
Strings
6
Frets
12
Displays
Numeric LED display, 6 x 12 fret LEDs
Voices
9 guitar, 8 bass, 3 others
Play Modes
STRUM (right hand), CHORD (left hand), BOTH (both hands)
Controls
[STANDBY/ON] switch, [VOLUME] control, tremolo
arm, [STRUM] button, [CHORD] button, [BOTH]
button, [DEMO] button, [SOUND] button, [SONG]
button,
[TEMPO]
button,
[BALANCE]
button,
[CAPO] button, [TUNING] button, VALUE [+]/[-] but-
tons
Songs
18 (additional songs can be loaded into internal
memory from a computer)
Tremolo Arm Range
-300
+300 cents
Tempo Range
32
280
Balance Range
0
127
Capo Range
0
10
Tuning
28 tuning settings in addition to normal
Connectors
DC IN 9V, PHONES/OUTPUT (mini stereo jack),
MIDI IN and MIDI OUT
Maximum Output Power
0.7 W (batteries or AC adaptor)
PHONES/OUTPUT
Output impedance: 50
Speaker
5 cm
Power Supply
PA-D09 AC Power Adaptor (supplied)
Six 1.5V
AA
size, R6P or equivalent batteries
Power Consumption
6.5 W (using the PA-D09 AC Power Adaptor)
Dimensions (w x d x h)
809 x 300 x 72 mm (32" x 11-3/4" x 3")
Weight
1.6 kg (3 lbs. 8oz.) (w/o batteries)
Supplied Accessories
Tremolo Arm, Strap, C-Clip x 2, Pick, AC Power Adap-
tor, USB-MIDI Interface UX16, Safety Precautions
Document, EZ-EG Song Chord Chart, Warranty Card
*
Specifications and descriptions in this owner’s manual are for information purposes
only. Yamaha Corp. reserves the right to change or modify products or specifica-
tions at any time without prior notice. Since specifications, equipment or options
may not be the same in every locale, please check with your Yamaha dealer.