Yamaha KP100 KP100 Owners Manual - Page 6
Assembling the KP100, The KP100 can be used with a double foot pedal YAMAHA DFP series - kick pad
 |
View all Yamaha KP100 manuals
Add to My Manuals
Save this manual to your list of manuals |
Page 6 highlights
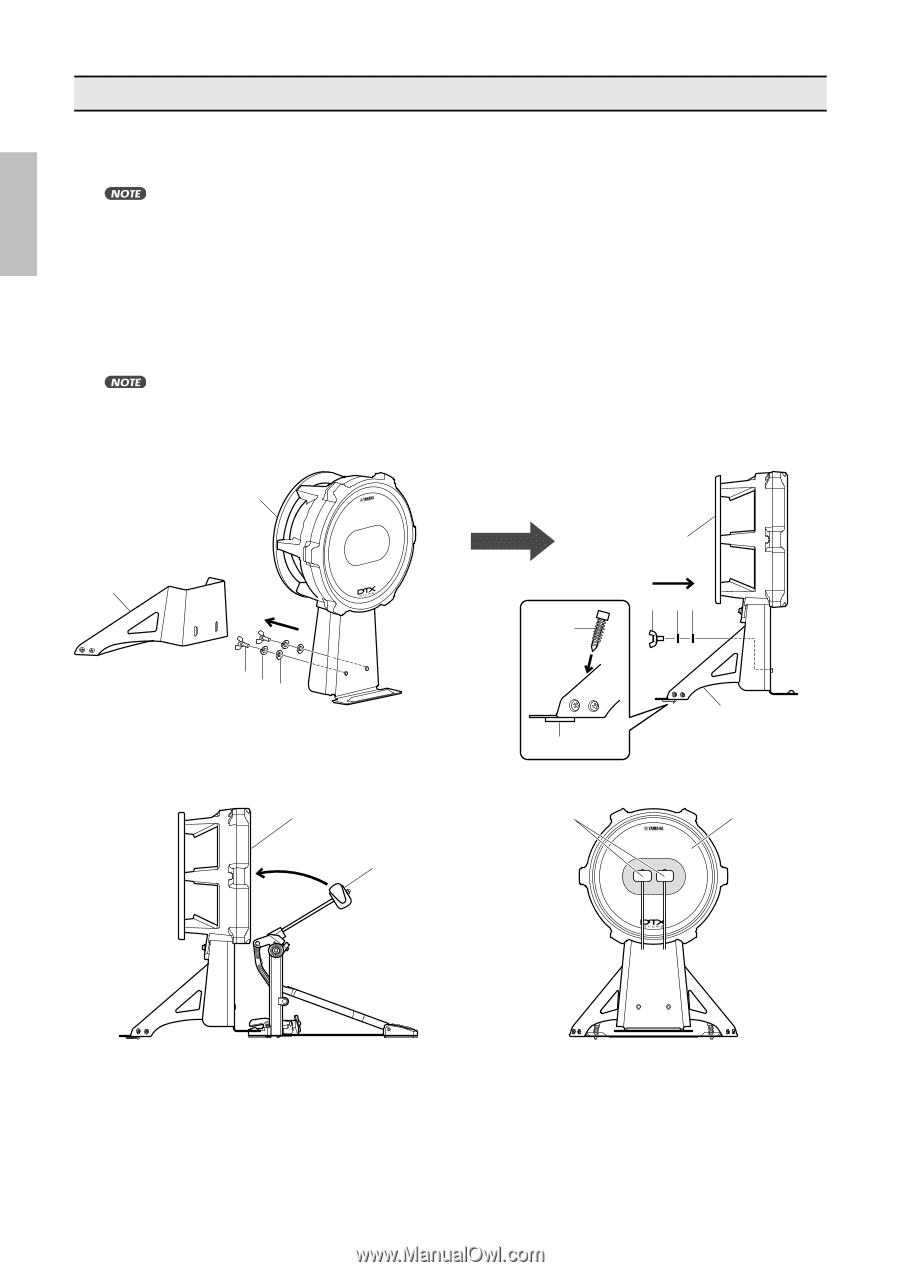
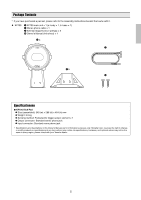
Assembling the KP100 1. Assemble the KP100. As shown in the illustration, remove the base attachment wing bolts q, spring washers w and washers e (2 each) that are attached to the main body, and use them to attach the base r to the main body t. Do not fully tighten the wing bolts in this step. If the drum pads are set on a special purpose drum riser (optional), or if damage to the floor is not a concern, connect the spurs y to the base so that the tip of the spurs dig into the riser or floor. To prevent damage to the floor, retract the spurs y, place a mat or carpet under the KP100 and use the Velcro™ strip u, attached to the underside of the KP100's base to prevent the KP100 from moving during performance. 2. Attach your foot pedal to the KP100. Adjust the base's position so that the pad surface of the KP100 is vertical when the foot pedal is attached, and the KP100 is stable when the beater hits the pad. After the position is determined, firmly tighten the wing bolts q to secure. 3. Adjust the position of the pedal and the length of the beater shaft so that the foot pedal's beater i hits in the center of the kick pad o. The KP100 can be used with a double foot pedal (YAMAHA DFP series, etc). When using a double foot pedal, please adjust the position of the pedal and the length of the beater i so that the space between the two beaters is positioned in the center of the pad. [Fig. A] 1 t r qwe t q we y r u 2 o 3i o i Figure A 6
-
 1
1 -
 2
2 -
 3
3 -
 4
4 -
 5
5 -
 6
6 -
 7
7 -
 8
8 -
 9
9 -
 10
10 -
 11
11 -
 12
12
 |
 |