Yamaha NS-AW570 Owners Manual - Page 5
Attaching The Grille, Mounting The Speakers - outdoor speakers
 |
View all Yamaha NS-AW570 manuals
Add to My Manuals
Save this manual to your list of manuals |
Page 5 highlights
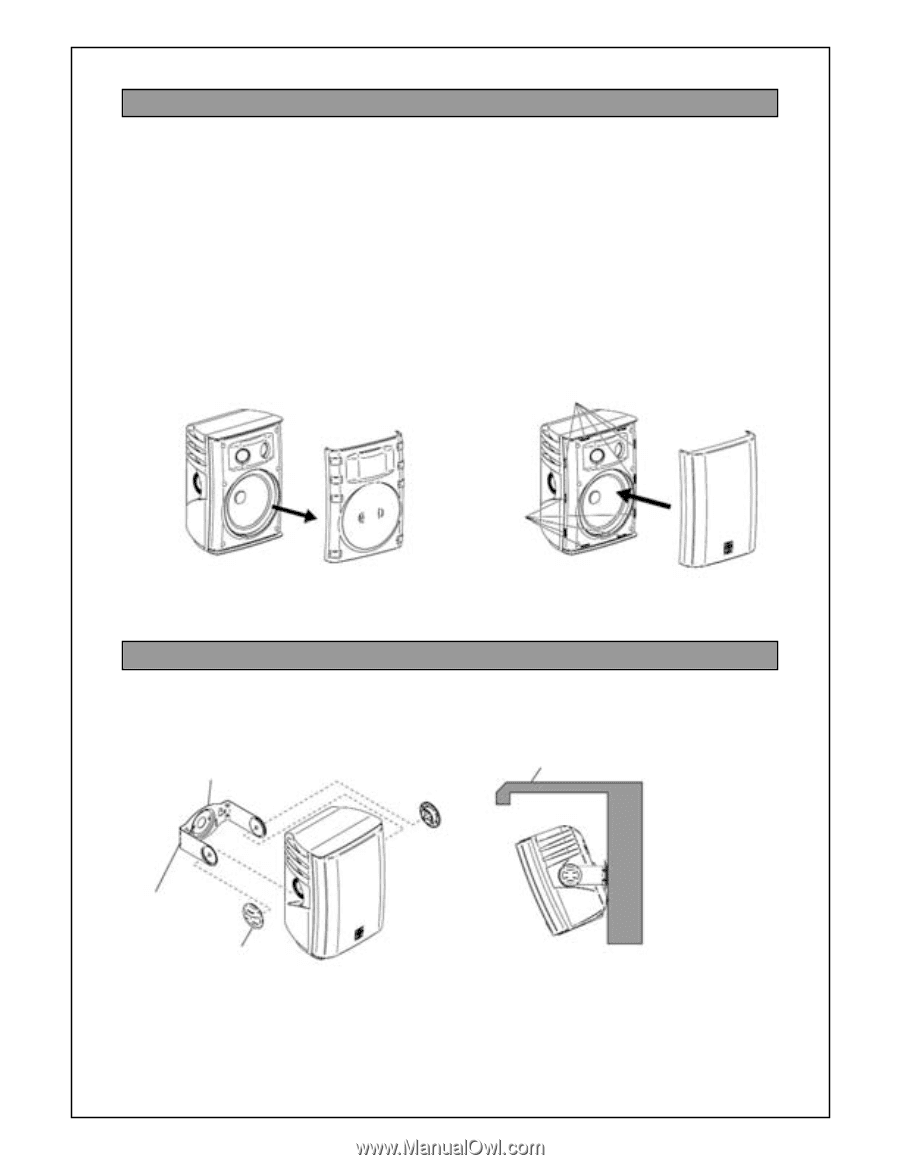
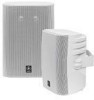
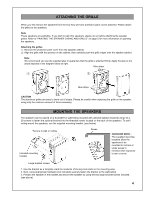
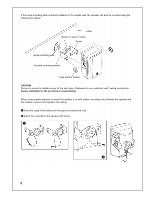
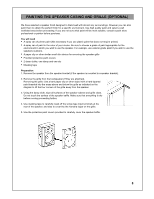
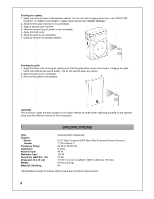
ATTACHING THE GRILLE When you first remove the speakers from the box they will have protective paint covers attached. Please attach the grilles to the speakers. Note These speakers are paintable. If you wish to paint the speakers, please do so before attaching the speaker grilles. Refer to "PAINTING THE SPEAKER CASING AND GRILLE" on page 8 for more information on painting the speakers. Attaching the grilles ᕃ Remove the protective paint cover from the speaker cabinet. ᕄ Align the grille with the grooves on the cabinet, then carefully push the grille edges onto the speaker cabinet. Note We recommend you use the supplied glue to guarantee that the grille is attached firmly. Apply the glue to the areas depicted in the diagram below at right. Glue strips ᕃ ᕄ Glue strips CAUTION The aluminum grilles are easy to bend out of shape. Please be careful when replacing the grille on the speaker, using only the minimum amount of force necessary. MOUNTING THE SPEAKERS The speakers can be placed on a bookshelf or wall/ceiling mounted with optional speaker brackets using 1/4 x 20 screws to fasten the optional bracket into the threaded inserts located on the back of the speakers. To wall / ceiling mount the speakers, use the supplied mounting bracket. (see below) *Secure to wall or ceiling Included mounting bracket Eaves OUTDOOR NOTE : The supplied mounting brackets allow the speakers to be mounted in corners or under eaves to minimize their exposure to rain or snow. Large bracket screws 1. Use the bracket as a template mark the locations of the key hole slots on the mounting area. 2. Next, using appropriate hardware (not included) securely fasten the bracket to the wall/ceiling. 3. Position the speaker in the bracket and secure the speaker by using the two large bracket screws included. (see above) 4
-
 1
1 -
 2
2 -
 3
3 -
 4
4 -
 5
5 -
 6
6 -
 7
7 -
 8
8 -
 9
9 -
 10
10 -
 11
11 -
12
 |
 |