Yamaha NS-B210 Owners Manual - Page 3
Placing The Speakers, For Ns-b210
 |
View all Yamaha NS-B210 manuals
Add to My Manuals
Save this manual to your list of manuals |
Page 3 highlights
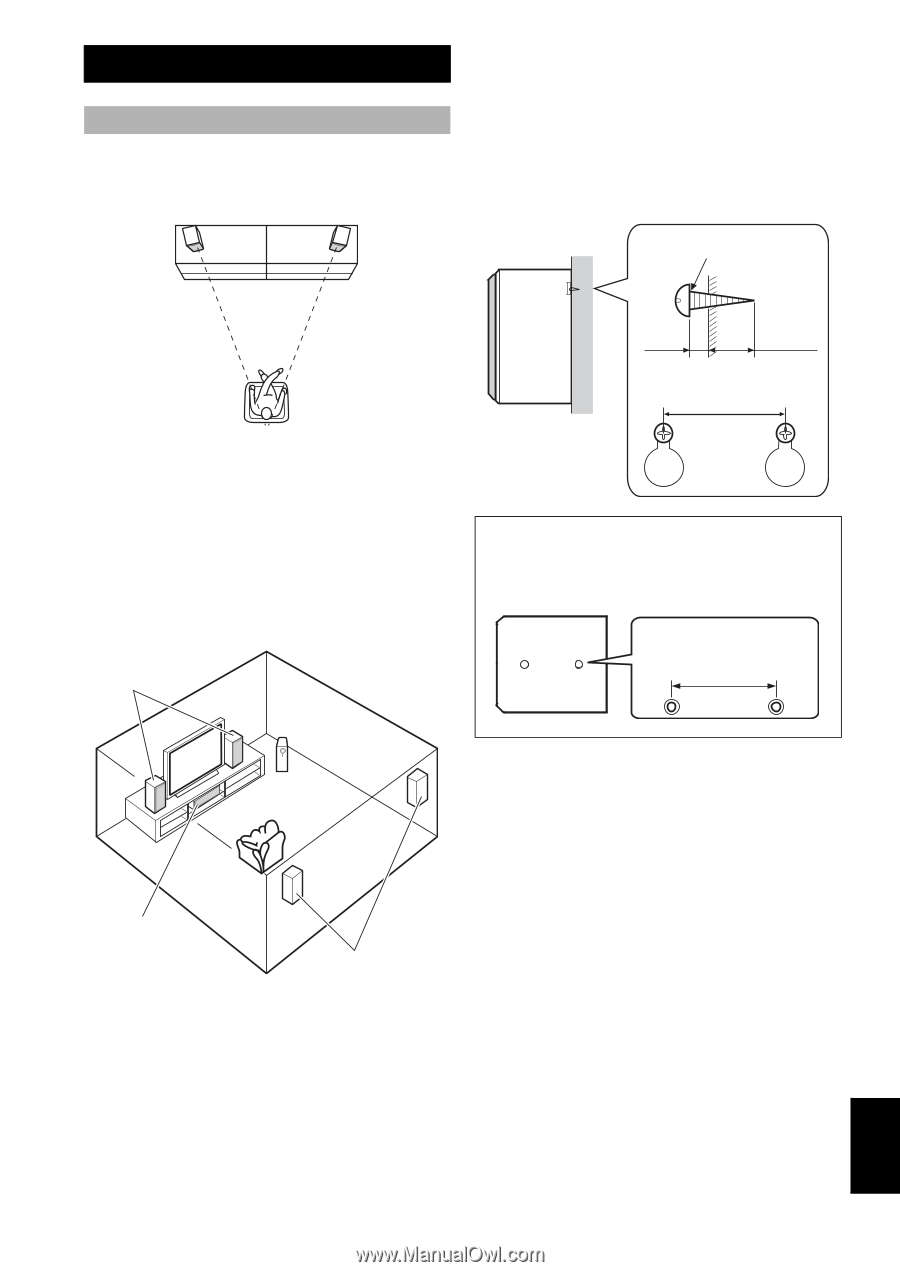
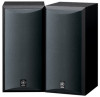
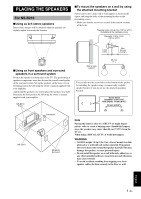
PLACING THE SPEAKERS For NS-B210 ■Using as 2ch stereo speakers Better stereo images will be obtained when the speakers are slightly angled in towards the listeners. ■To mount the speakers on a wall by using the attached mounting bracket Fasten screws into a firm wall or wall support as shown in the figure, and hang the holes of the mounting bracket on the protruding screws. * Make sure that the screws are secured in the narrow sections of the holes. Tapping screw (3.5-4 mm) (1/8" to 3/16") (Available at the hardware store) Diameter. 3.5 to 4 mm (1/8" to 3/16") 3 mm (1/8") Min. 20 mm (13/16") ■Using as front speakers and surround speakers in a surround system Position the speakers on both sides of the TV. The positioning of speakers is important, since this dictates the overall sound quality of the surround system. Set up the speakers on the basis of your listening position by following the owner's manual supplied with your amplifier. And mount the speakers on a wall or place the speakers on a shelf. Determine the best position by following the owner's manual supplied with your amplifier. NS-B210 Front Wall or wall support 26 mm (1") You can also use the screw holes on the bottom of the speaker for installing the speaker using a commercially available speaker bracket (if you do not use the attached mounting bracket). Screw holes Diameter: 6 mm (1/4") Hole Depth: 14 mm (9/16") 60 mm (2-3/8") NS-C210 Subwoofer NS-B210 Surround Note Placing this unit too close to a CRT TV set might impair picture color or create a buzzing noise. Should this happen, move the speaker away (more than 20 cm (7-7/8")) from the TV set. When using a PDP or LCD TV, it would not happen. WARNING • NS-B210 weighs 1.6 kg (3 lbs. 8 oz.). Do not mount it on thin plywood or a wall with soft surface material. If mounted, the screws may come out and the speaker may fall. This may damage the speaker, or cause personal injury. • Do not install the speaker on a wall with nails, adhesives, or any other unstable hardware. Long term use and vibrations may cause it to fall. • To avoid accidents resulting from tripping over loose speaker cables, fix them securely to the floor or wall. English 1 En
-
 1
1 -
 2
2 -
 3
3 -
 4
4 -
 5
5 -
 6
6 -
 7
7
 |
 |