Yamaha RX V661 MCXSP10 Manual - Page 83
Input rename, For HDMI IN jacks 1 and 2
 |
UPC - 027108927411
View all Yamaha RX V661 manuals
Add to My Manuals
Save this manual to your list of manuals |
Page 83 highlights
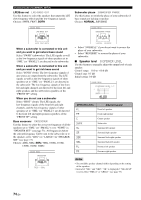
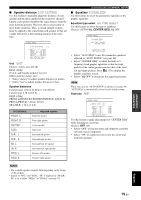
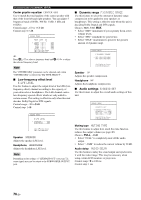
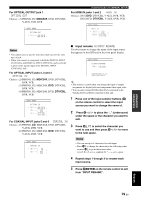
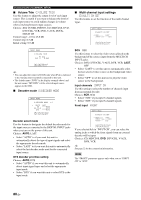
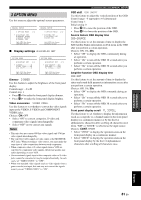
ADVANCED OPERATION p For OPTICAL OUTPUT jack 1 OPTICAL OUT Choices: (1) PHONO, CD, MD/CD-R, DVD, DTV/CBL, V-AUX, VCR, DVR INPUT MENU OPTICAL OUT . (1);;;;;MD/CD-R (MD/CD-R ) Customizing this unit (MANUAL SETUP) For HDMI IN jacks 1 and 2 HDMI IN Choices: [IN1] DVD, DTV/CBL, V-AUX, DVR, VCR [IN2] DVD, DTV/CBL, V-AUX, DVR, VCR INPUT MENU HDMI IN . [IN1];;; DVD ( DVD ) [IN2];;;DTV/CBL (DTV/CBL)) Notes • You cannot select a specific item more than once for the same type of jack. • When you connect a component to both the DIGITAL INPUT (COAXIAL) and DIGITAL INPUT (OPTICAL) jacks, priority is given to the signals input at the DIGITAL INPUT (COAXIAL) jack. For OPTICAL INPUT jacks 2, 3 and 4 OPTICAL IN Choices: (2) PHONO, CD, MD/CD-R, DVD, DTV/CBL, DVR, VCR (3) PHONO, CD, MD/CD-R, DVD, DTV/CBL, DVR, VCR (4) PHONO, CD, MD/CD-R, DVD, DTV/CBL, DVR, VCR INPUT MENU OPTICAL IN . (2);;;;;MD/CD-R (MD/CD-R ) (3);;;;; DVD ( DVD ) (4);;;;;DTV/CBL (DTV/CBL ) For COAXIAL INPUT jacks 5 and 6 COAXIAL IN Choices: (5) PHONO, CD, MD/CD-R, DVD, DTV/CBL, V-AUX, DVR, VCR (6) PHONO, CD, MD/CD-R, DVD, DTV/CBL, V-AUX, DVR, VCR [ p ■ Input rename B)INPUT RENAME Use this feature to change the name of the input source that appears in the OSD and in the front panel display. INPUT MENU B)INPUT RENAME DVD -> MY DVD [ ]/[[]:Position [ ]/[ ]:Chara. y • This feature is useful when you change the input or output assignment for digital jacks and component video input jacks. • You can only rename DOCK when iPod is stationed in the Yamaha Universal Dock connected to this unit. 1 Press one of the input selector buttons (A) on the remote control to select the input source you want to change the name of. 2 Press Dl / h to place the "_" (underscore) under the space or the character you want to edit. 3 Press Dk / n to select the character you want to use and then press Dl / h to move to the next space. INPUT MENU COAXIAL IN . (5);;;;; CD ( CD ) (6);;;;; DVD ( DVD ) (4);;;;;DTV/CBLTA Notes • You can use up to 8 characters for each input. • Press Dn to change the character in the following order, or press Dk to go in the reverse order: A to Z, 0 to 9, a to z, symbols etc.), space. 4 Repeat steps 1 through 3 to rename each input source. 5 Press DENTER on the remote control to exit from "INPUT RENAME". English 79 En
-
 1
1 -
2
-
3
-
4
-
5
-
6
-
7
-
8
-
9
-
10
-
11
-
12
-
13
-
14
-
15
-
16
-
17
-
18
-
19
-
20
-
21
-
22
-
23
-
24
-
25
-
26
-
27
-
28
-
29
-
30
-
31
-
32
-
33
-
34
-
35
-
36
-
37
-
38
-
39
-
40
-
41
-
42
-
43
-
44
-
45
-
46
-
47
-
48
-
49
-
50
-
51
-
52
-
53
-
54
-
55
-
56
-
57
-
58
-
59
-
60
-
61
-
62
-
63
-
64
-
65
-
66
-
67
-
68
-
69
-
70
-
71
-
72
-
73
-
74
-
75
-
76
-
77
-
 78
78 -
 79
79 -
 80
80 -
 81
81 -
 82
82 -
 83
83 -
 84
84 -
 85
85 -
 86
86 -
 87
87 -
 88
88 -
89
-
90
-
91
-
92
-
93
-
94
-
95
-
96
-
97
-
98
-
99
-
100
-
101
-
102
-
103
-
104
-
105
-
106
-
107
-
108
-
109
-
110
-
111
-
112
-
113
-
114
-
115
-
116
-
117
-
118
-
119
-
120
-
121
-
122
-
123
-
124
-
125
-
126
-
127
-
128
-
129
-
130
 |
 |
