Yamaha SLB200 Owner's Manual - Page 12
Refer to the Tuning
 |
View all Yamaha SLB200 manuals
Add to My Manuals
Save this manual to your list of manuals |
Page 12 highlights
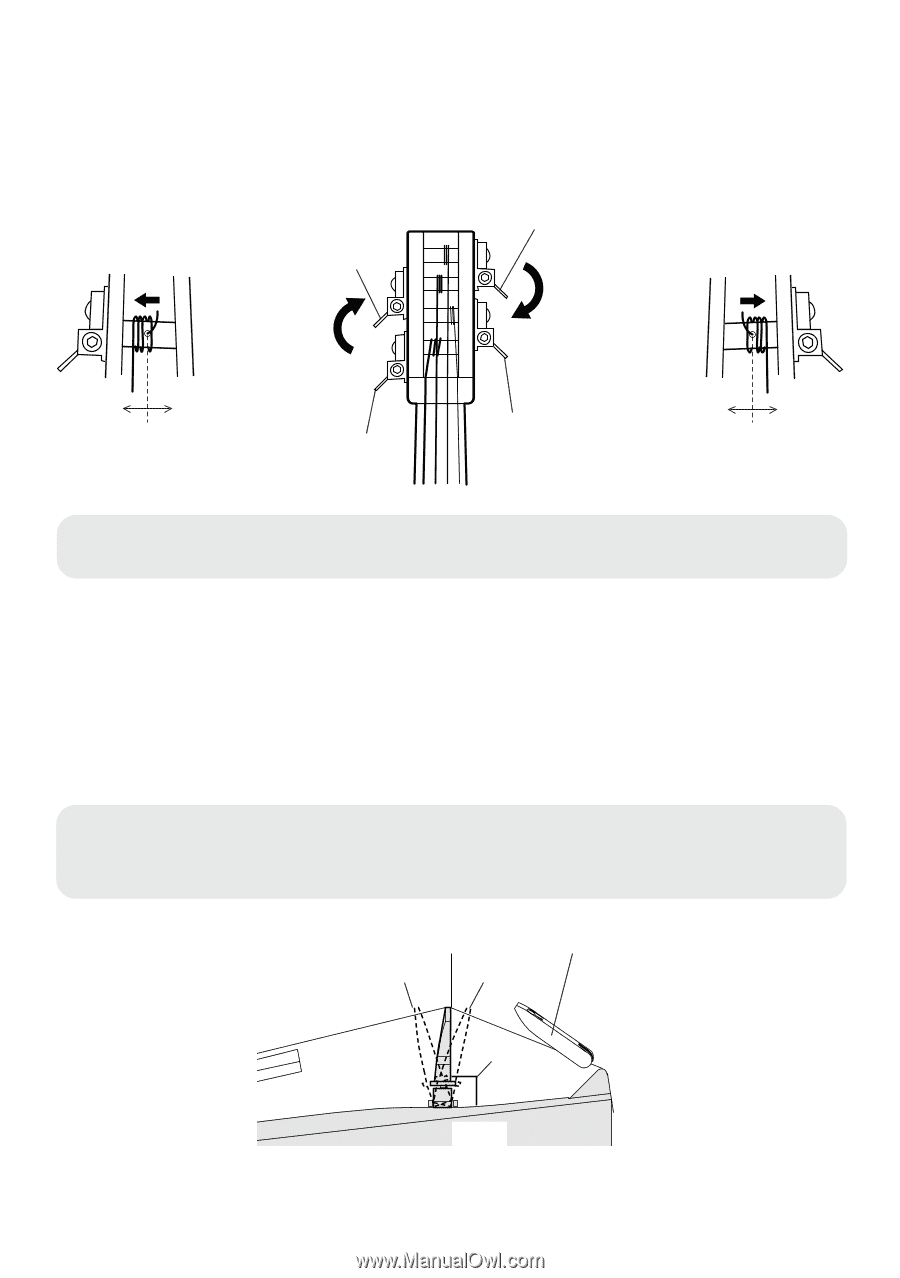
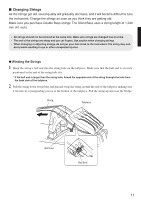
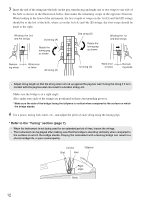
3 Insert the end of the string into the hole on the peg, turn the peg and make one or two wraps to one side of the hole as shown in the illustration below, then make the remaining wraps in the opposite direction. When looking at the front of the instrument, the first couple of wraps on the 1st (G) and 2nd (D) strings should be to the left of the hole, where as on the 3rd (A) and 4th (E) strings, the first wraps should be made to the right. Winding the 3rd and 4th strings 3rd string (A) Rotate the tuning peg as shown 2nd string (D) Rotate the tuning peg as shown Winding the 1st and 2nd strings Remaining winds Wind once or twice 4th string (E) 1st string (G) Wind once or twice Remaining winds • Adjust string length so that the string does not rub up against the peg box wall. Tuning the string if it is in contact with the peg box wall can result in a broken string, etc. Make sure the bridge is at a right angle. Also, make sure each of the strings are positioned in their corresponding grooves. * Make sure the side of the bridge facing the tailpiece is vertical when compared to the surface on which the bridge stands. 4 Use a piano, tuning fork, tuner, etc., and adjust the pitch of each string using the tuning pegs. * Refer to the "Tuning" section (page 7). • When the instrument is not being used for an extended period of time, loosen the strings. • The instrument can be played after making sure that the bridge is standing vertically when compared to the surface on which the bridge stands. Playing the instrument with a leaning bridge can result in a shorter bridge life, or poor sound quality. Correct Bad Bad Tailpiece Right angle Body 12
-
 1
1 -
2
-
3
-
4
-
5
-
6
-
 7
7 -
 8
8 -
 9
9 -
 10
10 -
 11
11 -
 12
12 -
 13
13 -
 14
14 -
 15
15
 |
 |