Yamaha YCM01U YCM01U Read This First - Page 6
Controls and Functions
 |
View all Yamaha YCM01U manuals
Add to My Manuals
Save this manual to your list of manuals |
Page 6 highlights
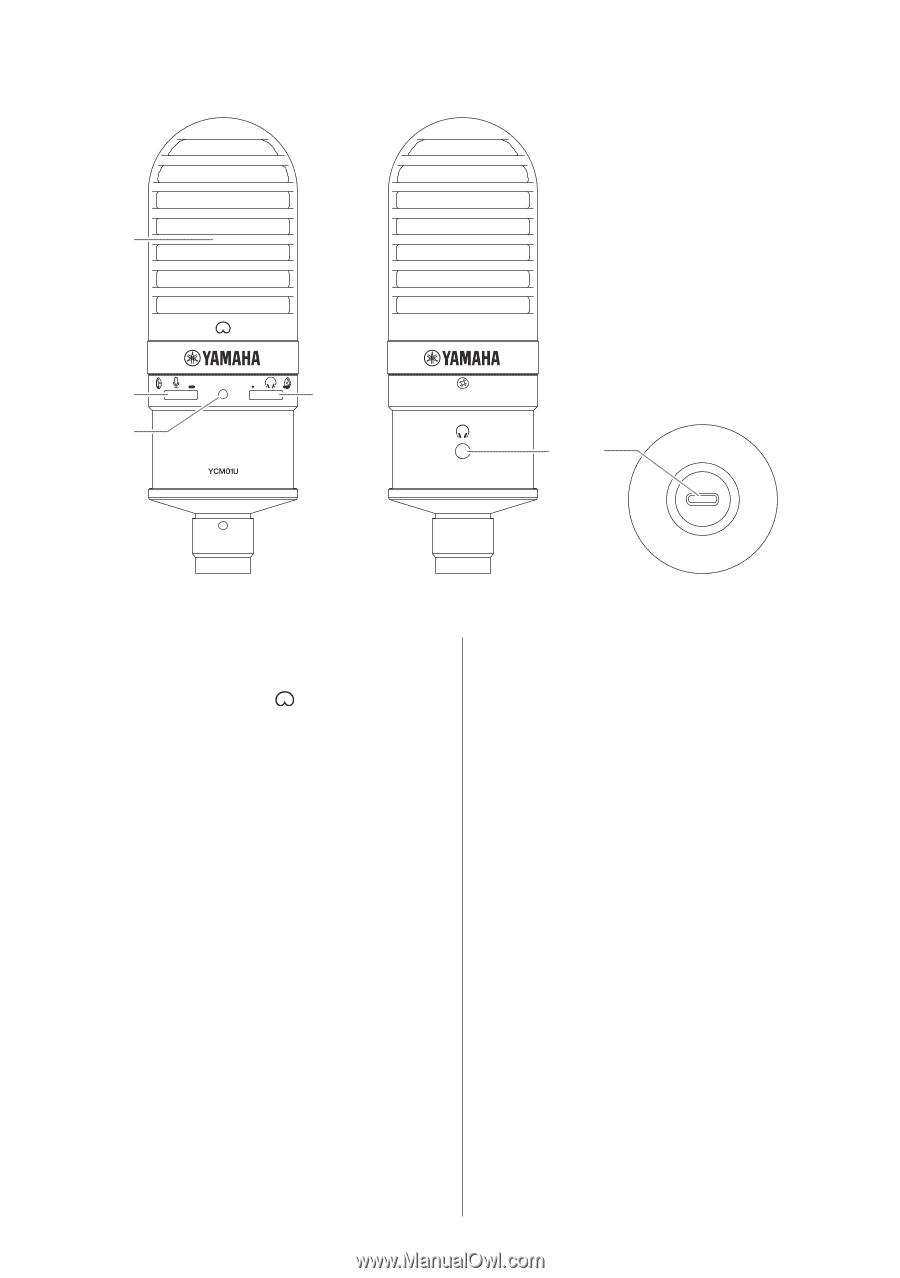
Controls and Functions ᶃ ᶄ ᶆ ᶅ ᶇᶈ Front Rear Bottom ① Microphone Input your voice here. Speak straight toward the microphone in front of the [ ] (cardioid pattern) mark. ② Microphone level control Use this dial to adjust the USB output volume of the voice input to the microphone. Turn the dial to the right to raise the volume, and turn it to the left to lower the volume. ③ Power LED This LED indicates whether the power is on or off. When the power is on, the LED lights up white. When the power is off, the LED turns off. This product features bus-powered operation. Therefore, this product is turned on just by connecting to a computer or smartphone via a USB cable. ④ Headphones level control Use this dial to adjust the level of the headphones or earphones. Turn the dial to the right to raise the volume, and turn it to the left to lower the volume. Adjusting the headphones volume does not affect the streaming volume level. ⑤ Headphones output (ø3.5mm stereo mini jack) Connect headphones or earphones here. You can monitor microphone audio and computer or smartphone audio. ⑥ USB port (USB C) Insert the USB cable here to connect this product to a computer or smartphone. When connecting to an iPhone or iPad that accepts a Lightning connector, make sure to use a commercially available USB A to USB C cable and the Apple Lightning to USB 3 camera adapter. Refer to the connection example on the previous page. Note • Do not use the USB-C to Lightning cable that came with your iPhone or iPad. • Refer to the User Guide (HTML) for more information on the appropriate settings on the computer. 6ɹYCM01U Read This First
-
 1
1 -
 2
2 -
 3
3 -
 4
4 -
 5
5 -
 6
6 -
 7
7 -
 8
8 -
 9
9 -
 10
10 -
 11
11 -
 12
12 -
13
 |
 |