Yamaha YSP 800 Owner's Manual - Page 35
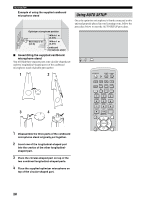
Preparation, Auto Beam Optimization, Acoustic Optimization, Press Enter To Start The Auto Setup - sub woofer
 |
UPC - 027108923581
View all Yamaha YSP 800 manuals
Add to My Manuals
Save this manual to your list of manuals |
Page 35 highlights
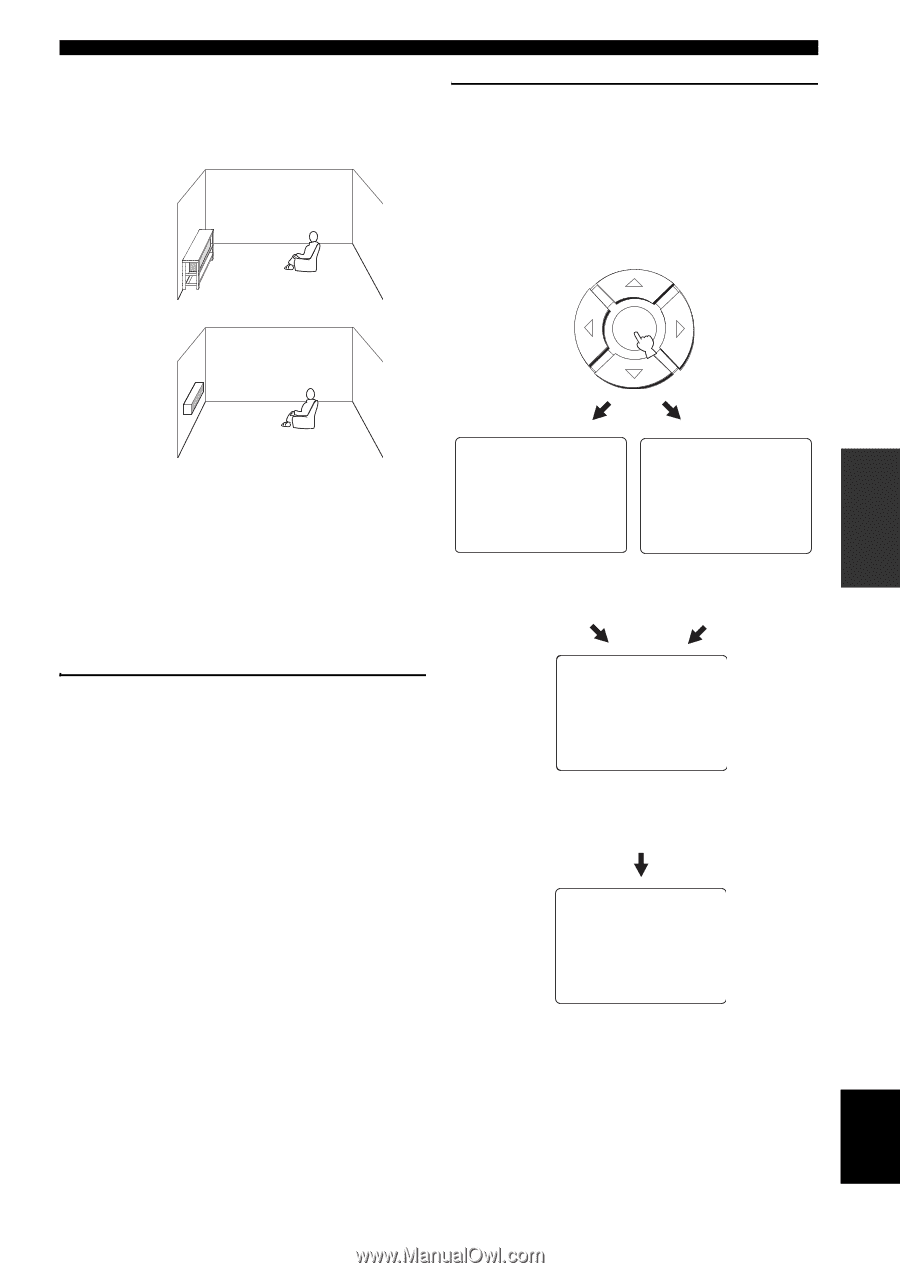
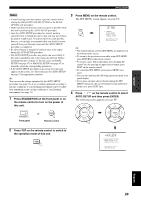
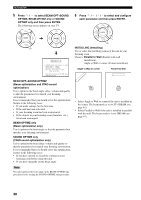
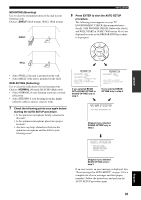
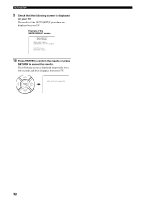
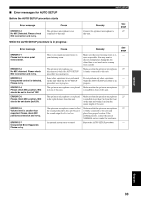
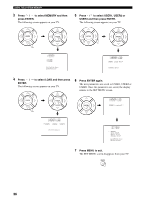
MOUNTING (Mounting) Use to select the mounted position of the unit in your listening room. Choices: SHELF (Shelf mount), WALL (Wall mount) SHELF AUTO SETUP 8 Press ENTER to start the AUTO SETUP procedure. The following screen appears on your TV. ENVIRONMENT CHECK (Environmental noise check), SUB WOOFER CHECK (Subwoofer check) and WILL START in 10 SEC (Will start in 10 sec) are displayed in order as the PREPARATION procedure is in progress. SETUP ENTER WALL • Select WALL if the unit is mounted on the wall. • Select SHELF if the unit is mounted on the shelf. REFLECTING (Reflecting) Use to select the reflectivity of your listening room. Choices: NORMAL (Normal), HI ECHO (High echo) • Select NORMAL if your listening room has a normal reflectivity. • Select HI ECHO if your listening room has highly reflective surfaces such as concrete walls. 7 Check the following points once again before starting the AUTO SETUP procedure. • Is the optimizer microphone firmly connected to this unit? • Is the optimizer microphone placed in a proper location? • Are there any large obstacles in between the optimizer microphone and the walls in your listening room? PREPARATION . ENVIRONMENT CHECK ;;;[OK] SUB WOOFER CHECK ;;;[NOT IN USE] WILL START in 10 SEC Move aside or behind YSP *****----- If you selected BEAM OPT+SOUND OPTIMZ or SOUND OPTIMZ only in step 5. PREPARATION . ENVIRONMENT CHECK ;;;[OK] WILL START in 10 SEC Move aside or behind YSP *****----- If you selected BEAM OPTIMZ only in step 5. AUTO BEAM OPTIMIZATION AUTO BEAM MEASUREMENT/SET Skipped if you selected SOUND OPTIMZ only in step 5. ACOUSTIC OPTIMIZATION . SETTING VOLUME MEASURE DISTANCE MEASURE FREO CHAR MEASURE VOLUME Skipped if you selected BEAM OPTIMZ only in step 5. If an error occurs, an error message is displayed. See "Error messages for AUTO SETUP" on page 33 for a complete list of error messages and their proper remedies. Follow the instructions and perform the AUTO SETUP procedure again. 31 English
-
 1
1 -
2
-
3
-
4
-
5
-
6
-
7
-
8
-
9
-
10
-
11
-
12
-
13
-
14
-
15
-
16
-
17
-
18
-
19
-
20
-
21
-
22
-
23
-
24
-
25
-
26
-
27
-
28
-
29
-
 30
30 -
 31
31 -
 32
32 -
 33
33 -
 34
34 -
 35
35 -
 36
36 -
 37
37 -
 38
38 -
 39
39 -
 40
40 -
41
-
42
-
43
-
44
-
45
-
46
-
47
-
48
-
49
-
50
-
51
-
52
-
53
-
54
-
55
-
56
-
57
-
58
-
59
-
60
-
61
-
62
-
63
-
64
-
65
-
66
-
67
-
68
-
69
-
70
-
71
-
72
-
73
-
74
-
75
-
76
-
77
-
78
-
79
-
80
-
81
-
82
-
83
-
84
-
85
-
86
-
87
-
88
-
89
-
90
-
91
-
92
-
93
-
94
-
95
-
96
-
97
-
98
-
99
-
100
-
101
 |
 |