ZyXEL P-662HW-61 Quick Start Guide - Page 6
OTIST, Troubleshooting, Disable wireless security, Manually assign a WEP key
 |
View all ZyXEL P-662HW-61 manuals
Add to My Manuals
Save this manual to your list of manuals |
Page 6 highlights
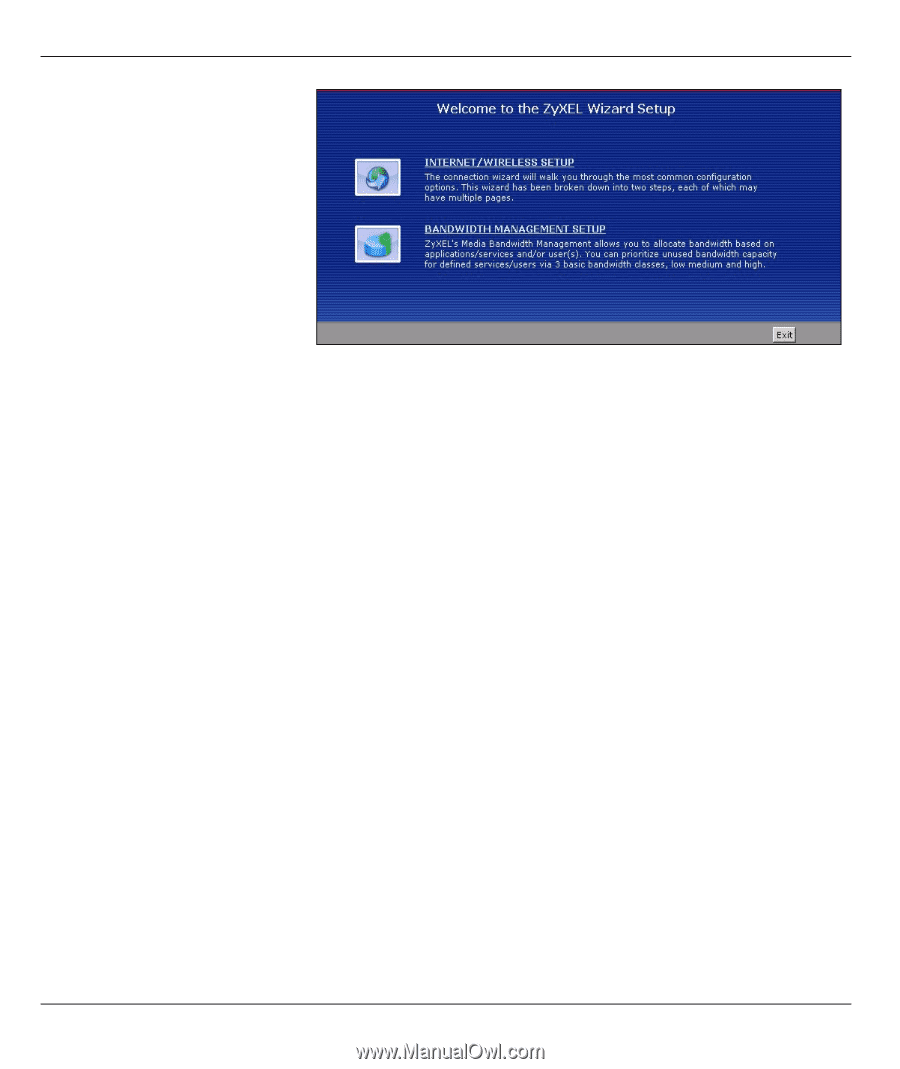
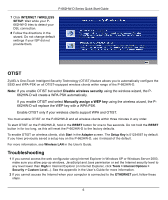
P-662HW-D Series Quick Start Guide 7 Click INTERNET / WIRELESS SETUP. Wait while your P662HW-D tries to detect your DSL connection. 8 Follow the directions in the wizard. Do not change default settings if your ISP did not provide them. OTIST ZyXEL's One-Touch Intelligent Security Technology (OTIST) feature allows you to automatically configure the SSID and WPA-PSK on all OTIST-equipped wireless clients within range of the P-662HW-D. Note: If you enable OTIST but select Disable wireless security using the wireless wizard, the P- 662HW-D will create a WPA-PSK automatically. If you enable OTIST and select Manually assign a WEP key using the wireless wizard, the P662HW-D will replace the WEP key with a WPA-PSK. Enable OTIST only if your wireless clients support WPA and OTIST. You must enable OTIST on the P-662HW-D and all wireless clients within three minutes in any order. To start OTIST on the P-662HW-D, hold in the RESET button for one to five seconds. Do not hold the RESET button in for too long, as this will reset the P-662HW-D to the factory defaults. To enable OTIST on wireless clients, click Start in the Adapter screen. The Setup Key is 01234567 by default. If you have previously saved a setup key on the P-662HW-D, use it instead of the default. For more information, see Wireless LAN in the User's Guide. Troubleshooting 1 If you cannot access the web configurator using Internet Explorer in Windows XP or Windows Server 2003, make sure you allow pop-up windows, JavaScript and Java permission or set the Internet security level to any level lower than High in Internet Explorer (in Internet Explorer, click Tools > Internet Options > Security > Custom Level...). See the appendix in the User's Guide for more information. 2 If you cannot access the Internet when your computer is connected to the ETHERNET port, follow these steps. 6
-
 1
1 -
 2
2 -
 3
3 -
 4
4 -
 5
5 -
 6
6 -
 7
7
 |
 |