2014 Chevrolet Express 1500 Cargo Owner Manual - Page 165
2014 Chevrolet Express 1500 Cargo Manual

Page 165 highlights
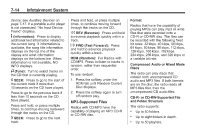
Infotainment System Caution (Continued) the CD player, use only CDs in good condition without any label, load one CD at a time, and keep the CD player and the loading slot free of foreign materials, liquids, and debris. If an error displays, see "CD Player Messages" later in this section. the CD does not play properly or not at all. Do not touch the bottom side of a CD while handling it; this could damage the surface. Pick up CDs by the outer edges or the edge of the hole and the outer edge. If the surface of a CD is soiled, clean it with a soft, lint-free cloth or dampen a clean, soft cloth in a mild, neutral detergent solution mixed with water. Make sure the wiping process starts from the center to the edge. 7-13 Playing a CD If the ignition or radio is turned off with a CD in the player, it stays in the player. When the ignition or radio is turned on, the CD starts playing where it stopped, if it was the last selected audio source. When a CD is inserted, the CD symbol displays on the left side of the radio display. As each new track starts to play, the track number displays. The CD player can play the smaller 8 cm (3 in) single CDs with an adapter ring. Full-size CDs and the smaller CDs are loaded in the same manner. CD/AUX (CD/Auxiliary): Press to cycle between CD or Auxiliary when listening to the radio. The CD icon and a message showing the disc and/or track number will display when a CD is in the player. Press again and the system automatically searches for an auxiliary input Care of CDs If playing a CD-R, the sound quality can be reduced due to CD-R or CD-RW quality, the method of recording, the quality of the music that has been recorded, and the way the CD-R or CD-RW has been handled. Handle them carefully. Store CD-Rs or CD-RWs in their original cases or other protective cases and away from direct sunlight and dust. The CD player scans the bottom surface of the disc. If the surface of a CD is damaged, such as cracked, broken, or scratched, Inserting a CD Insert a CD partway into the slot, label side up. The player pulls it in and the CD should begin playing. Ejecting a CD Z EJECT: Press and release to eject the disc. Remove the CD when Remove Disc displays. If the disc is not removed, after several seconds the disc is automatically pulled back into the player.
-
 1
1 -
2
-
3
-
4
-
5
-
6
-
7
-
8
-
9
-
10
-
11
-
12
-
13
-
14
-
15
-
16
-
17
-
18
-
19
-
20
-
21
-
22
-
23
-
24
-
25
-
26
-
27
-
28
-
29
-
30
-
31
-
32
-
33
-
34
-
35
-
36
-
37
-
38
-
39
-
40
-
41
-
42
-
43
-
44
-
45
-
46
-
47
-
48
-
49
-
50
-
51
-
52
-
53
-
54
-
55
-
56
-
57
-
58
-
59
-
60
-
61
-
62
-
63
-
64
-
65
-
66
-
67
-
68
-
69
-
70
-
71
-
72
-
73
-
74
-
75
-
76
-
77
-
78
-
79
-
80
-
81
-
82
-
83
-
84
-
85
-
86
-
87
-
88
-
89
-
90
-
91
-
92
-
93
-
94
-
95
-
96
-
97
-
98
-
99
-
100
-
101
-
102
-
103
-
104
-
105
-
106
-
107
-
108
-
109
-
110
-
111
-
112
-
113
-
114
-
115
-
116
-
117
-
118
-
119
-
120
-
121
-
122
-
123
-
124
-
125
-
126
-
127
-
128
-
129
-
130
-
131
-
132
-
133
-
134
-
135
-
136
-
137
-
138
-
139
-
140
-
141
-
142
-
143
-
144
-
145
-
146
-
147
-
148
-
149
-
150
-
151
-
152
-
153
-
154
-
155
-
156
-
157
-
158
-
159
-
 160
160 -
 161
161 -
 162
162 -
 163
163 -
 164
164 -
 165
165 -
 166
166 -
 167
167 -
 168
168 -
 169
169 -
 170
170 -
171
-
172
-
173
-
174
-
175
-
176
-
177
-
178
-
179
-
180
-
181
-
182
-
183
-
184
-
185
-
186
-
187
-
188
-
189
-
190
-
191
-
192
-
193
-
194
-
195
-
196
-
197
-
198
-
199
-
200
-
201
-
202
-
203
-
204
-
205
-
206
-
207
-
208
-
209
-
210
-
211
-
212
-
213
-
214
-
215
-
216
-
217
-
218
-
219
-
220
-
221
-
222
-
223
-
224
-
225
-
226
-
227
-
228
-
229
-
230
-
231
-
232
-
233
-
234
-
235
-
236
-
237
-
238
-
239
-
240
-
241
-
242
-
243
-
244
-
245
-
246
-
247
-
248
-
249
-
250
-
251
-
252
-
253
-
254
-
255
-
256
-
257
-
258
-
259
-
260
-
261
-
262
-
263
-
264
-
265
-
266
-
267
-
268
-
269
-
270
-
271
-
272
-
273
-
274
-
275
-
276
-
277
-
278
-
279
-
280
-
281
-
282
-
283
-
284
-
285
-
286
-
287
-
288
-
289
-
290
-
291
-
292
-
293
-
294
-
295
-
296
-
297
-
298
-
299
-
300
-
301
-
302
-
303
-
304
-
305
-
306
-
307
-
308
-
309
-
310
-
311
-
312
-
313
-
314
-
315
-
316
-
317
-
318
-
319
-
320
-
321
-
322
-
323
-
324
-
325
-
326
-
327
-
328
-
329
-
330
-
331
-
332
-
333
-
334
-
335
-
336
-
337
-
338
-
339
-
340
-
341
-
342
-
343
-
344
-
345
-
346
-
347
-
348
-
349
-
350
-
351
-
352
-
353
-
354
-
355
-
356
-
357
-
358
-
359
-
360
-
361
-
362
-
363
-
364
-
365
-
366
-
367
-
368
-
369
-
370
-
371
-
372
-
373
-
374
-
375
-
376
-
377
-
378
-
379
-
380
-
381
-
382
-
383
-
384
-
385
-
386
-
387
-
388
-
389
-
390
-
391
-
392
-
393
-
394
-
395
-
396
-
397
-
398
-
399
-
400
-
401
-
402
-
403
-
404
-
405
-
406
 |
 |