1998 Mercury Grand Marquis Owner Guide 1st Printing - Page 135
1998 Mercury Grand Marquis Manual
Page 135 highlights
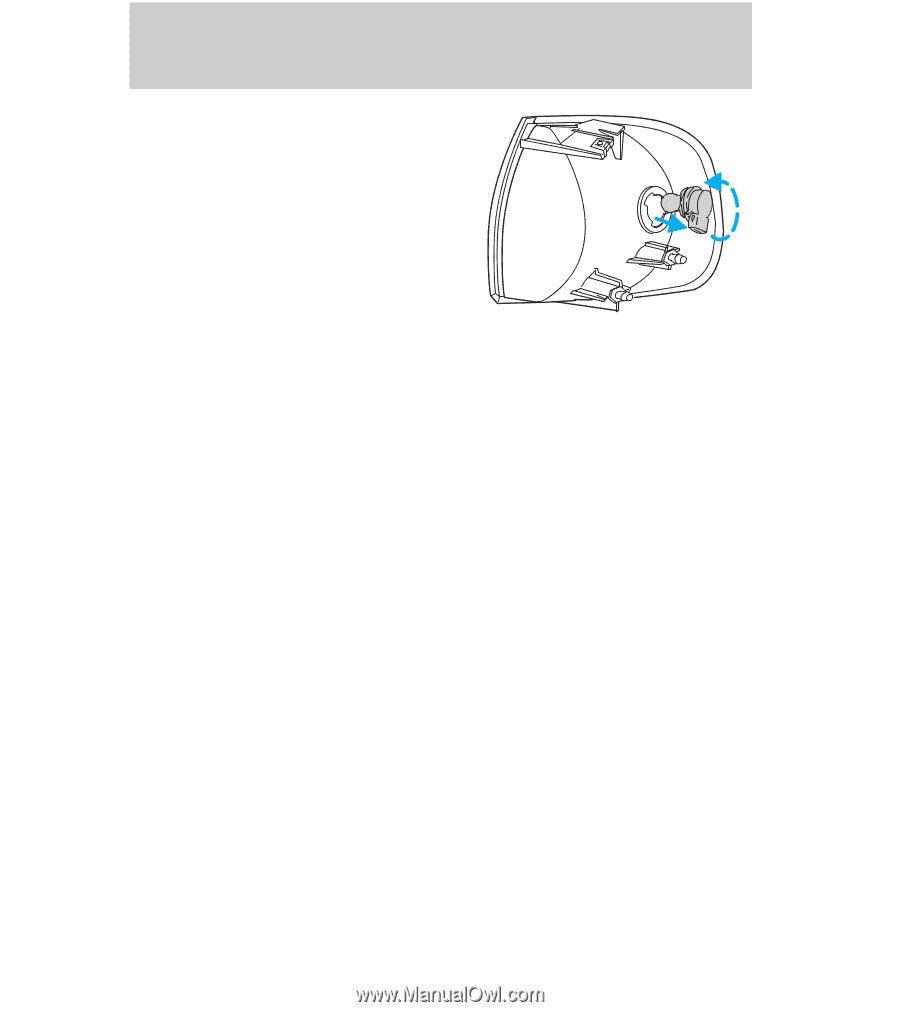
Maintenance and care 3. Disconnect the electrical connector from the bulb socket. 4. Rotate the bulb socket counterclockwise about ¼ turn and remove. 5. Without turning, carefully pull out the bulb. 6. Insert the new bulb into the parking lamp assembly. When the grooves in the plastic base are aligned, push the bulb into the lamp assembly until the plastic base contacts the rear of the lamp assembly. 7. To complete installation of the parking lamp/turn signal assembly, follow the removal procedures in reverse order. Replacing tail lamp/backup bulbs For bulb replacement, see a dealer or qualified technician. Replacing sidemarker and cornering lamp bulbs For bulb replacement, see a dealer or qualified technician. High-mount brakelamp For bulb replacement, see a dealer or qualified technician. Replacing license plate lamp bulbs For bulb replacement, see a dealer or qualified technician. AIMING THE HEADLAMPS The alignment of your headlamps should be checked by a qualified service technician if: 1. Oncoming motorists frequently signal you to deactivate your high beams, and your high beams are not activated. 2. The headlamps do not seem to provide enough light for clear night vision. 3. The headlamp beams are pointed substantially away from a slightly down and to the right position. 135
-
 1
1 -
2
-
3
-
4
-
5
-
6
-
7
-
8
-
9
-
10
-
11
-
12
-
13
-
14
-
15
-
16
-
17
-
18
-
19
-
20
-
21
-
22
-
23
-
24
-
25
-
26
-
27
-
28
-
29
-
30
-
31
-
32
-
33
-
34
-
35
-
36
-
37
-
38
-
39
-
40
-
41
-
42
-
43
-
44
-
45
-
46
-
47
-
48
-
49
-
50
-
51
-
52
-
53
-
54
-
55
-
56
-
57
-
58
-
59
-
60
-
61
-
62
-
63
-
64
-
65
-
66
-
67
-
68
-
69
-
70
-
71
-
72
-
73
-
74
-
75
-
76
-
77
-
78
-
79
-
80
-
81
-
82
-
83
-
84
-
85
-
86
-
87
-
88
-
89
-
90
-
91
-
92
-
93
-
94
-
95
-
96
-
97
-
98
-
99
-
100
-
101
-
102
-
103
-
104
-
105
-
106
-
107
-
108
-
109
-
110
-
111
-
112
-
113
-
114
-
115
-
116
-
117
-
118
-
119
-
120
-
121
-
122
-
123
-
124
-
125
-
126
-
127
-
128
-
129
-
 130
130 -
 131
131 -
 132
132 -
 133
133 -
 134
134 -
 135
135 -
 136
136 -
 137
137 -
 138
138 -
 139
139 -
 140
140 -
141
-
142
-
143
-
144
-
145
-
146
-
147
-
148
-
149
-
150
-
151
-
152
 |
 |