2000 Oldsmobile Alero Owner's Manual - Page 262
2000 Oldsmobile Alero Manual
Page 262 highlights
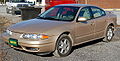
Rear Turn Signal and Stop/Taillamp Bulb Replacement For the type of bulb, see "Replacement Bulbs" in the Index. 1. Disconnect the cargo net in the trunk. 2. Pull back the trunk trim. 3. Remove the three wing nut bolts which fasten the taillamp lens to the vehicle. 4. Carefully remove the taillamp lens from the body and avoid scratching the paint or dropping it. 5. Twist the bulb socket 1/6 of a turn counterclockwise and pull out the bulb assembly. 6. To remove a bulb, gently pull the bulb out from the socket. 7. Reverse Steps 3 through 6 to reassemble the taillamp. A. Parking Lamp B. Parking/Brake Lamp C. Parking Lamp D. Turn Signal E. Back up Lamp 6-34
-
 1
1 -
2
-
3
-
4
-
5
-
6
-
7
-
8
-
9
-
10
-
11
-
12
-
13
-
14
-
15
-
16
-
17
-
18
-
19
-
20
-
21
-
22
-
23
-
24
-
25
-
26
-
27
-
28
-
29
-
30
-
31
-
32
-
33
-
34
-
35
-
36
-
37
-
38
-
39
-
40
-
41
-
42
-
43
-
44
-
45
-
46
-
47
-
48
-
49
-
50
-
51
-
52
-
53
-
54
-
55
-
56
-
57
-
58
-
59
-
60
-
61
-
62
-
63
-
64
-
65
-
66
-
67
-
68
-
69
-
70
-
71
-
72
-
73
-
74
-
75
-
76
-
77
-
78
-
79
-
80
-
81
-
82
-
83
-
84
-
85
-
86
-
87
-
88
-
89
-
90
-
91
-
92
-
93
-
94
-
95
-
96
-
97
-
98
-
99
-
100
-
101
-
102
-
103
-
104
-
105
-
106
-
107
-
108
-
109
-
110
-
111
-
112
-
113
-
114
-
115
-
116
-
117
-
118
-
119
-
120
-
121
-
122
-
123
-
124
-
125
-
126
-
127
-
128
-
129
-
130
-
131
-
132
-
133
-
134
-
135
-
136
-
137
-
138
-
139
-
140
-
141
-
142
-
143
-
144
-
145
-
146
-
147
-
148
-
149
-
150
-
151
-
152
-
153
-
154
-
155
-
156
-
157
-
158
-
159
-
160
-
161
-
162
-
163
-
164
-
165
-
166
-
167
-
168
-
169
-
170
-
171
-
172
-
173
-
174
-
175
-
176
-
177
-
178
-
179
-
180
-
181
-
182
-
183
-
184
-
185
-
186
-
187
-
188
-
189
-
190
-
191
-
192
-
193
-
194
-
195
-
196
-
197
-
198
-
199
-
200
-
201
-
202
-
203
-
204
-
205
-
206
-
207
-
208
-
209
-
210
-
211
-
212
-
213
-
214
-
215
-
216
-
217
-
218
-
219
-
220
-
221
-
222
-
223
-
224
-
225
-
226
-
227
-
228
-
229
-
230
-
231
-
232
-
233
-
234
-
235
-
236
-
237
-
238
-
239
-
240
-
241
-
242
-
243
-
244
-
245
-
246
-
247
-
248
-
249
-
250
-
251
-
252
-
253
-
254
-
255
-
256
-
 257
257 -
 258
258 -
 259
259 -
 260
260 -
 261
261 -
 262
262 -
 263
263 -
 264
264 -
 265
265 -
 266
266 -
 267
267 -
268
-
269
-
270
-
271
-
272
-
273
-
274
-
275
-
276
-
277
-
278
-
279
-
280
-
281
-
282
-
283
-
284
-
285
-
286
-
287
-
288
-
289
-
290
-
291
-
292
-
293
-
294
-
295
-
296
-
297
-
298
-
299
-
300
-
301
-
302
-
303
-
304
-
305
-
306
-
307
-
308
-
309
-
310
-
311
-
312
-
313
-
314
-
315
-
316
-
317
-
318
-
319
-
320
-
321
-
322
-
323
-
324
-
325
-
326
-
327
 |
 |

6-34
Rear Turn Signal and Stop/Taillamp
Bulb Replacement
A.
Parking Lamp
B.
Parking/Brake Lamp
C.
Parking Lamp
D.
Turn Signal
E.
Back up Lamp
For the type of bulb, see “Replacement Bulbs” in
the Index.
1.
Disconnect the cargo net in the trunk.
2.
Pull back the trunk trim.
3.
Remove the three wing nut bolts which fasten the
taillamp lens to the vehicle.
4.
Carefully remove the taillamp lens from the body
and avoid scratching the paint or dropping it.
5.
Twist the bulb socket 1/6 of a turn counterclockwise
and pull out the bulb assembly.
6.
To remove a bulb, gently pull the bulb out from
the socket.
7.
Reverse Steps 3 through 6 to reassemble
the taillamp.