3Com 3CDSG8-US User Guide
3Com 3CDSG8-US - OfficeConnect Managed Gigabit Switch Manual
 |
UPC - 662705533162
View all 3Com 3CDSG8-US manuals
Add to My Manuals
Save this manual to your list of manuals |
3Com 3CDSG8-US manual content summary:
- 3Com 3CDSG8-US | User Guide - Page 1
3Com® OfficeConnect® Managed Gigabit Switch User Guide 3CDSG8 www.3Com.com Part Number 10016799 Rev. BA Published July 2008 - 3Com 3CDSG8-US | User Guide - Page 2
is provided with only such rights as are provided in 3Com's standard commercial license for the Software. Technical data is provided with limited rights only as provided to you in conjunction with, this User Guide. Unless otherwise indicated, 3Com registered trademarks are registered in the United - 3Com 3CDSG8-US | User Guide - Page 3
3 ABOUT THIS GUIDE This guide provides information about the Web user interface for the 3Com® OfficeConnect Managed Gigabit Switch. The Web interface is a network management system that allows you to configure, monitor, and troubleshoot your switch from a remote web browser. The Web interface web - 3Com 3CDSG8-US | User Guide - Page 4
Quality of Service - Provides information defining Quality of Service, including 802 guide, follow the instructions in the release notes. Most user guides and release notes are available in Adobe Acrobat Reader Portable Document Format (PDF) or HTML on the 3Com Web site: • http://www.3Com.com - 3Com 3CDSG8-US | User Guide - Page 5
...14 Default Users and Passwords...15 Upgrading the Software Using the CLI ...16 Accessing the Switch using the 3Com Detect Application 16 2 INSTALLING THE SWITCH ...18 Important Safety Information ...18 Positioning the Switch...19 Supplying Power to the Switch...20 Using SFP Transceivers - 3Com 3CDSG8-US | User Guide - Page 6
14 Device Specifications and Features...68 15 Pin-Outs ...73 16 3Com CLI Reference Guide...76 17 Troubleshooting ...86 18 Obtaining Support for Your 3Com Product...89 19 Regulatory Notices...94 FCC STATEMENT ...94 INFORMATION TO THE USER ...94 ICES STATEMENT...94 CE STATEMENT (EUROPE)...94 - 3Com 3CDSG8-US | User Guide - Page 7
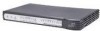
Switch • Switch Setup Overview • Using the Command Line Interface (CLI) • Setting Up Web Interface Management • Setting Up SNMP Management V1 or V2 • Default Users and Passwords • Upgrading Software using the CLI About the OfficeConnect Managed Gigabit Switch The OfficeConnect Managed Gigabit Switch - 3Com 3CDSG8-US | User Guide - Page 8
Forward Half and full duplex on all front panel ports Supported on all ports. If fiber SFP transceivers are used, Auto MDIX is not supported. In full duplex operation all ports are supported. The OfficeConnect Managed Gigabit PoE Switch ports are capable of receiving, but not sending pause frames - 3Com 3CDSG8-US | User Guide - Page 9
Flashes green when the switch is performing power-on self test (POST) or upgrading firmware. The switch has failed POST or the software image is corrupt. Consult troubleshooting section. The SFP module is inserted and recognised. The SFP module is inserted without link, no SFP module is inserted or - 3Com 3CDSG8-US | User Guide - Page 10
of the switch and therefore the overall performance of your network. This section explains the initial set up of the switch and the different methods of accessing the management software to manage a switch. It covers the following topics: • Methods of Managing a Switch • Switch Setup Overview - 3Com 3CDSG8-US | User Guide - Page 11
Getting Started 11 • Manually set the IP Address using the Console Port • Viewing IP Information using the Console Port • Setting Up Web Interface Management • Default Users and Passwords Methods of Managing a Switch To manage your switch, you need to use Web Interface Management. In addition, - 3Com 3CDSG8-US | User Guide - Page 12
the risk of the IP address changing. To manually enter IP information for your switch, work through the "IP Setup" on page 81. Using The Command Line Interface (CLI) You can access the switch through the Console port to manually set the IP address, or to view the IP address that was assigned - 3Com 3CDSG8-US | User Guide - Page 13
software for more information. 3. Power up the switch. The Power on Self Test (POST) will be performed. The OfficeConnect Managed Gigabit Switch takes approximately 30 seconds to boot. Manually set the IP Address using the Console Port You are now ready to manually set up the switch with IP - 3Com 3CDSG8-US | User Guide - Page 14
a Switch" on page 11. For more information about the CLI, refer to "3Com CLI Reference Guide" on page 77. If you do not intend to use the command line interface using the console port to perform other functions, you can disconnect the serial cable and close the terminal emulator software. Setting - 3Com 3CDSG8-US | User Guide - Page 15
correctly and the switch is powered up. 4. Open your web browser and enter the IP address of the switch that you wish to manage in the URL locator, for example, in the following format: http://xxx.xxx.xxx.xxx 5. At the login and password prompts, enter admin as your user name and press Return - 3Com 3CDSG8-US | User Guide - Page 16
using this method. Please refer to the instructions that accompanied the TFTP application. Note: You can also upgrade the software using the switch Web user interface. See "Upgrade Firmware" page 33. 1. To download the runtime application file, enter: IP tftpget aaa.aaa.aaa.aaa rrr where aaa - 3Com 3CDSG8-US | User Guide - Page 17
specifying an IP range. Note that specifying a large range may take some time for the search to complete. 4. Once your Switch or Switches have been located you will be presented with a list. Select the switch you wish to connect to and click on "Open". Your default web browser will now open and it - 3Com 3CDSG8-US | User Guide - Page 18
or Free-Standing • Supplying Power to the Switch • Using SFP Transceivers • Performing Spot Checks Important Safety Information Please refer to the safety information found in the Support and Safety Information manual included with this product. You can find the 3Com Switch Family Safety and - 3Com 3CDSG8-US | User Guide - Page 19
, incluido en este producto. Puede encontrar el manual en el CDROM adjunto a su switch. Alternativamente lo puede bajar de la web de 3Com: www.3Com.com Istotne informacje dot. bezpiecze stwa Informacje dotyczące bezpieczeństwa są umieszczone w Support and Safety Information, która jest do łączona - 3Com 3CDSG8-US | User Guide - Page 20
check the power supply connections including another mains outlet if appropriate. If the Power LED is still not lit it is likely that the power adapter is faulty. Refer to the Troubleshooting Appendix of this User Guide. Checking for Correct Operation After you power on the Switch, it automatically - 3Com 3CDSG8-US | User Guide - Page 21
and see if POST was successfully completed. • Restore the default configuration the Switch. Refer to the CLI commands appendix for instructions on using the System Restore Default command • Reload the software. CAUTION: Resetting the Switch to its factory defaults erases all your settings. You will - 3Com 3CDSG8-US | User Guide - Page 22
access the latest list of approved SFP transceivers for the Switch on the 3Com Web site, enter this URL into your Internet browser: http://www.3Com.com 3Com recommends using 3Com SFPs in the Switch. If you insert an SFP transceiver that is not supported, the Switch will not recognize it. Inserting - 3Com 3CDSG8-US | User Guide - Page 23
intervals, you should visually check the Switch. Regular checks can give you an early warning of a possible failure; any problems can then be attended to when there will be least effect on users. 3Com recommends periodically checking the cabling, including the power adapter and it's connections. - 3Com 3CDSG8-US | User Guide - Page 24
an overview of the configuration of the switch. There are five different tables on this page: • System Identity - Displays general information about the switch. • Address Information - Displays the IP Address configuration of the switch. • Port Information - Displays the configuration of every - 3Com 3CDSG8-US | User Guide - Page 25
the SUPPORT > Update Software page. The Number of Ports, Hardware Version, and Serial Number values are created when the switch is manufactured and cannot be changed. 3.1.2 Address Information IP Address, Subnet Mask and Gateway IP Address are set from the SYSTEM > IP Address page. Management VLAN - 3Com 3CDSG8-US | User Guide - Page 26
- A list of the ports that are members of the VLAN. By default, all ports are members of VLAN 1. 3.2 Statistics You can display statistics on network traffic from the ports. These statistics can be used to identify potential problems with the switch (such as a faulty port or unusually heavy loading - 3Com 3CDSG8-US | User Guide - Page 27
High Priority The total number of received packets that set as High Priority in the Packets QoS settings. Transmitted High Priority The total number of transmitted packets that set as High Priority in Packets the QoS settings. Received Multicast Packets The number of packets, delivered by - 3Com 3CDSG8-US | User Guide - Page 28
including FCS octets). 1024-1518 Byte Frames There are two main buttons associated with this page: • REFRESH - Resends the information. • CLEAR - Clears all counters and sets them back to zero. - 3Com 3CDSG8-US | User Guide - Page 29
. The System Name is displayed on the Login page, and the SYSTEM > Information page. • System Name - The name of the switch. The System Name can be up to 24 HELP - Displays this text. • APPLY - Updates the switch configuration. No changes are made to the configuration until this button is pressed - 3Com 3CDSG8-US | User Guide - Page 30
Gateway address used by the switch. If in doubt, set this to be the same as the Default Gateway address used by your PC. Note: If DHCP is enabled, the word "Fallback" will be added to the front of the other parameter names to indicate the usage of a manually assigned IP Address. Note: If you - 3Com 3CDSG8-US | User Guide - Page 31
is extremely important that you do not forget your password. If you forget your password, you will have to manually reset the switch to its factory defaults. See the Troubleshooting page for more details. Power cycle will not reset the password. There are three main buttons associated with this page - 3Com 3CDSG8-US | User Guide - Page 32
switch, or restart the switch. Restore to Factory Defaults Forces the switch to restore the original factory settings. To reset the switch, select "Reset to Factory Defaults" from the drop-down list and click APPLY. Upgrade Firmware Upgrades the switch system firmware using a file provided by 3com - 3Com 3CDSG8-US | User Guide - Page 33
list, then click "Upload" or "Download," and then click on the "Browse" button to select the file. Restart Switch To restart the switch, select from the Tools drop-down list, and then click APPLY. The reset will be complete when the user interface displays the login page. There are two main buttons - 3Com 3CDSG8-US | User Guide - Page 34
Jumbo Frames, Speed, Duplex and Flow Control settings for every port on the switch. It also allows the power saving modes to be configured. • Enable Jumbo Frames - Click box to enable jumbo frames. This setting is applied to all the ports on the switch. The Port Configuration table has one row for - 3Com 3CDSG8-US | User Guide - Page 35
on the switch to save the power that would normally be wasted when no cable was connected. When a device is connected to the switch it will power the port back up to ensure normal operation. Note: The power saving modes have been rigorously tested to ensure that your OfficeConnect® switch meets and - 3Com 3CDSG8-US | User Guide - Page 36
indicate that the link is down when there is a cable connecting a device to the switch). Note: Auto causes the switch to negotiate the link speed and duplex settings with the connected device; this is called Auto-negotiation. All of the other settings cause Autonegotiation to be turned off. Note: In - 3Com 3CDSG8-US | User Guide - Page 37
. When the threshold is exceeded, packets are dropped, irrespective of the flow-control settings. There are three main buttons associated with this page: • HELP - Displays this text. • APPLY - Updates the switch configuration. No changes are made to the configuration until this button is pressed - 3Com 3CDSG8-US | User Guide - Page 38
Note: You cannot mirror the destination port. There are three main buttons associated with this page: • HELP - Displays this text. • APPLY - Updates the switch configuration. No changes are made to the configuration until this button is pressed. • CANCEL - All changes made to the page are discarded - 3Com 3CDSG8-US | User Guide - Page 39
that can occur on Category 5 twisted pair cabling. Note: Due to a hardware issue Port 8 cannot display cable diagnostic information. There are two main buttons associated with this page: • HELP - Displays this text. • APPLY - Updates the switch configuration. No changes are made to the configuration - 3Com 3CDSG8-US | User Guide - Page 40
a maximum of 4 trunks of up to 8 ports each. For instructions on how to create, modify, and delete trunks, please see Working with of any trunks. This is the default state. • Trunk T1 - T4 - These columns correspond to the 4 trunks that are supported by the switch. Clicking on the radio button in - 3Com 3CDSG8-US | User Guide - Page 41
The trunk will accept both tagged and untagged packets (see VLANS > VLAN Settings) Ports that are removed from a trunk, retain the configuration with this page: • HELP - Displays this text. • APPLY - Updates the switch configuration. No changes are made to the configuration until this button is - 3Com 3CDSG8-US | User Guide - Page 42
to change the Speed, Duplex and Flow Control settings for each trunk on the switch. The Trunk Configuration Table has one row for associated with this page: • HELP - Displays this text. • APPLY - Updates the switch configuration. No changes are made to the configuration until this button is pressed. - 3Com 3CDSG8-US | User Guide - Page 43
Note: Auto is the default setting and need not be changed unless you are experiencing problems establishing link with a connected device (i.e. the front-panel LEDs or SYSTEM > Information page indicate that the link is down when there is a cable connecting a device to the switch). Note: In full - 3Com 3CDSG8-US | User Guide - Page 44
Setup This page allows you to configure LACP for each port. The switch supports be activated to replace it. The LACP Updates the switch configuration. No changes are made to the configuration until this button is pressed. • REFRESH - Reloads the current page with the latest configuration settings - 3Com 3CDSG8-US | User Guide - Page 45
• REFRESH - Reloads the current page with the latest configuration settings. 6.4.1 Aggregation Information The following information is displayed for Link in the LACP group that is attached to this switch. • Local Port Aggregated - Displays port member list of the local LACP group. The - 3Com 3CDSG8-US | User Guide - Page 46
46 Trunks • Seconds Since Last Changed - Number of seconds since the last LACP was received. 6.4.2 LACP Port Status The following information is displayed for LACP port status: • Port - Displays the ID number of the LACP group. • Protocol Active - Shows if the port is a member of the active LACP - 3Com 3CDSG8-US | User Guide - Page 47
create up to 64 VLANs. You can also delete the VLANs or make changes to the VLAN membership and behavior of individual ports. VLANs are powerful but can be difficult to set up properly. If you are unfamiliar with VLANs please see the Introduction to VLANs. To create a VLAN, enter a VLAN ID into the - 3Com 3CDSG8-US | User Guide - Page 48
needs, it is recommended that you leave the VLAN settings in the default configuration. The default configuration is as follows: • All ports are members of VLAN 1 • The switch management interface is on VLAN 1 (this cannot be changed) • All ports have a Port VLAN ID (PVID) of 1 • All ports can send - 3Com 3CDSG8-US | User Guide - Page 49
PVID has no effect in this case. 7.2 VLAN Port Config This page allows you to configure the VLAN parameters for individual ports. VLANs are powerful but can be difficult to set up properly. If you are unfamiliar with VLANs please see the Introduction to VLANs. Each row of the table corresponds to - 3Com 3CDSG8-US | User Guide - Page 50
VLAN ID. (Default: All) • Packet Type - Set a port's handling of tagged and untagged packets. (Default: 1) There are three main buttons associated with this page: • HELP - Displays this text. • APPLY - Saves the settings to memory, and updates the configuration. No changes are made to the switch - 3Com 3CDSG8-US | User Guide - Page 51
1X 51 8 802.1X 8.1 Settings Network switches can provide open and easy access to network users can use the same credentials for authentication from any point within the network. There are three main buttons associated with this page: • HELP - Displays this text. • APPLY - Updates the switch - 3Com 3CDSG8-US | User Guide - Page 52
users to first submit credentials for authentication. System Setting • Mode - Indicates if 802.1X protocol is globally enabled or disabled on the switch. • RADIUS IP - Sets the RADIUS server IP address. • RADIUS UDP Port - Sets plugged into a switch port. • Reauthentication Period - Sets • Reset - - 3Com 3CDSG8-US | User Guide - Page 53
802.1X 53 8.2 Statistics Displays 802.1X statistics • Port Statistics - Statistics can be viewed on a per-port basis. Select the port that you want to view here. • Authenticator counters - General statistics for authenticator. • Backend Authenticator counters - General statistics for RADIUS - 3Com 3CDSG8-US | User Guide - Page 54
supported.. The page is composed of two tables: • IGMP Snooping Configuration - Configure global system settings. • IGMP Snooping VLAN Configuration - Configure VLAN related settings. There are three main buttons associated with this page: • HELP - Displays this text. • APPLY - Updates the switch - 3Com 3CDSG8-US | User Guide - Page 55
needs, it is recommended that you leave the VLAN settings in the default configuration. The default configuration is as follows: • All ports are members of VLAN 1 • The switch management interface is on VLAN 1 (this cannot be changed) • All ports have a Port VLAN ID (PVID) of 1 • All ports can send - 3Com 3CDSG8-US | User Guide - Page 56
with the current status 9.2.1 IGMP Snoop Statistics The table has one row for each port and seven columns. The columns are: • VLAN ID - VLAN ID number. • Querier - Show whether Querying is enabled. • Queries transmitted - Show the number of transmitted Query packets. • Queries received - Show the - 3Com 3CDSG8-US | User Guide - Page 57
tables: • RSTP System Configuration - Configure global system settings. • RSTP Port Configuration - Setup port related settings. There are three main buttons associated with this page: • HELP - Displays this window. • APPLY - Updates the Switch configuration. No changes are made to the configuration - 3Com 3CDSG8-US | User Guide - Page 58
over when a primary link goes down. The spanning tree algorithms supported by this switch include these versions: • STP - Spanning Tree Protocol (IEEE discarding to learning to forwarding). Number between 4 - 30 (default is 15). • Force Version - Set and show the RSTP protocol to use. Normal - use - 3Com 3CDSG8-US | User Guide - Page 59
this page: • RSTP Bridge Overview - Show the RSTP settings for the whole switch. • RSTP Port Status - Detailed RSTP information for each port switch. 10.2.2 RSTP Port Status The table has one row for each port and seven columns. The columns are: • Port/Trunk - Port/Trunk ID number. • VLAN ID - VLAN - 3Com 3CDSG8-US | User Guide - Page 60
60 RSTP • Port State - Show the current port state, blocking, forwarding, learning etc. - 3Com 3CDSG8-US | User Guide - Page 61
Service) is a mechanism which is used to prioritize certain traffic as it is moves through the switch. Traffic can be classified as High, Medium, Normal or Low priority. This switch features both strict priority-based and weighted Frame is disabled in Ports > Settings. You can select how traffic is - 3Com 3CDSG8-US | User Guide - Page 62
PCs, are not usually VLAN aware, they do not create VLANtagged frames. As a result, this method of prioritization is not ideal when there are a lot of PCs connected to the Switch. 11.1.2 DSCP The Differentiated Services Code Point (DSCP) is a six bit field that is contained within an IP (TCP or UDP - 3Com 3CDSG8-US | User Guide - Page 63
Management Protocol (SNMP). The SNMP agent permits the switch to be managed from any system in the network using management software. You can set the following options: • SNMP Enabled -Activate or deactivate SNMP. • SNMP Trap Destination - IP address of the trap manager. Traps indicating status - 3Com 3CDSG8-US | User Guide - Page 64
64 SNMP • APPLY - Updates the switch configuration. No changes are made to the configuration until this button is pressed. • CANCEL - All changes made to the page are discarded and the switch configuration remains unchanged. - 3Com 3CDSG8-US | User Guide - Page 65
defaults and the ability to detect network misconfigurations. It can also offer optimization suggestions, making this application ideal for network managers with all levels of experience. To find out more about 3Com Network Supervisor and to download a trial version, go to: www.3com.com/3ns 3Com - 3Com 3CDSG8-US | User Guide - Page 66
" console in Microsoft Active Directory. With a single click, a user (or even an entire department) can be moved to a different VLAN, or a computer can be blocked from connecting to the network. 3Com Network Access Manager leverages the advanced desktop security capabilities of 3Com switches and - 3Com 3CDSG8-US | User Guide - Page 67
Object IDs, icons, MIBs, and traps for 3Com devices. The package supports both Windows platforms and UNIX or Solaris platforms. It can be installed as a standalone plug-in to HP OpenView, or used with a 3Com management application such as 3Com Enterprise Management Suite (EMS). To find out more - 3Com 3CDSG8-US | User Guide - Page 68
SPECIFICATIONS AND FEATURES Related Standards The 3Com® OfficeConnect Managed Gigabit Switch has been designed to the following to +158 °F) 0-95% (non-condensing) EN 60068 (IEC 68) Physical Width Depth Height Weight Mounting 330 mm (12.99 in.) 203.2 mm (8 in.) 44 mm (1.73 in.) or ½ - 3Com 3CDSG8-US | User Guide - Page 69
Rating Maximum Power Consumption Max Heat Dissipation 12V DC 1 Amp (Max) 23.9 BTU/hr (7.6 Watts) 19 BTU/hr Switch Features This section describes the device features. The system supports the following features: Table 6 Features of the OfficeConnect Managed Gigabit Switch Feature Description - 3Com 3CDSG8-US | User Guide - Page 70
Command Line Interface (CLI) is an interface using a serial connection that allows basic features to be configured, including IP address management and firmware upgrading. The CLI is not intended as the main interface for the switch. Configuration File Management The device configuration is stored - 3Com 3CDSG8-US | User Guide - Page 71
, see "Default Users and Passwords" page 29. Port-based authentication enables authenticating system users on a perport basis via an external server. Only authenticated and approved system users can transmit and receive data. Ports are authenticated via the Remote Authentication Dial In User Service - 3Com 3CDSG8-US | User Guide - Page 72
, each carrying a sequence number. The device supports boot image, software and configuration upload/download via TFTP. VCT detects and reports copper link cabling occurrences, such as open cables and cable shorts. VLANs are collections of switching ports that comprise a single broadcast domain - 3Com 3CDSG8-US | User Guide - Page 73
Pin-Outs 73 15 PIN-OUTS Null Modem Cable RJ-45 to RS-232 25-pin PC-AT Cable RJ-45 to 9-pin - 3Com 3CDSG8-US | User Guide - Page 74
74 Pin-Outs Modem Cable RJ-45 to RS-232 25-pin Ethernet Port RJ-45 10/100 and 1000BASE-T RJ45 Connections Pin Assignment Table 7 Pin Assignments Pin Number 10/ - 3Com 3CDSG8-US | User Guide - Page 75
Pin-Outs 75 Table 8 Pin Assignments Pin Number 10/100 Ports configured as MDIX 1 Receive Data + 2 Receive Data • 3 Transmit Data + 4 Not assigned 5 Not assigned 6 Transmit Data • 7 Not assigned 8 Not assigned 1000 Bidirectional Data B+ Bidirectional Data B• Bidirectional Data - 3Com 3CDSG8-US | User Guide - Page 76
a User Name and Password. The default user name for first time configuration is admin. No password is required. User names and passwords are case sensitive. To logon to the CLI Interface: 1. After the switch has booted up, The Login prompt displays: Username: 2. Enter your User Name at the Login - 3Com 3CDSG8-US | User Guide - Page 77
interface supports one CLI session. Closing CLI Sessions To logout of the CLI session, enter exit and press Return. CLI Commands This Command section contains the following commands: • ? • System Restore Default • System Reboot • Console Password • IP Setup • IP Status • IP Ping • IP Dhcp • IP - 3Com 3CDSG8-US | User Guide - Page 78
Default The System Restore Default command resets the device configuration to factory defaults. Adding the keepIP option retains the IP address of the switch. Syntax [System] restore default [keep IP] Parameters • keep IP - retain the same IP address after returning to factory settings. Default - 3Com 3CDSG8-US | User Guide - Page 79
Guide 79 This command has no default configuration. User Guidelines The system does not prompt for confirmation of the request. The switch is not rebooted. Example The following displays the list presented for the system restore default command: System>restore default *** Restoring to default - 3Com 3CDSG8-US | User Guide - Page 80
back to factory defaults. See the System Restore Command. Example The following displays the list presented for the Console password command: >console Console>password admin Console>password Password: admin Console> IP Setup The IP Setup command allows the user to display the IP address settings or - 3Com 3CDSG8-US | User Guide - Page 81
: 1 IP> IP Status The IP Status command allows the user to display the IP address settings on the device. Syntax [IP] status Default Configuration This command has no default configuration. User Guidelines Entering the IP setup command without supplying a manual IP address will result in the switch - 3Com 3CDSG8-US | User Guide - Page 82
number of echo requests to send • timeout - timeout in seconds to wait for each reply • ipaddress - IP address to ping Default Configuration This command has no default configuration. User Guidelines The maximum timeout is 60 seconds. Example The following displays the list presented for the - 3Com 3CDSG8-US | User Guide - Page 83
starts a firmware download for system upgrading or replacing corrupted firmware. Syntax [IP] tftpget Parameters • tftp server ip address - the address of the workstation hosting the tftp server • filename - the name of the software to be downloaded. Default - 3Com 3CDSG8-US | User Guide - Page 84
: Passed S/W Version: V1.0.0 H/W Version: R01 serial number0001 Default IP address: 169.254.17.16 **Bootup finish**.... IP tftpput The IP tftpput command copies either the backup configuration file or the current runtime software to a tftp server. Syntax [IP] tftpput [config¦ image] - 3Com 3CDSG8-US | User Guide - Page 85
CLI Reference Guide 85 appear representing the backup process in the CLI interface. Note that the configuration backup file is not a text file and cannot be edited. Example The following displays the list presented for the ftppput command: IP>tftpput config 192.168.1. backup_config TFTP transfer - 3Com 3CDSG8-US | User Guide - Page 86
found in this chapter, contact Customer Support. Troubleshooting Solutions Listed below are some possible troubleshooting problems and solutions. These error messages include: • Cannot connect to management using RS-232 serial connection • Cannot connect to switch management using HTTP, SNMP, etc - 3Com 3CDSG8-US | User Guide - Page 87
Troubleshooting 87 Problems Cannot connect to management using RS232 serial connection Possible Cause Cannot connect to switch management using HTTP, SNMP, etc. No response from the terminal emulation software Faulty serial cable Incorrect serial cable Software settings Response from the - 3Com 3CDSG8-US | User Guide - Page 88
finish** Entered safe mode Note The software and hardware versions, serial number and default IP address on your switch are likely to be different to those shown in the above example. You now have access to a limited set of commands that do not require you to login in to gain access to them - 3Com 3CDSG8-US | User Guide - Page 89
, Repair Services, and Service Request. If you have trouble registering your product, please contact 3Com Global Services for assistance. T Troubleshoot Online You will find support tools posted on the 3Com Web site at www.3Com.com 3Com Knowledgebase - Helps you to troubleshoot 3Com products - 3Com 3CDSG8-US | User Guide - Page 90
90 Obtaining Support First time users will need to apply for a user name and password. A link to software downloads can be found at http://eSupport.3com.com/, or under the Product Support heading at www.3com.com/ Software Upgrades are the feature releases that follow the software version included - 3Com 3CDSG8-US | User Guide - Page 91
Vietnam Call the U.S. direct by dialing 1 201 0288, then dialing 800 763 6780 You can also obtain non-urgent support in this region at this email address [email protected] Or request a return material authorization number (RMA) by FAX using this number: +61 2 9937 5048, or send an - 3Com 3CDSG8-US | User Guide - Page 92
.3com.com/support/email.html You can also obtain non-urgent support in this region at these email addresses: Technical support and general requests: [email protected] Return material authorization number: [email protected] Contact Requests: [email protected] Obtaining Support - 3Com 3CDSG8-US | User Guide - Page 93
URL: http://lat.3com.com/lat/support/form.html Portuguese speakers, enter the URL: http://lat.3com.com/br/support/form.html English speakers in Latin America should send an e-mail to: [email protected] Country Telephone Number US and Canada - Telephone Technical Support and Repair All - 3Com 3CDSG8-US | User Guide - Page 94
case the user may be required to take adequate measures. A copy of the signed Declaration of Conformity can be downloaded from the Product Support web page for the OfficeConnect Managed Gigabit Switch (3CDSG8) at http://www.3Com.com. Also available at http://support.3com.com/doc/3CDSG8_EU_DOC.pdf
-
 1
1 -
 2
2 -
 3
3 -
 4
4 -
 5
5 -
 6
6 -
 7
7 -
8
-
9
-
10
-
11
-
12
-
13
-
14
-
15
-
16
-
17
-
18
-
19
-
20
-
21
-
22
-
23
-
24
-
25
-
26
-
27
-
28
-
29
-
30
-
31
-
32
-
33
-
34
-
35
-
36
-
37
-
38
-
39
-
40
-
41
-
42
-
43
-
44
-
45
-
46
-
47
-
48
-
49
-
50
-
51
-
52
-
53
-
54
-
55
-
56
-
57
-
58
-
59
-
60
-
61
-
62
-
63
-
64
-
65
-
66
-
67
-
68
-
69
-
70
-
71
-
72
-
73
-
74
-
75
-
76
-
77
-
78
-
79
-
80
-
81
-
82
-
83
-
84
-
85
-
86
-
87
-
88
-
89
-
90
-
91
-
92
-
93
-
94
 |
 |

3Com
®
OfficeConnect
®
Managed
Gigabit Switch
User Guide
3CDSG8
www.3Com.com
Part Number 10016799 Rev. BA
Published July 2008