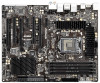
ASRock C216 WS User Manual - Page 67
Troubleshooting
 |
View all ASRock C216 WS manuals
Add to My Manuals
Save this manual to your list of manuals |
Page 67 highlights
Chapter 5: Troubleshooting 5.1 Troubleshooting Procedures Follow the procedures below to troubleshoot your system. Always unplug the power cord before adding, removing or changing any hardware components. Failure to do so may cause physical injuries to you and damages to motherboard components. 1. Disconnect the power cable and check whether the PWR LED is off. 2. Unplug all cables, connectors and remove all add-on cards from the motherboard. Make sure that the jumpers are set to default settings. 3. Confirm that there are no short circuits between the motherboard and the chassis. 4. Install a CPU and fan on the motherboard, then connect the chassis speaker and power LED. If there is no power... 1. Confirm that there are no short circuits between the motherboard and the chassis. 2. Make sure that the jumpers are set to default settings. 3. Check the settings of the 115V/230V switch on the power supply. 4. Verify if the battery on the motherboard provides ~3VDC. Install a new battery if it does not. If there is no video... 1. Try replugging the monitor cables and power cord. 2. Check for memory errors. If there are memory errors... 1. Verify that the DIMM modules are properly seated in the slots. 2. Use recommended DDR3 1600/1333/1066 ECC DIMMs. 3. If you have installed more than one DIMM modules, they should be identical with the same brand, speed, size and chip-type. 4. Try inserting different DIMM modules into different slots to identify faulty ones. 5. Check the settings of the 115V/230V switch on the power supply. Unable to save system setup configurations... 1. Verify if the battery on the motherboard provides ~3VDC. Install a new battery if it does not. 2. Confirm whether your power supply provides adaquate and stable power. 67
-
 1
1 -
2
-
3
-
4
-
5
-
6
-
7
-
8
-
9
-
10
-
11
-
12
-
13
-
14
-
15
-
16
-
17
-
18
-
19
-
20
-
21
-
22
-
23
-
24
-
25
-
26
-
27
-
28
-
29
-
30
-
31
-
32
-
33
-
34
-
35
-
36
-
37
-
38
-
39
-
40
-
41
-
42
-
43
-
44
-
45
-
46
-
47
-
48
-
49
-
50
-
51
-
52
-
53
-
54
-
55
-
56
-
57
-
58
-
59
-
60
-
61
-
 62
62 -
 63
63 -
 64
64 -
 65
65 -
 66
66 -
 67
67 -
 68
68 -
 69
69
 |
 |
