Acer 4672WLMi User Manual
Acer 4672WLMi - TravelMate - Core Duo 1.66 GHz Manual
 |
UPC - 099802545086
View all Acer 4672WLMi manuals
Add to My Manuals
Save this manual to your list of manuals |
Acer 4672WLMi manual content summary:
- Acer 4672WLMi | User Manual - Page 1
TravelMate 4210/4270/4670 Series User's Guide - Acer 4672WLMi | User Manual - Page 2
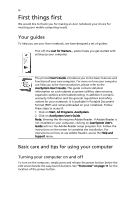
or otherwise, without the prior written permission of Acer Incorporated. TravelMate 4210/4270/4670 Series Notebook PC Model number Serial number Date of purchase Place of purchase Acer and the Acer logo are registered trademarks of Acer Incorporated. Other companies' product names or trademarks - Acer 4672WLMi | User Manual - Page 3
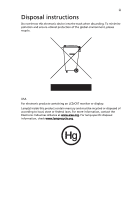
iii Disposal instructions Do not throw this electronic device into the trash when discarding. To minimize pollution and ensure utmost or federal laws. For more information, contact the Electronic Industries Alliance at www.eiae.org. For lamp-specific disposal information, check www.lamprecycle.org. - Acer 4672WLMi | User Manual - Page 4
on your computer, clicking on AcerSystem User's Guide will run the Adobe Reader setup program first. Follow the instructions on the screen to complete the installation. For instructions on how to use Adobe Reader, access the Help and Support menu. Basic care and tips for using your computer - Acer 4672WLMi | User Manual - Page 5
you close it. • Never place the computer on uneven surfaces. Taking care of your AC adapter Here are some ways to take care of your AC adapter: • Do not connect the adapter to any other device. • Do not step on the power cord or place heavy objects on top of it. Carefully route the - Acer 4672WLMi | User Manual - Page 6
that may cause undesired operation. Users are requested to follow the RF safety instructions for wireless option devices that are included in the user's manual of each RF option device. An improper installation or unauthorized use may cause harmful interference to radio communications. Also, any - Acer 4672WLMi | User Manual - Page 7
Disposal instructions iii First things first iv Your guides iv Basic care and tips for using your computer iv Turning your computer on and off iv Taking care of your computer v Taking care of your AC adapter v Taking care of your battery pack vi Cleaning and servicing vi Acer - Acer 4672WLMi | User Manual - Page 8
30 Using the system utilities 31 Acer GridVista (dual-display compatible) 31 Launch Manager 32 Norton AntiVirus 33 Frequently asked questions 34 Requesting service 37 International Travelers Warranty (ITW) 37 Before you call 37 Taking your notebook PC with you 38 Disconnecting from - Acer 4672WLMi | User Manual - Page 9
50 Playing DVD movies 50 Power management 51 Acer eRecovery Management 51 Create backup 52 Restore from backup 52 Create factory default image CD 53 Re-install bundled software without CD 53 Change password 54 Troubleshooting 55 Troubleshooting tips 55 Error messages 55 - Acer 4672WLMi | User Manual - Page 10
Declaration of Conformity 67 Declaration of Conformity for CE Marking 68 Index 69 - Acer 4672WLMi | User Manual - Page 11
. • Acer eRecovery Management backs up/recovers data flexibly, reliably and completely. • Acer eSettings Management accesses system information and adjusts settings easily. • Acer eNet Management hooks up to location-based networks intelligently. • Acer ePower Management extends battery power via - Acer 4672WLMi | User Manual - Page 12
can decrypt any file on your system; the file-specific password is assigned when you encrypt each individual file. The Acer eDataSecurity Management setup wizard will prompt you for a supervisor password and default file-specific password. This file-specific password will be used to encrypt files by - Acer 4672WLMi | User Manual - Page 13
. If you do not set a password, Acer eLock Management will reset back to the initial status with all locks removed. Note: If you lose your password, there is no method to reset it except by reformatting your notebook or taking your notebook to an Acer Customer Service Center. Be sure to remember or - Acer 4672WLMi | User Manual - Page 14
ePerformance Management is a system optimization tool that boosts the performance of your Acer notebook. It provides you with the following options to enhance overall system performance: • Memory optimization - releases unused memory and check usage. • Disk optimization - removes unneeded items - Acer 4672WLMi | User Manual - Page 15
are stored on D:\ drive. Acer eRecovery Management provides you with: • Password protection. • Recovery of applications and drivers. • Image/data backup: . For more information, please refer to "Acer eRecovery Management" on page 51 in the AcerSystem User's Guide. Note: If your computer did not come - Acer 4672WLMi | User Manual - Page 16
on your notebook, or start the program from the Start menu. You also have the option to set Acer eNet Management to start automatically when you boot up your PC. Acer eNet Management automatically detects the best settings for a new location, while offering you the freedom to manually adjust the - Acer 4672WLMi | User Manual - Page 17
Empowering Technology 7 Acer eNet Management can save network settings for a location to a profile, and automatically apply the AP details, etc.), as well as default printer settings. Security and safety concerns mean that Acer eNet Management does not store username and password information. - Acer 4672WLMi | User Manual - Page 18
launch it, select Acer ePower Management from the Empowering Technology interface, or double-click the Acer ePower Management icon in battery mode. 4 Choose which power options best fit your needs, then click OK. 5 The new profile will appear on the main screen. Battery status For real-time battery - Acer 4672WLMi | User Manual - Page 19
be taken when the cover is closed, and set passwords for accessing the system after Hibernation or Standby. • View information about Acer ePower Management. Acer ePresentation Management Acer ePresentation Management lets you select from two of the most common projector resolutions: XGA and SVGA. - Acer 4672WLMi | User Manual - Page 20
- Acer 4672WLMi | User Manual - Page 21
tour After setting up your computer as illustrated in the Just for Starters... poster, let us show you around your new Acer notebook. Front view # Item Description 1 Display screen Also called Liquid-Crystal Display (LCD), displays computer output. 2 Microphone Internal microphone for sound - Acer 4672WLMi | User Manual - Page 22
) 4-way scroll button. 6 Palmrest Comfortable support area for your hands when you use the computer. 7 Power button Turns the computer on and off. IR-aware computer) (for TravelMate 4270/4670 Series). Indicates the computer's power status. 4 Battery indicator Indicates the computer's - Acer 4672WLMi | User Manual - Page 23
11 Item Headphones/ speaker/line-out jack with S/PDIF support 5-in-1 card reader Bluetooth communication button/indicator Wireless adapter. 2 Modem (RJ-11) Connects to a phone line. port 3 Acer MediaBay Houses an optical drive module, second battery pack or hard disk drive (for TravelMate - Acer 4672WLMi | User Manual - Page 24
Right view # Icon Item 1 IEEE 1394 port (4-pin) 2 PC Card slot eject button 3 PC Card slot Description Connects to IEEE 1394 devices (for TravelMate 4270/4670 Series). Ejects the PC Card from the slot. Accepts one Type II PC Card. 4 ExpressCard/34 slot Accepts one ExpressCard/34 module - Acer 4672WLMi | User Manual - Page 25
10/100/1000- port based network. 2 DVI-D port Supports digital video connections (for TravelMate 4270/4670 Series). 3 124-pin Acer ezDock Connects to Acer ezDock connector (for TravelMate 4670 Series). 4 Battery Powers the computer. 5 Kensington lock slot Connects to a Kensington - Acer 4672WLMi | User Manual - Page 26
of the fan. 3 Memory compartment Houses the computer's main memory. 4 Hard disk bay Houses the computer's hard disk (secured with screws). 5 Acer MediaBay release Releases the Acer MediaBay module for latch removal (for TravelMate 4670 Series). 6 Battery lock Locks the battery in position - Acer 4672WLMi | User Manual - Page 27
Specifications English Operating system Platform System memory Display and graphics • Genuine Windows® XP Home Edition (Service Pack 2) • Genuine Windows® XP Professional (Service solution, supporting Acer SignalUp™ support (for TravelMate 4270/4670 Series) • DVI-D (true digital video interface - Acer 4672WLMi | User Manual - Page 28
Hibernation power-saving modes • 71 W 8-cell or 59.2 W 8-cell Li-ion battery pack • 42 W 6-cell Li-ion 2nd battery pack • Acer QuicCharge™ technology: • 80% charge in 1 hour • 2-hour rapid charge system-off • 2.5-hour charge-in-use • 90 W AC adapter • 88-/89-key Acer FineTouch™ keyboard • Touchpad - Acer 4672WLMi | User Manual - Page 29
out (NTSC/PAL) port (for TravelMate 4270/4670 Series) Headphones/speaker/line-out jack with S/PDIF support Microphone-in jack Line-in jack Ethernet (RJ-45) port Modem (RJ-11) port DC-in jack for AC adapter Acer Disk Anti-Shock Protection (DASP) Kensington lock slot BIOS user and supervisor passwords - Acer 4672WLMi | User Manual - Page 30
TravelMate 4670 Series) • Acer MediaBay 6-cell Li-ion 2nd battery pack (for TravelMate 4670 Series) • 8-cell Li-ion battery pack • 6-cell Li-ion 2nd battery pack (for TravelMate 4670 Series) • 90 W AC adapter Warranty (ITW) Note: The specifications listed above are for reference only. The - Acer 4672WLMi | User Manual - Page 31
English 21 Indicators The computer has seven easy-to-read status indicators, including four on the front panel. The power, battery and wireless communication status indicators are visible even when the LCD display is closed. Icon Function Caps Lock Description Lights up when Caps Lock is - Acer 4672WLMi | User Manual - Page 32
amber when the battery is charging. 2. Fully charged: The light shows green when in AC mode. Easy-launch buttons Located above the keyboard are four browser, mail and programmable buttons, run the Acer Launch Manager. See "Launch Manager" on page 32. Easy-launch button - Acer 4672WLMi | User Manual - Page 33
means the cursor responds as you move your finger across the surface of the touchpad. The central location on the palmrest provides optimum comfort and support. Touchpad basics The following items show you how to use the touchpad: - Acer 4672WLMi | User Manual - Page 34
English 24 • Move your finger across the touchpad (2) to move the cursor. • Press the left (1) and right (4) buttons located beneath the touchpad to perform selection and execution functions. These two buttons are similar to the left and right buttons on a mouse. Tapping on the touchpad is the - Acer 4672WLMi | User Manual - Page 35
keypad functions like a desktop numeric keypad. It is indicated by small characters located on the upper right corner of the keycaps. To simplify the keyboard legend, cursor-control key symbols are not printed on the keys. Desired access Num Lock on Num Lock off Number keys on embedded keypad - Acer 4672WLMi | User Manual - Page 36
English 26 Windows keys The keyboard has two keys that perform Windows-specific functions. Key Description Windows key Pressed most of the computer's controls like screen brightness, volume output and the BIOS utility. To activate hotkeys, press and hold the key before pressing - Acer 4672WLMi | User Manual - Page 37
. See "Acer Empowering Technology" on page 1. Puts the computer in Sleep mode. Display toggle Screen blank Touchpad toggle Speaker toggle Switches display output between the display screen, external monitor (if connected) and both. Turns the display screen backlight off to save power. Press any - Acer 4672WLMi | User Manual - Page 38
Open a text editor or word processor. 2 Either press < > at the bottom-right of the keyboard, or hold and then press the key at the upper-center of the keyboard. Note: Some fonts and software do not support the Euro symbol. Please refer to www.microsoft.com/typography/faq/faq12.htm for - Acer 4672WLMi | User Manual - Page 39
is on. Insert a clip to the emergency eject hole to eject the optical drive tray when the computer is off. Using a computer security lock The notebook comes with a Kensington-compatible security slot for a security lock. - Acer 4672WLMi | User Manual - Page 40
English 30 Wrap the computer security lock cable around an immovable object such as a table or handle of a locked drawer. Insert the lock into the notch and turn the key to secure the lock. Some keyless models are also available. Audio The computer comes with 32-bit Intel High-Definition audio, and - Acer 4672WLMi | User Manual - Page 41
the system utilities Note: The system utilities work under Microsoft Windows XP only. Acer GridVista (dual-display compatible) Note: This feature is only available on certain models. To enable the dual monitor feature of your notebook, first ensure that the second monitor is connected, then, select - Acer 4672WLMi | User Manual - Page 42
GridVista is simple to set up: 1 Run Acer GridVista and select your preferred screen configuration for each display from the taskbar. 2 Manager allows you to set the four easy-launch buttons located above the keyboard. "Easy-launch buttons" on page 22 for the location of the easylaunch buttons. - Acer 4672WLMi | User Manual - Page 43
Run Full System Scan. 4 When the scan is complete, a scan summary appears. Click Finished. You can schedule customized virus scans that run unattended on specific dates and times or at periodic intervals. If you are using the computer when the scheduled scan begins, it runs in the background so that - Acer 4672WLMi | User Manual - Page 44
: • If it is not lit, no power is being supplied to the computer. Check the following: • If you are using on the battery, it may be low and unable to power the computer. Connect the AC adapter to recharge the battery pack. • Make sure that the AC adapter is properly plugged into the computer and to - Acer 4672WLMi | User Manual - Page 45
on the power. There is keyboard does not respond. Try attaching an external keyboard to a USB port on the computer. If it works, contact your dealer or an authorized service center as the internal keyboard drivers (for printing to an infrared printer). • During the POST, press to access the BIOS - Acer 4672WLMi | User Manual - Page 46
Dialing Rules and begin setting up your location. Refer to the Windows manual. Note: Please note, on first booting your notebook, that you can skip the Internet Connection setup, as it is not necessary to complete the installation of your Operating System. After the Operating System is set up, you - Acer 4672WLMi | User Manual - Page 47
the Acer logo is showing, press + at the same time to enter the recovery process. 3 Refer to the onscreen instructions to Acer for online service, and please be at your computer when you call. With your support, we can reduce the amount of time a call takes and help solve your problems - Acer 4672WLMi | User Manual - Page 48
notebook the cord from the AC adapter. 6 Disconnect the keyboard, pointing device, printer, external , open the display; then press and release the power button. If you are taking the computer to , Turn Off Computer, then click on Turn Off (Windows XP). Or: You can put the computer in Sleep mode by - Acer 4672WLMi | User Manual - Page 49
than your computer. If your meeting will be longer, or if your battery is not fully charged, you may want to bring the AC adapter with you to plug in your computer in the meeting room. If some items at home, take the following items with you: • AC adapter and power cord • The printed User's Guide - Acer 4672WLMi | User Manual - Page 50
in the computer is charged. Airport security may require you to turn on your computer when carrying it into the gate area. What to take with you Take the following items with you: • AC adapter • Spare, fully-charged battery pack(s) • Additional printer driver files if you plan to use another printer - Acer 4672WLMi | User Manual - Page 51
• AC adapter • Power cords that are appropriate for the country to which you are traveling • Spare, fully-charged battery packs • Additional printer driver files if local AC voltage and the AC adapter power cord specifications are compatible. If not, purchase a power cord that is compatible with the - Acer 4672WLMi | User Manual - Page 52
a security notch and passwords. Using a computer security lock The notebook comes with a Kensington-compatible security slot for a security lock entry into the BIOS utility. Once set, you must enter this password to gain access to the BIOS utility. See "BIOS utility" on page authorized service center. - Acer 4672WLMi | User Manual - Page 53
press to enter the BIOS utility at boot-up. • Type the Supervisor Password and press to access the BIOS utility. If you enter the password password correctly after three tries, the system halts. Press and hold the power button for four seconds to shut down the computer. Then turn on the - Acer 4672WLMi | User Manual - Page 54
English 44 Expanding through options Your notebook PC offers you a complete mobile computing experience. Connectivity options Ports allow you to connect peripheral devices to your computer as you would with a desktop PC. For instructions on how to connect different external devices to the computer, - Acer 4672WLMi | User Manual - Page 55
English 45 Built-in network feature The built-in network feature allows you to connect your computer to an Ethernet-based network. To use the network feature, connect an Ethernet cable from the Ethernet (RJ-45) port on the chassis of the computer to a network jack or hub on your network. Fast - Acer 4672WLMi | User Manual - Page 56
English 46 Universal Serial Bus (USB) The USB 2.0 port is a high-speed serial bus which allows you to connect USB peripherals without taking up precious system resources. IEEE 1394 port The computer's IEEE 1394 port allows you to connect to an IEEE 1394compatible device like a video camera or - Acer 4672WLMi | User Manual - Page 57
SCSI cards. CardBus improves on the 16-bit PC card technology by expanding the bandwidth to 32 bits. Note: Refer to your card's manual for details on how to install and use the card, and its functions. Inserting a PC Card Insert the card into the slot and make the proper connections (e.g., network - Acer 4672WLMi | User Manual - Page 58
ExpressCard/54 and ExpressCard/ 34 (54mm and 34mm), each with different functions. Not all ExpressCard slots will support both types. Please refer to your card's manual for details on how to install and use the card, and its functions. Inserting an ExpressCard Insert the card into the slot and push - Acer 4672WLMi | User Manual - Page 59
Follow these steps to install memory: 1 Turn off the computer, unplug the AC adapter (if connected) and remove the battery pack. Then turn the you encounter configuration problems, you may need to run it. To activate the BIOS utility, press during the POST; while the notebook PC logo is being - Acer 4672WLMi | User Manual - Page 60
Password To set a password on boot, activate the BIOS utility, then select Security from the categories listed at Playing DVD movies When the DVD drive module is installed in the optical drive bay, you can play DVD code. DVD disks are divided into 6 regions. Once your DVD drive is set to a region code - Acer 4672WLMi | User Manual - Page 61
from backup 3 Create factory default image CD, or burn bundled software to an application CD 4 Re-install bundled software without CD 5 Change Acer eRecovery Management password This chapter will guide you through each process. Note: This feature is only available on certain models. For systems that - Acer 4672WLMi | User Manual - Page 62
XP. 2 Press + to open the Acer eRecovery Management utility. 3 Enter the password to proceed. The default password is six zeros. 4 In the Acer eRecovery Management window, select Recovery actions and click Next. 5 Select the desired restore action and follow the onscreen instructions - Acer 4672WLMi | User Manual - Page 63
by using this feature. 1 Boot to Windows XP. 2 Press + to open the Acer eRecovery Management utility. 3 Enter the password to proceed. The drivers and click Next. 6 Select the desired driver/application and follow the instructions on screen to re-install. At first launch, Acer eRecovery - Acer 4672WLMi | User Manual - Page 64
to change the password in Acer eRecovery Management. 1 Boot to Windows XP. 2 Press + to open the Acer eRecovery Management utility. 3 Enter the settings window, select Password: Change Acer eRecovery Management password and click Next. 6 Follow the instructions on screen to complete the - Acer 4672WLMi | User Manual - Page 65
attempt to open the computer yourself; contact your dealer or authorized service center for assistance. Troubleshooting tips This notebook PC incorporates an advanced design that delivers onscreen error message reports to help you solve problems. If the system reports an error message or an error - Acer 4672WLMi | User Manual - Page 66
56 If you still encounter problems after going through the corrective measures, please contact your dealer or an authorized service center for assistance. Some problems may be solved using the BIOS utility. English - Acer 4672WLMi | User Manual - Page 67
notices ENERGY STAR guidelines compliance As an ENERGY STAR partner, Acer Inc. has determined that this product meets the ENERGY STAR guidelines installation. This device generates, uses, and can radiate radio frequency energy and, if not installed and used in accordance with the instructions, - Acer 4672WLMi | User Manual - Page 68
du Canada. Declaration of Conformity for EU countries Hereby, Acer, declares that this notebook PC series is in compliance with the essential requirements harm to the telephone network, the telephone company may discontinue your service temporarily. If possible, they will notify you in advance. But - Acer 4672WLMi | User Manual - Page 69
advance to give you an opportunity to maintain uninterrupted telephone service. If this equipment should fail to operate properly, disconnect the equipment from the phone line to determine if it is causing the problem. If the problem is with the equipment, discontinue use and contact your dealer or - Acer 4672WLMi | User Manual - Page 70
Telecom's Specifications: a There shall be no more than 10 call attempts to the same number within any 30 minute period for any single manual call initiation shall not be set up to make automatic calls to Telecom's 111 Emergency Service. For modem with approval number PTC 211/01/030 1 The grant of - Acer 4672WLMi | User Manual - Page 71
's specifications, the associated equipment shall be set to ensure that calls are answered between 3 and 30 seconds of receipt of ringing. 8 This equipment shall not be set up to make automatic calls to Telecom's 111 Emergency Service. Important safety instructions Read these instructions carefully - Acer 4672WLMi | User Manual - Page 72
a distinct change in performance, indicating a need for service. 12 The notebook PC series uses lithium batteries. Replace the battery with the same type as the product's battery we recommend in the product specification list. Use of another battery may present a risk of fire or explosion. 13 - Acer 4672WLMi | User Manual - Page 73
English English 63 Laser compliance statement The CD or DVD drive used with this computer is a laser product. The CD or DVD drive's classification label (shown below) is located on the drive. CLASS 1 LASER PRODUCT CAUTION: INVISIBLE LASER RADIATION WHEN OPEN. AVOID EXPOSURE TO BEAM. APPAREIL A - Acer 4672WLMi | User Manual - Page 74
English 64 Radio device regulatory notice Note: Below regulatory information is for models with wireless LAN and/or Bluetooth only. General This product complies with the radio frequency and safety standards of any country or region in which it has been approved for wireless use. Depending on - Acer 4672WLMi | User Manual - Page 75
notebook PC series shall be used in such a manner that the potential for human contact during normal operation is minimized as follows: 1 Users are requested to follow the RF safety instructions on wireless option devices that are included in the user's manual The Acer wireless Mini PCI adapter - Acer 4672WLMi | User Manual - Page 76
to LELAN (Licence-Exempt Local Area Network) devices. Exposure of humans to RF fields (RSS-102) The notebook PC series employs low gain integral antennas that do not emit RF field in excess of Health Canada limits for the general population; consult Safety Code 6, obtainable from Health Canada - Acer 4672WLMi | User Manual - Page 77
is responsible for this declaration: Product name: Notebook PC Model number: ZB1 Machine type: TravelMate 4210/4270/4670 SKU number: TravelMate 421xxx/427xxx/467xxx ("x" = 0 - 9, a - z, or A - Z) Name of responsible party: Acer America Corporation Address of responsible party: 2641 - Acer 4672WLMi | User Manual - Page 78
Tel: 886-2-8691-3089 Fax: 886-2-8691-3000 E-mail: [email protected] Declares that product: Notebook PC Trade name: Acer Model number: ZB1 Machine type: TravelMate 4210/4270/4670 SKU number: TravelMate 421xxx/427xxx/467xxx ("x" = 0 - 9, a - z, or A - Z) Is in compliance with the - Acer 4672WLMi | User Manual - Page 79
battery pack caring for vi BIOS utility 49 brightness hotkeys 27 C caps lock 25 on indicator 21 care AC adapter v battery pack vi computer v CD-ROM ejecting manually 35 troubleshooting 35 cleaning computer vi computer caring for v cleaning vi disconnecting 38 features 11, 31 indicators 21 keyboards - Acer 4672WLMi | User Manual - Page 80
47 ejecting 47 inserting 47 ports 44 printer troubleshooting 35 problems 34 CD-ROM 35 display 34 keyboard 35 printer 35 startup 34 troubleshooting 55 Q questions setting location for modem use 36 S safety CD or DVD 63 FCC notice 57 general instructions 61 modem notices 58 scroll lock 25 security
-
 1
1 -
 2
2 -
 3
3 -
 4
4 -
 5
5 -
 6
6 -
 7
7 -
8
-
9
-
10
-
11
-
12
-
13
-
14
-
15
-
16
-
17
-
18
-
19
-
20
-
21
-
22
-
23
-
24
-
25
-
26
-
27
-
28
-
29
-
30
-
31
-
32
-
33
-
34
-
35
-
36
-
37
-
38
-
39
-
40
-
41
-
42
-
43
-
44
-
45
-
46
-
47
-
48
-
49
-
50
-
51
-
52
-
53
-
54
-
55
-
56
-
57
-
58
-
59
-
60
-
61
-
62
-
63
-
64
-
65
-
66
-
67
-
68
-
69
-
70
-
71
-
72
-
73
-
74
-
75
-
76
-
77
-
78
-
79
-
80
 |
 |

TravelMate 4210/4270/4670 Series
User's Guide