Acer H6535i User Manual
Acer H6535i Manual
 |
View all Acer H6535i manuals
Add to My Manuals
Save this manual to your list of manuals |
Acer H6535i manual content summary:
- Acer H6535i | User Manual - Page 1
V60AF/AF550B/ X1525i/DX530E/BS-530K/KF340A/H6535M/ H6535i/F1P1806/ X1325WC/D720E/EV-W70K/V60AW/ AW550B/X1325Wi/DX430E/BS-330K/ KW340A/FWX1807/ X1225C/D710E/EV-X70K/V60AX/AX550B/ X1225i/DX230E/BS-130K/KX340A/FNX1808/ X1125C/D700E/EV-S70K/V60AS/AS550B/ X1125i/DX130E/BS-030K/KS340A/FSV1809 User's Guide - Acer H6535i | User Manual - Page 2
. Acer Incorporated. All Rights Reserved. Acer Projector User's Guide Original Issue: 09/2018 Changes may be made periodically to the information in this publication without obligation to notify any person of such revisions or changes. Such changes will be incorporated in new editions of this manual - Acer H6535i | User Manual - Page 3
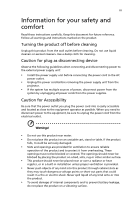
carefully. Keep this document for future reference. Follow all warnings and instructions marked on the product. Turning the product off before cleaning Unplug this product from the wall outlet before cleaning. Do not use liquid cleaners or - Acer H6535i | User Manual - Page 4
following requirements: detachable type, UL listed/CSA certified, VDE approved or its equivalent, 4.5 meters (15 feet) maximum length. Product servicing Do not attempt to service this product yourself, as opening or removing covers may expose you to dangerous voltage points or other risks. Refer all - Acer H6535i | User Manual - Page 5
• the product has been dropped or the case has been damaged • the product exhibits a distinct change in performance, indicating a need for service • the product does not operate normally after following the operating instructions Note: Adjust only those controls that are covered by the operating - Acer H6535i | User Manual - Page 6
down, and follow all changing instructions. • Reset the "Lamp service personnel. • Do not stand the projector on end vertically. It may cause the projector to fall over, causing injury or damage. • This product is capable of displaying inverted images for ceiling mount installation. Only use acer - Acer H6535i | User Manual - Page 7
Decrease the volume if you can't hear people speaking near you. Disposal instructions Do not throw this electronic device into the trash when discarding. To and Electronics Equipment (WEEE) regulations, visit http://www.acer-group.com/public/Sustainability/sustainability01.htm Mercury advisory For - Acer H6535i | User Manual - Page 8
Follow all warnings, precautions and maintenance as recommended in this user's guide to maximize the life of your unit. Warning: • Do not look changing the lamp, please allow unit to cool down, and follow all changing instructions. • This product will detect the life of the lamp itself. Please be - Acer H6535i | User Manual - Page 9
adjusting distance and zoom 15 User Controls 19 Onscreen Display (OSD) Menus 19 Color 20 Image 22 Source 23 Setting 23 Management 25 Information 26 Acer LAN webpage management 27 How to login in 27 System Status 28 Change Password 28 - Acer H6535i | User Manual - Page 10
Projector Control Panel 29 Network Setting 29 Crestron Setting 29 Appendices 30 Troubleshooting 30 LED & Alarm Definition Listing 31 Replacing the Lamp 32 Ceiling Mount Installation 33 Specifications 36 Compatibility modes 38 Regulations and safety notices 40 - Acer H6535i | User Manual - Page 11
ratio supported • Enables projecting 3D content via DLP Link Technology • Acer ColorBoost technology supporting HDCP • Advanced digital keystone correction optimizes presentations • Smart detection delivers quick, intelligent source detection • Multi-language onscreen display (OSD) menus • Manual - Acer H6535i | User Manual - Page 12
if any thing is missing. English Projector 2 x Batteries ©2018, Acer Inc. All rights reserved. Acer Projector Media CD Power cord VGA cable (option) ©2018, Acer Inc. All rights reserved. User's Manual Quick Start Guide Panduan ringkas Ghid de pornire rapidă Stručná příručka Priročnik - Acer H6535i | User Manual - Page 13
English 3 Projector Overview Projector Outlook Front / upper side 11 2 1 9 10 3 78 # Description 1 Control panel 2 Focus ring 3 Zoom ring 4 Remote control receiver 5 Projection lens 6 Quick-release lever Rear / Left side 24 5 76 # Description 7 Adjuster foot 8 Air - Acer H6535i | User Manual - Page 14
4 Control Panel English 4 567 8 1 6 2 10 3 9 7 11 12 13 # Icon Function 1 POWER 2 TEMP 3 LAMP 4 POWER 5 SOURCE 6 VOLUME 7 KEYSTONE 8 Four directional select keys 9 ENTER 10 MODE 11 BACK 12 MENU 13 RESYNC Description Power Indicator LED Temp Indicator LED - Acer H6535i | User Manual - Page 15
English 5 Remote Control Layout 1 2 13 3 14 4 15 16 5 17 6 18 7 19 8 9 20 10 21 11 22 23 12 # Icon Function 1 Infrared transmitter 2 POWER Description Sends signals to the projector. Refer to the "Turning the Projector On/Off" section. 3 FREEZE To pause the screen - Acer H6535i | User Manual - Page 16
English 6 # Icon Function 10 VGA 11 HDMI 12 RESYNC 13 SOURCE 14 HIDE 15 KEYSTONE 16 Enter Play/Pause 17 MUTE 18 MENU 19 MODE 20 Volume UP/ Down Description Press "VGA" to change source to the VGA connector. To change source to HDMI. Automatically determines the best - Acer H6535i | User Manual - Page 17
English 7 Getting Started Connecting the Projector 4 8 27 5 6 3 9 HDTV adapter 10 12 11 2 WR # Description 1 Power cord 2 VGA cable 3 RS232 cable 4 USB cable (mini-B to type A) 5 Component Video to VGA (DSub) adapter cable 6 HDMI cable # Description 7 Audio cable Jack/Jack 8 - Acer H6535i | User Manual - Page 18
English 8 Turning the Projector On/Off Turning on the Projector 1 Ensure that the power cord and signal cable are securely connected. The Power indicator LED will turn orange. 2 Turn on the projector by pressing "Power" button on the control panel or remote control, and the Power indicator LED will - Acer H6535i | User Manual - Page 19
to unplug the power cord. Note: Whenever the projector automatically shuts down and the LED lamp indicator turns solid red, contact your local reseller or service center. Note: Functions vary depending on model definition. - Acer H6535i | User Manual - Page 20
English 10 Adjusting the Projected Image Adjusting the Height of Projected Image The projector is equipped with elevator feet for adjusting the height of image. 1 Pull the quick-release lever and lift the front of the projector. Once the image is positioned where you want it, release the quick- - Acer H6535i | User Manual - Page 21
English 11 How to optimize image size and distance • SVGA series Consult the table below to find the optimal image sizes achievable when the projector is positioned at a desired distance from the screen. If the projector is 2.0 m from the screen, good image quality is possible for image sizes - Acer H6535i | User Manual - Page 22
English 12 • XGA series Consult the table below to find the optimal image sizes achievable when the projector is positioned at a desired distance from the screen. If the projector is 2.0 m from the screen, good image quality is possible for image sizes between 43" and 51". Note: Remind as below - Acer H6535i | User Manual - Page 23
English 13 • WXGA series Consult the table below to find the optimal image sizes achievable when the projector is positioned at a desired distance from the screen. If the projector is 2.0 m from the screen, good image quality is possible for image sizes between 50" and 60". Note: Remind as below - Acer H6535i | User Manual - Page 24
English 14 • 1080p series Consult the table below to find the optimal image sizes achievable when the projector is positioned at a desired distance from the screen. If the projector is 2.0 m from the screen, good image quality is possible for image sizes between 55" and 66". Note: Remind as below - Acer H6535i | User Manual - Page 25
English 15 How to get a preferred image size by adjusting distance and zoom • SVGA series The table below shows how to achieve a desired image size by adjusting either the position or the zoom ring. To obtain an image size of 60" set the projector at a distance 2.4 m and 2.9 m from the screen. A - Acer H6535i | User Manual - Page 26
English 16 • XGA series The table below shows how to achieve a desired image size by adjusting either the position or the zoom ring. To obtain an image size of 60" set the projector at a distance 2.4 m and 2.8 m from the screen. A 60" Desired image size D Height: 102 cm from base to top of image - Acer H6535i | User Manual - Page 27
English 17 • WXGA series The table below shows how to achieve a desired image size by adjusting either the position or the zoom ring. To obtain an image size of 60" set the projector at a distance 2.0 m and 2.4 m from the screen. A 60" Desired image size D Height: 89 cm from base to top of image - Acer H6535i | User Manual - Page 28
English 18 • 1080p series The table below shows how to achieve a desired image size by adjusting either the position or the zoom ring. To obtain an image size of 60" set the projector at a distance 1.8 m and 2.2 m from the screen. A 60" Desired image size D Height: 85 cm from base to top of image - Acer H6535i | User Manual - Page 29
English 19 User Controls Onscreen Display (OSD) Menus The projector has multilingual OSD that allow you to make image adjustments and change a variety of settings. Using the OSD menus • To open the OSD menu, press "MENU" on the remote control. • When the OSD is displayed, use the keys to - Acer H6535i | User Manual - Page 30
20 Color English LumiSense BluelightShield Display Mode Reference Mode Brightness Contrast Sharpeness Brilliant Color The light sensor of LumiSense+ technology can intelligently optimize the brightness and color saturation of projected image based on actual ambient light. The feature greatly - Acer H6535i | User Manual - Page 31
English 21 Gamma Effects the representation of dark scenery. With greater gamma value, dark scenery looks brighter. Color Temperature Use this function to choose CT1, CT2, CT3 mode. Color R Gain Temperature Fine Adjusts the red gain for color temperature optimization. Tuning G Gain Adjusts - Acer H6535i | User Manual - Page 32
English 22 Image Wall Color Aspect Ratio H./V. Keystone 4 Corner Correction Use this function to choose a proper color according to the wall. There are several choices, including white, light yellow, light blue, pink, dark green. It will compensate the color deviation due to the wall color to - Acer H6535i | User Manual - Page 33
image for ceiling-mounted projection. Menu Display Time Choose the OSD menu display time. (Default is 20 seconds). Select "Manual" to turn off main menu/one direct-key menu manually by user. Menu Position Sets the On-Screen Display (OSD) menu position. Reminder Message Sets whether to display the - Acer H6535i | User Manual - Page 34
English 24 Startup Screen USB 5V (Standby) VGA OUT (Standby) Firmware Upgrade Use this function to select your desired startup screen. If you change the setting, the changes will take effect when you exit the OSD menu. Default is "Off". Choose "On" to supply 5V/1.5A pwoer while in standby mode. - Acer H6535i | User Manual - Page 35
Altitude Audio Settings Lamp Settings ECO Mode Security Settings Test Pattern Choose "On" to turn on High Altitude OSD on-screen steps. If you forget the password, contact your local reseller or service center to decode the number. Change Security • Power On Lock Choose to enter the password - Acer H6535i | User Manual - Page 36
English 26 Network Settings Reset LAN IP / Mask Identify IP and Mask address. WiFi IP/Mask Identify IP and Mask address. MAC Address Identify MAC address. Wake on LAN (Standby) Set to "On" to enable wake-on-LAN function to power on projector via LAN under standby status. It is required to - Acer H6535i | User Manual - Page 37
and set DHCP to off in Network. Open browser and enter the Server IP address by 192.168.100.10 to find below homepage of acer LAN webpage management. A password is needed to login in before using. Default password of User is "0000". - Acer H6535i | User Manual - Page 38
Status, Change Password, Projector Control, Network Setting, and Crestron. System Status page is automatically selected after login. Download EZCast Pro Installer for PC projection from Acer portal http:// www.acer.com/projectors/app/ Change Password Enduser can change the login password as wish. - Acer H6535i | User Manual - Page 39
English 29 Projector Control Panel Enduser can control and adjust projector setting value via this page. Network Setting Enduser can set IP address as wish. After change network configurations, Network Setting on both webpage and projector will refresh automatically after press "Apply". Crestron - Acer H6535i | User Manual - Page 40
Troubleshooting If you experience a problem with your Acer projector, refer to the following troubleshooting guide. If the problem persists, please contact your local reseller or service center. # Problem Solution 1 Start-up problems turned on. Refer to the computer manual. • If the image is out - Acer H6535i | User Manual - Page 41
LED & Alarm Definition Listing LED Messages Message Stand-by mode Powering up Lamp retry Normal operation Normal power-down cooling Lamp error in normal operation Lamp is not lit up The remaining time of lamp life becomes 5% or lower. Fan 1 (blower) error (the actual fan speed exceeds the desired - Acer H6535i | User Manual - Page 42
English 32 Replacing the Lamp Use a screwdriver to remove the screw(s) from the cover, and then pull out the lamp. Make sure the projector has been cooling down for at least 45 minutes before changing the lamp. Warning: The lamp compartment is hot! Allow it to cool down before changing the lamp. - Acer H6535i | User Manual - Page 43
English 33 Ceiling Mount Installation If you wish to install the projector using a ceiling mount, please refer to the steps below: 1 Drill four holes into a solid, structurally sound part of the ceiling, and secure the mount base. 20mm mm13 m4m9.9 8.4 mm 130 mm 2 Choose the length combination - Acer H6535i | User Manual - Page 44
to mount the projector to the ceiling mount bracket. Type 2 and Type 3: Alternatively, for the larger size, use the sliding extensions for more supports. Type 1: Type 2: Type 3: Note: It is recommended that you keep a reasonable space between the bracket and the projector to allow for proper - Acer H6535i | User Manual - Page 45
in the table below. 4 mm diameter screws are enclosed in the screw pack. Screw Type B Diameter (mm) Length (mm) 4 25 Large V Washer Type Small V SCREW SPEC. M4 x 25 mm 50 216 66 41.7 84 125.8 107.5 23.5 116.1 92.6 94 44 238 172 - Acer H6535i | User Manual - Page 46
notice. For final specs, please refer to Acer's published marketing specifications. 79 mm, 1.2X manual zoom and manual focus • X1525C/D750E/EV-F70K/V60AF/AF550B/X1525i/ DX530E/BS-530K/KF340A/H6535M/H6535i/ F1P1806 series: F = 2.47 ~ 2.66, f = 20.4 ~24.48 mm, 1.2X manual zoom and manual focus 40" ( - Acer H6535i | User Manual - Page 47
(1.55 ~ 1.87) • X1525C/D750E/EV-F70K/V60AF/AF550B/X1525i/ DX530E/BS-530K/KF340A/H6535M/H6535i/ F1P1806 series: 66"@2 m (1.37 ~ 1.66) 15 - 90 kHz 24, 50 - 's guide (Projector) (CD-ROM) x1 • User's guide (Media/Wireless function) (CD-ROM) x1 • Quick start guide (Projector) x1 • Quick start guide ( - Acer H6535i | User Manual - Page 48
38 Compatibility modes English A. Computer • Multiple signal support • Horizontal Frequency: 15-90 kHz, Vertical Frequency: 24, 50-85 Hz, Pixel Clock: 12-162 MHz Mode PC Resolution 55.90 67.50 63.98 79.98 60.00 65.32 60.30 67.50 75.00 Analog Support Digital Support - Acer H6535i | User Manual - Page 49
) 59.9 50.0 60.0 50.0 24.0 60.0 50.0 Horizontal frequency (kHz) 31.50 31.60 45.00 37.50 27.00 67.50 56.30 Analog Support Digital Support Note 1: Functions vary depending on model definition. Note 2: 480i/576i/1080i interlaced signals are not - Acer H6535i | User Manual - Page 50
40 Regulations and safety notices FCC notice This device has been tested and found to comply with the limits for a Class radio frequency energy and, if not installed and used in accordance with the instructions, may cause harmful interference to radio communications. However, there is no guarantee - Acer H6535i | User Manual - Page 51
including interference that may cause undesired operation of the device. b Operation in 2.4 GHz band To prevent radio interference to the licensed service, this device is intended to be operated indoors and installation outdoors is subject to licensing. List of applicable countries This device must - Acer H6535i | User Manual - Page 52
Tel: +39-02-939-921 ,Fax: +39-02 9399-2913 www.acer.it Product: DLP Projector Trade Name: Acer Model Number: F1P1806/ FWX1807/ FNX1808/ FSV1809 Marketing Name: X1125i/X1225i/X1325Wi/X1525i/H6535i We, Acer Incorporated, hereby declare under our sole responsibility that the product described - Acer H6535i | User Manual - Page 53
Italy s.r.l. Via Lepetit, 40, 20020 Lainate (MI) Italy Tel: +39-02-939-921 ,Fax: +39-02 9399-2913 www.acer.it Product: DLP Projector Trade Name: Acer Model Number: F1P1806/ FWX1807/ FNX1808/ FSV1809 Marketing Name: X1525C/X1325WC/ X1225C/ X1125C/ D750E/ V60AF/EV-F70K/ AF550B /DX530E/BS-530K - Acer H6535i | User Manual - Page 54
U. S. A. Tel: 254-298-4000 Fax: 254-298-4147 www.acer.com Federal Communications Commission Declaration of Conformity This equipment complies with part 15 of /D750E/EV-F70K/V60AF/AF550B/ X1525i/DX530E/BS-530K/KF340A/H6535M/ H6535i//X1325WC/D720E/EV-W70K/V60AW/ AW550B/X1325Wi/DX430E/BS-330K/KW340A/
-
 1
1 -
 2
2 -
 3
3 -
 4
4 -
 5
5 -
 6
6 -
 7
7 -
8
-
9
-
10
-
11
-
12
-
13
-
14
-
15
-
16
-
17
-
18
-
19
-
20
-
21
-
22
-
23
-
24
-
25
-
26
-
27
-
28
-
29
-
30
-
31
-
32
-
33
-
34
-
35
-
36
-
37
-
38
-
39
-
40
-
41
-
42
-
43
-
44
-
45
-
46
-
47
-
48
-
49
-
50
-
51
-
52
-
53
-
54
 |
 |

Acer Projector
X1525C/D750E/EV-F70K/V60AF/AF550B/
X1525i/DX530E/BS-530K/KF340A/H6535M/
H6535i/F1P1806/
X1325WC/D720E/EV-W70K/V60AW/
AW550B/X1325Wi/DX430E/BS-330K/
KW340A/FWX1807/
X1225C/D710E/EV-X70K/V60AX/AX550B/
X1225i/DX230E/BS-130K/KX340A/FNX1808/
X1125C/D700E/EV-S70K/V60AS/AS550B/
X1125i/DX130E/BS-030K/KS340A/FSV1809
User's Guide