Acer P3250 Acer P3150 and P3250 Projector Series User's Guide - Page 18
English, Function, Description - password
 |
UPC - 884483153084
View all Acer P3250 manuals
Add to My Manuals
Save this manual to your list of manuals |
Page 18 highlights
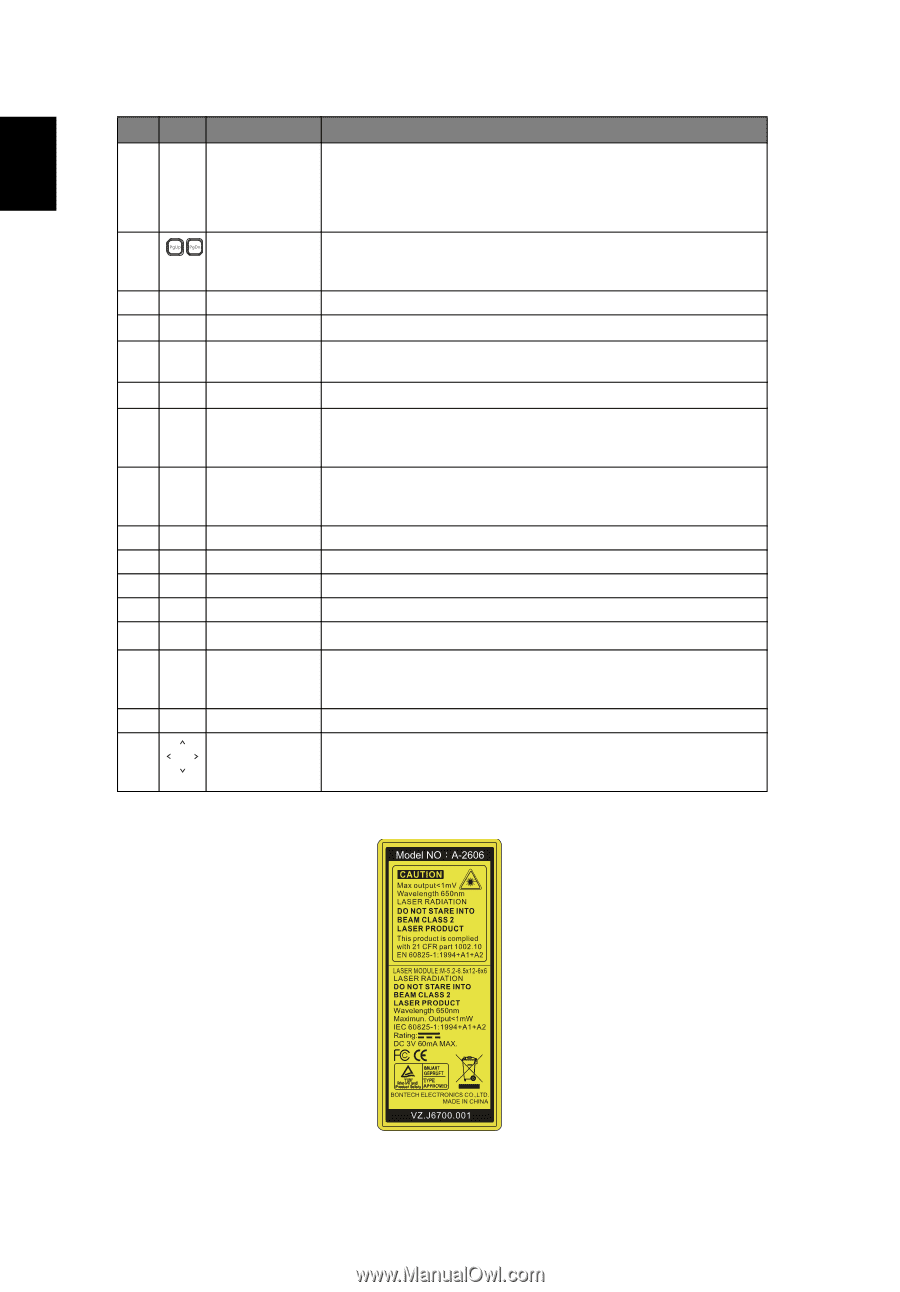
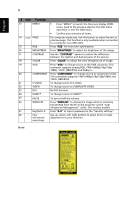
6 English # Icon Function Description 13 MENU • Press "MENU" to launch the Onscreen display (OSD) menu, back to the previous step for the OSD menu operation or exit the OSD menu. • Confirm your selection of items. 14 PAGE For computer mode only. Use this button to select the next or previous page. This function is only available when connected to a computer via a USB cable. 15 RGB Press "RGB" for true-color optimization. 16 BRIGHTNESS Press "BRIGHTNESS" to adjust the brightness of the image. 17 CONTRAST Use the "CONTRAST" option to control the difference between the lightest and darkest parts of the picture. 18 COLOR Press "COLOR" to adjust the color temperature of image. 19 VGA Press "VGA" to change source to the VGA connector. This connector supports analog RGB, YPbPr (480p/576p/720p/ 1080i), YCbCr (480i/576i) and RGBsync. 20 COMPONENT Press "COMPONENT" to change source to Component video. This connection supports YPbPr (480p/576p/720p/1080i) and YCbCr (480i/576i). 21 S-VIDEO To change source to S-Video. 22 VIDEO To change source to COMPOSITE VIDEO. 23 DVI No DVI function. 24 HDMI™ To change source to HDMI™. 25 MUTE To turn on/off the volume. 26 WIRELESS Press "WIRELESS" to display the image which is wirelessly transmitted from the PC to the projector via the "Acer eProjection Management" utility. (for wireless model) 27 KeyPad 0~9 Press "0~9" to input a password in the "Security settings". 28 Four Use up, down, left, right buttons to select items or make directional adjustments to your selection. select keys Note:
-
 1
1 -
2
-
3
-
4
-
5
-
6
-
7
-
8
-
9
-
10
-
11
-
12
-
 13
13 -
 14
14 -
 15
15 -
 16
16 -
 17
17 -
 18
18 -
 19
19 -
 20
20 -
 21
21 -
 22
22 -
 23
23 -
24
-
25
-
26
-
27
-
28
-
29
-
30
-
31
-
32
-
33
-
34
-
35
-
36
-
37
-
38
-
39
-
40
-
41
-
42
-
43
-
44
-
45
-
46
-
47
-
48
-
49
-
50
-
51
-
52
-
53
 |
 |