Adobe 25510629 User Guide - Page 18
Tutorial, Hands Apart Wedding clip onto the Input Clip thumbnail.
 |
UPC - 883919067353
View all Adobe 25510629 manuals
Add to My Manuals
Save this manual to your list of manuals |
Page 18 highlights
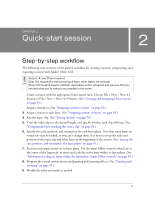
NOTE ■ Add virtual shadows or reflections. (See "Adding shadows and reflections" on page 111.) ■ Correct color. (See "Correcting colors" on page 108.) ■ Defocus the sources. (See "Defocusing a source" on page 119.) ■ Adjust the audio volume of the clips. (See "Adjusting the volume of a video clip" on page 107.) 10. Export the finished movie. (See "Saving the finished video" on page 119.) Tutorial The following is a step-by-step example of a simple NTSC session that uses NTSC sample files included with Ultra. 1. Start Ultra. 2. Drag a background from the Animations folder on the Backgrounds tab onto the Background thumbnail. 3. On the Browse tab, double-click the NTSC Sample Clips folder to open it. Drag the Hands Apart (Wedding) clip onto the Input Clip thumbnail. The first frame in this clip shows only the greenscreen background. The method described in this tutorial only works for clips that have at least one frame that is a shot of only the background color screen. 4. Click the Set Key button on the Keyer tab. If the controls on the Keyer tab are disabled, click Input Clip thumbnail. 5. Drag the slider under the Output Preview Monitor to the time of 1 seconds (00:00:01.00), or enter this timecode in the timecode text box. A video frame showing two hands appears on the Output Preview Monitor. 6. On the Input tab, click the Set button to the right of the In Point text box. This makes it so that the first frame to appear in the movie is the frame at the time of 1 second in the input clip. 7. Move the Transparency slider on the Keyer tab to the left to 0.350, or type that value in the adjacent text box. The two hands become opaque. The Hands Apart clip has a well-lit, even background that can be keyed out well with only this one adjustment. Some backgrounds require more manual fine-tuning to achieve a clean, convincing key. For more information, see "Fine-tuning the Keyer settings" on page 84. Quick-start session NOTE
-
 1
1 -
2
-
3
-
4
-
5
-
6
-
7
-
8
-
9
-
10
-
11
-
12
-
 13
13 -
 14
14 -
 15
15 -
 16
16 -
 17
17 -
 18
18 -
 19
19 -
 20
20 -
 21
21 -
 22
22 -
 23
23 -
24
-
25
-
26
-
27
-
28
-
29
-
30
-
31
-
32
-
33
-
34
-
35
-
36
-
37
-
38
-
39
-
40
-
41
-
42
-
43
-
44
-
45
-
46
-
47
-
48
-
49
-
50
-
51
-
52
-
53
-
54
-
55
-
56
-
57
-
58
-
59
-
60
-
61
-
62
-
63
-
64
-
65
-
66
-
67
-
68
-
69
-
70
-
71
-
72
-
73
-
74
-
75
-
76
-
77
-
78
-
79
-
80
-
81
-
82
-
83
-
84
-
85
-
86
-
87
-
88
-
89
-
90
-
91
-
92
-
93
-
94
-
95
-
96
-
97
-
98
-
99
-
100
-
101
-
102
-
103
-
104
-
105
-
106
-
107
-
108
-
109
-
110
-
111
-
112
-
113
-
114
-
115
-
116
-
117
-
118
-
119
-
120
-
121
-
122
-
123
-
124
-
125
-
126
-
127
-
128
-
129
-
130
 |
 |
