Adobe 65015634 Scripting Guide - Page 66
Applying a wave filter, Adobe Photoshop CS4 JavaScript Scripting Reference, Hello
 |
UPC - 883919159232
View all Adobe 65015634 manuals
Add to My Manuals
Save this manual to your list of manuals |
Page 66 highlights
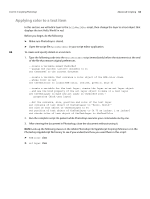
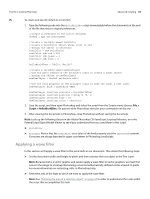
CHAPTER 3: Scripting Photoshop Advanced Scripting 66 JS To create and specify details in a text item: 1. Type the following code into the HelloWorldDoc script immediately before the statements at the end of the file that restore original preferences. //create a reference to the active document docRef = app.activeDocument //create a variable named textColor //create a SolidColor object whose color is red //assign the object to textColor textColor = new solidColor textColor.rgb.red = 255 textColor.rgb.green = 0 textColor.rgb.blue = 0 helloWorldText = "Hello, World!" //create a variable named newTextLayer //use the add() method of the artLayers class to create a layer object //assign the object to newTextLayer newTextLayer = docRef.artLayers.add() //use the kind property of the artLayer class to make the layer a text layer newTextLayer.kind = LayerKind.TEXT newTextLayer.textItem.contents = helloWorldText newTextLayer.textItem.position = Array(0.75, 1) newTextLayer.textItem.size = 36 newTextLayer.textItem.color = textColor 2. Save the script, and then open Photoshop and select the script from the Scripts menu (choose File > Script > HelloWorldDoc). Be patient while Photoshop executes your commands one by one. 3. After viewing the document in Photoshop, close Photoshop without saving the document. NOTE: Look up the following classes in the Adobe Photoshop CS4 JavaScript Scripting Reference, or in the ExtendScript Object Model Viewer to see if you understand how you used them in this script: ➤ SolidColor ➤ ArtLayer. Notice that the LayerKind.TEXT value of the kind property uses the LayerKind constant. Constants are always depicted in upper case letters in Photoshop JavaScripts. Applying a wave filter In this section we'll apply a wave filter to the word Hello in our document. This entails the following steps: ➤ Set the document width and height to pixels and then rasterize the text object in the Text Layer. NOTE: Because text is a vector graphic and cannot apply a wave filter to vector graphics, we must first convert the image to a bitmap. Rasterizing converts mathematically defined vector artwork to pixels. For more information on rasterizing, refer to Photoshop Help. ➤ Select the area of the layer to which we want to apply the wave filter. NOTE: See "Defining the area of a selection object" on page 67 in order to understand the code within the script that accomplishes this task.
-
 1
1 -
2
-
3
-
4
-
5
-
6
-
7
-
8
-
9
-
10
-
11
-
12
-
13
-
14
-
15
-
16
-
17
-
18
-
19
-
20
-
21
-
22
-
23
-
24
-
25
-
26
-
27
-
28
-
29
-
30
-
31
-
32
-
33
-
34
-
35
-
36
-
37
-
38
-
39
-
40
-
41
-
42
-
43
-
44
-
45
-
46
-
47
-
48
-
49
-
50
-
51
-
52
-
53
-
54
-
55
-
56
-
57
-
58
-
59
-
60
-
 61
61 -
 62
62 -
 63
63 -
 64
64 -
 65
65 -
 66
66 -
 67
67 -
 68
68 -
 69
69 -
 70
70 -
 71
71 -
72
-
73
-
74
-
75
-
76
-
77
-
78
-
79
-
80
-
81
-
82
-
83
-
84
-
85
-
86
-
87
 |
 |
