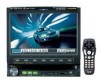
Alpine D900 Owners Manual - Page 28
Blackout Mode On and Off, Demonstration, Switching Display Modes, seconds to start the blackout mode.
 |
UPC - 793276200310
View all Alpine D900 manuals
Add to My Manuals
Save this manual to your list of manuals |
Page 28 highlights
DEMO 2 MUTE/DSP. OFF Switching Display Modes After carrying out the steps 1 to 3 of "To display the DVD mode Screen" explained on page 28, perform the operation described below. Press and hold WIDE/DISP for at least 2 seconds in the visual source. Each press changes the display modes as follows: MODE 1 ↔ MODE 2 ↔ MODE 3 (WIDE) (NORMAL) (CINEMA) MODE1 Rotary encoder WIDE/DISP. SOURCE/POWER SPE.ANA. Blackout Mode On and Off When Blackout mode is turned on, the display will turn off to reduce power consumption. This additional power enhances the sound quality. Press and hold MUTE/DISP. OFF for at least 2 seconds to start the blackout mode. By doing so the display will turn off. • If any button on the unit is pressed during Blackout mode, the function will be displayed for 5 seconds to show the operation before returning to Blackout mode. To cancel Blackout mode, press and hold MUTE/DISP. OFF for at least 2 seconds. Demonstration In Mode 1 (Wide), the monitor displays a normal picture wider to fit in a wide-screen monitor by evenly stretching out the picture horizontally. MODE2 In Mode 2 (Normal), the monitor displays a normal picture at the center of the screen with a vertical black band at each side. MODE3 This unit has a Demonstration feature which simulates the display functions. 1 Press and hold DEMO for at least 2 seconds. Each press toggle between DEMO ON and DEMO OFF. 2 Press and hold DEMO for at least 2 seconds to return to normal operation. In Mode 3 (Cinema), the monitor displays a normal picture by stretching out the picture horizontally and vertically. This mode is good for displaying a cinema type picture at the 16 : 9 ratio. 26-EN
-
 1
1 -
2
-
3
-
4
-
5
-
6
-
7
-
8
-
9
-
10
-
11
-
12
-
13
-
14
-
15
-
16
-
17
-
18
-
19
-
20
-
21
-
22
-
 23
23 -
 24
24 -
 25
25 -
 26
26 -
 27
27 -
 28
28 -
 29
29 -
 30
30 -
 31
31 -
 32
32 -
 33
33 -
34
-
35
-
36
-
37
-
38
-
39
-
40
-
41
-
42
-
43
-
44
-
45
-
46
-
47
-
48
-
49
-
50
-
51
-
52
-
53
-
54
-
55
-
56
-
57
-
58
-
59
-
60
-
61
-
62
-
63
-
64
-
65
-
66
-
67
-
68
-
69
-
70
-
71
-
72
-
73
-
74
-
75
-
76
-
77
-
78
-
79
-
80
-
81
-
82
-
83
 |
 |
