Asko WL6511XXL User manual WL6511XXL Use & Care Guide EN (English UCG 2+1 - Page 24
Installation instructions
 |
View all Asko WL6511XXL manuals
Add to My Manuals
Save this manual to your list of manuals |
Page 24 highlights
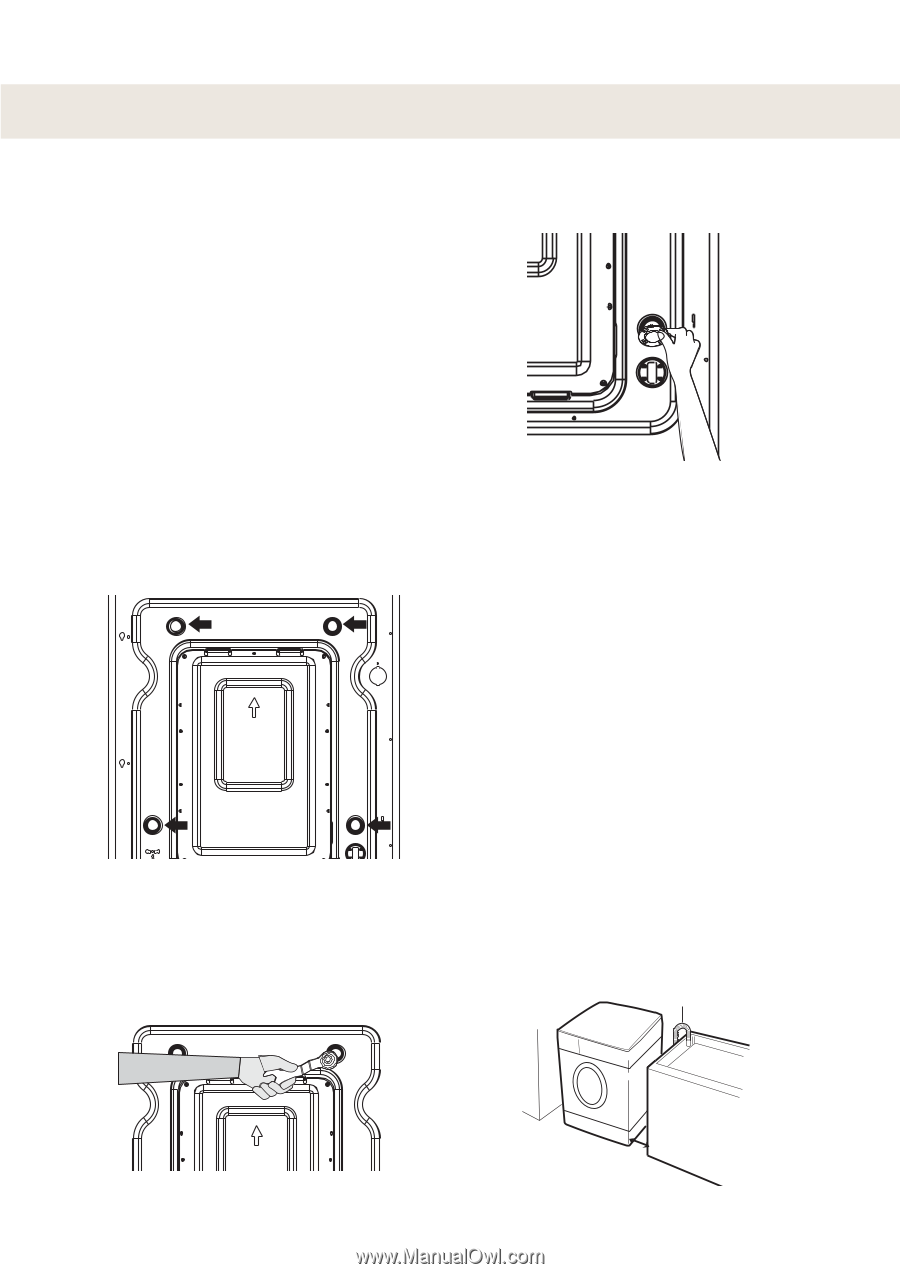
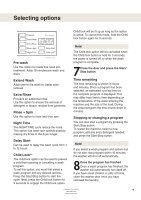
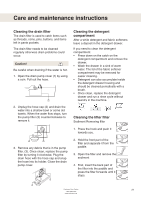
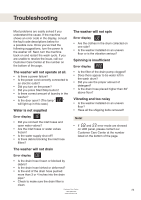
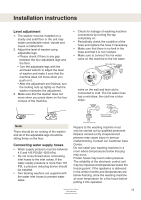
Installation instructions Read these instructions carefully and completely before you install the machine. The installation should be carried out by a qualified person who is familiar with all local codes and ordinances for electrical and plumbing connections. Cosmetic damage must be reported to your dealer within five days from the date of purchase. After unpacking the washer, thoroughly check the unit for cosmetic damage. Removing shipping bolts 1. Before operating the washer, remove the shipping bolts(4ea) along with the rubber. • If the bolts are not removed, it may cause heavy vibration, noise and malfunction. 2. Unscrew the 4 bolts with the wrench supplied. Keep the 4 bolts and wrench for future use. • Whenever the appliance is transported, the transit bolts must be reused. 3. Close holes with supplied cap holders. Location of your washer • Check location where the washer will be installed. Make sure you have everything necessary for correct installation. • Do not place or store your washer below 32 °F (0 °C) to avoid any damage from freezing. • Do not place or store laundry products on top of washer at any time. • Install the washer on a horizontal solid floor. If the washer is installed on an unsuitable floor, it could make considerable noise, vibrate severely and cause a malfunction. If the washer is not level, adjust the leveling legs up or down to make the unit level. • Ventilation openings must not be obstructed by carpeting when the washer is installed on a carpeted floor. • Leave some space. There should be at least 1/2" clearance on all sides of the unit. Drain Hose Washer Laundry Tub approx. 1/2" 12mm 24 Customer Care Center 1-800-898-1879 www.askousa.com
-
 1
1 -
2
-
3
-
4
-
5
-
6
-
7
-
8
-
9
-
10
-
11
-
12
-
13
-
14
-
15
-
16
-
17
-
18
-
 19
19 -
 20
20 -
 21
21 -
 22
22 -
 23
23 -
 24
24 -
 25
25 -
 26
26 -
 27
27 -
 28
28 -
 29
29 -
30
-
31
 |
 |