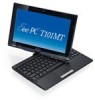
Asus Eee PC T101MT User Manual
Asus Eee PC T101MT Manual
 |
View all Asus Eee PC T101MT manuals
Add to My Manuals
Save this manual to your list of manuals |
Asus Eee PC T101MT manual content summary:
- Asus Eee PC T101MT | User Manual - Page 1
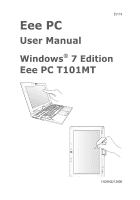
E5119 Eee PC User Manual Windows® 7 Edition Eee PC T101MT 15G06Q212000 - Asus Eee PC T101MT | User Manual - Page 2
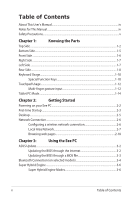
1-12 Tablet PC Mode...1-14 Chapter 2: Getting Started Powering on your Eee PC...2-2 First-time Startup...2-3 Desktop...2-5 Network Connection...2-6 Configuring a wireless network connection 2-6 Local Area Network 2-7 Browsing web pages 2-10 Chapter 3: Using the Eee PC ASUS Update - Asus Eee PC T101MT | User Manual - Page 3
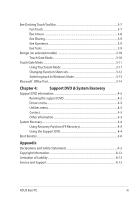
...4-3 Other information 4-3 System Recovery...4-4 Using Recovery Partition (F9 Recovery 4-4 Using the Support DVD 4-4 Boot Booster...4-6 Appendix Declarations and Safety Statements A-2 Copyright Information...A-12 Limitation of Liability...A-13 Service and Support...A-13 ASUS Eee PC iii - Asus Eee PC T101MT | User Manual - Page 4
major sections of this User's Manual: 1. Knowing the Parts Provides information on the Eee PC's components. 2. Getting Started Provides information on getting started with the Eee PC. 3. Using the Eee PC Provides information on using the Eee PC's utilities. 4. Support DVD and System Recovery Gives - Asus Eee PC T101MT | User Manual - Page 5
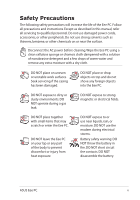
Precautions The following safety precautions will increase the life of the Eee PC. Follow all precautions and instructions. Except as described in this manual, refer all servicing to qualified personnel. Do not use damaged power cords, accessories, or other peripherals. Do not use strong solvents - Asus Eee PC T101MT | User Manual - Page 6
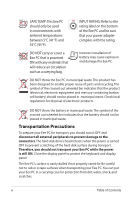
indicates that the battery should not be placed in municipal waste. Transportation Precautions To prepare your Eee PC for transport, you should turn it OFF and disconnect all external peripherals to prevent damage to the connectors. The hard disk drive's head retracts when the power is turned OFF - Asus Eee PC T101MT | User Manual - Page 7
to use battery power, be sure to fully charge your battery pack before going on long trips. Remember that the power adapter charges the battery pack as long as it is plugged into the computer and an AC power source. Be aware that it takes much longer to charge the battery pack when the Eee PC is in - Asus Eee PC T101MT | User Manual - Page 8
viii Table of Contents - Asus Eee PC T101MT | User Manual - Page 9
Top Side Bottom Side Right Side Left Side Front Side Rear Side Keyboard Usage Touchpad Usage Tablet PC Mode 1 Knowing the Parts - Asus Eee PC T101MT | User Manual - Page 10
Top Side Refer to the diagram below to identify the components on this side of the Eee PC. The top side may vary in appearance depending on model. 1 2 3 4 5 6 7 8 9 The keyboard differs for each territory. 1-2 Chapter 1: Knowing the Parts - Asus Eee PC T101MT | User Manual - Page 11
the Eee PC. The power switch only works when the display panel is opened. Power Indicator The power indicator lights when the Eee PC is turned ON and blinks slowly when the Eee PC is in the Suspend-to-RAM (Sleep) mode. This indicator is OFF when the Eee PC is turned OFF. 5 Express Gate Button (on - Asus Eee PC T101MT | User Manual - Page 12
charging status as follows: Powered ON / Standby mode High battery power (95%-100%) Medium battery power (10%-94%) With Adapter Green ON Orange ON Without Adapter Off Off Low battery power (0%-10%) Orange Blinking Orange Blinking Powered OFF High battery power (95%-100%) Medium battery power - Asus Eee PC T101MT | User Manual - Page 13
the keys can be depressed) and palm rest for both hands. 9 Touchpad and Buttons The touchpad and its buttons comprises a pointing device that provides the same functions as a desktop mouse. Multi-finger gesture input is available to allow easy web and document navigation. ASUS Eee PC 1-5 - Asus Eee PC T101MT | User Manual - Page 14
temperatures are normal during charging or operation. DO NOT use on soft surfaces such as beds or sofas, which may hinder heat dissipation. DO NOT PUT THE Eee PC ON YOUR LAP OR OTHER PARTS OF THE BODY TO AVOID INJURY FROM THE HEAT. 1 Battery Lock - Manual The manual battery lock is used to keep - Asus Eee PC T101MT | User Manual - Page 15
automatically charged when connected to an AC power source and maintains power to the Eee PC when AC power is not connected. This allows use when moving temporarily between locations. Battery time varies by usage and by the specifications for this Eee PC.The battery pack cannot be disassembled - Asus Eee PC T101MT | User Manual - Page 16
connected in a series up to 12Mbits/sec (USB 1.1) and 480Mbits/sec (USB 2.0). Also, the USB supports hot-swapping function. Left Side Refer to the diagram below to identify the components on this side of the Eee PC. 1 23 4 1 Air Vents The air vents allow cool air to enter and warm air to exit - Asus Eee PC T101MT | User Manual - Page 17
to a local network. The built-in connector allows convenient use without additional adapters. 3 Display (Monitor) Output The 15-pin D-sub monitor port supports a standard VGA- compatible device such as a monitor or projector to allow viewing on a larger external display. ASUS Eee PC 1-9 - Asus Eee PC T101MT | User Manual - Page 18
The supplied power adapter converts AC power to DC power for use with this jack. Power supplied through this jack supplies power to the Eee PC and charges the internal battery pack.To prevent damage to the Eee PC and battery pack, always use the supplied power adapter. THE ADAPTER MAY BECOME - Asus Eee PC T101MT | User Manual - Page 19
whenever your hot key locations do not match the manual. Zz Icon (F1): Places the Eee PC in sleep mode (Suspend-to-RAM). Radio Tower (F2) (Wireless Models Only):Toggles the . LCD/Monitor Icons (F8): Toggles between the Eee PC's LCD display and an external monitor. ASUS Eee PC 1-11 - Asus Eee PC T101MT | User Manual - Page 20
the speaker volume. Super Hybrid Engine (Fn+Space Bar): Toggles among various power saving modes. The selected mode is shown on the display. Num Lk ( . End (→): Press to move the pointer to the end of the line. Windows icon: Displays the start menu. Menu with pointer icon : Activates the properties - Asus Eee PC T101MT | User Manual - Page 21
finger scrolling up/down or left/right Three-finger page up/down Applications Adobe reader, Windows Photo Viewer Adobe reader, Windows Photo Viewer Adobe reader, MS Word, MS Excel Adobe reader, MS Word, MS Excel make a clockwise or counterclockwise rotation based on your needs. ASUS Eee PC 1-13 - Asus Eee PC T101MT | User Manual - Page 22
up/down or left/right- Use two fingertips to slide up/down or left/right on the touchpad to scroll a window up/down or left/ right. If your display window includes several sub-windows, move the pointer on that pane before scrolling. Three-finger page up/down- Use three fingers to move horizontally - Asus Eee PC T101MT | User Manual - Page 23
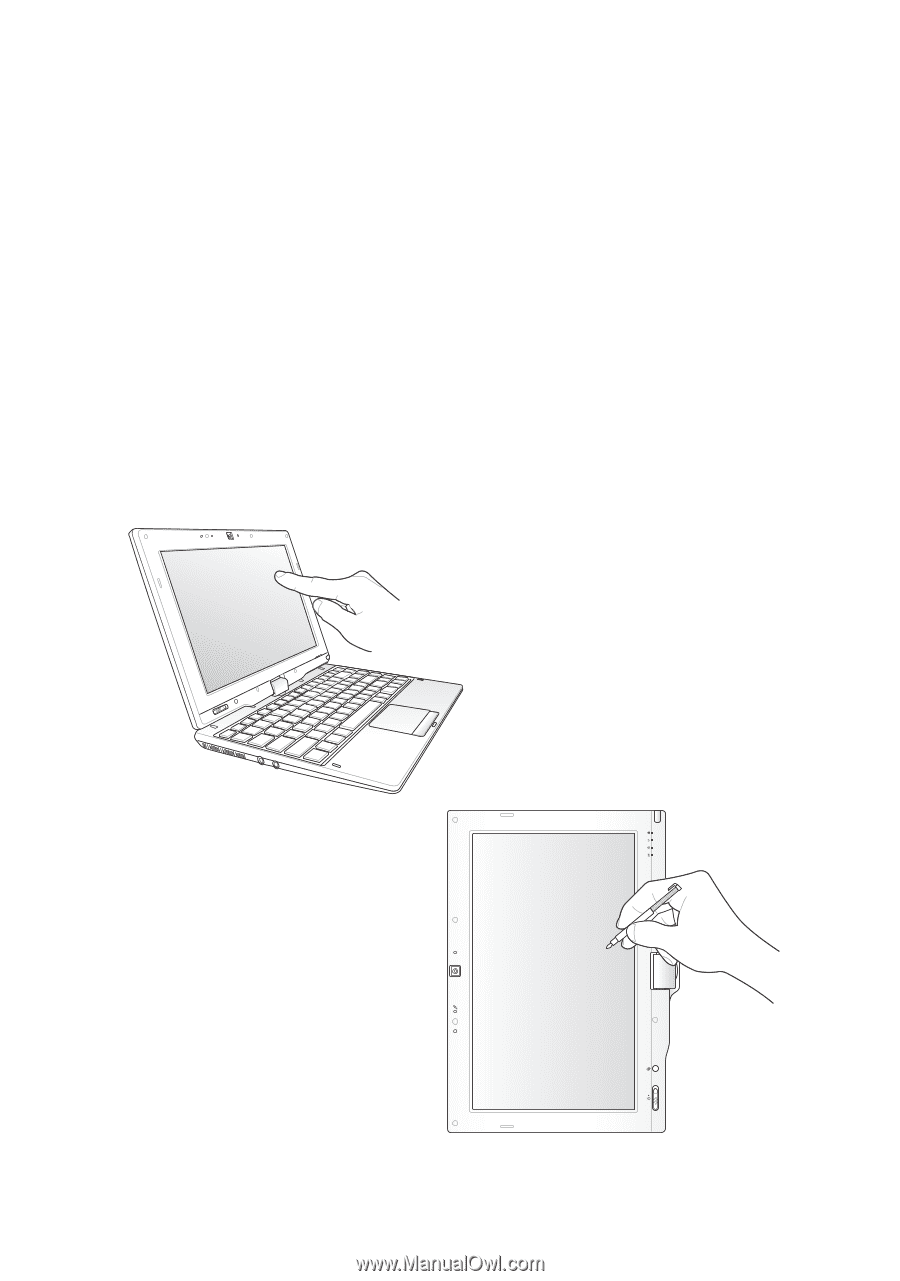
The following are illustrations for using the tablet PC function. 1. Firmly hold the edge of your 2. Rotate the display panel Eee PC, and then open the clockwise and vertically to a display panel to a 90° angle, work properly under the desktop rotation angle of 90° and 270°. ASUS Eee PC 1-15 - Asus Eee PC T101MT | User Manual - Page 24
1-16 Chapter 1: Knowing the Parts - Asus Eee PC T101MT | User Manual - Page 25
Powering on your Eee PC First-time Startup Desktop Network Connection 2 Getting Started - Asus Eee PC T101MT | User Manual - Page 26
your Eee PC These are only quick instructions for using your Eee PC. 1. Install the battery pack 2. Connect the AC power adapter 1 3 2 3 2 1 3. Turn ON the Eee PC Damage may occur if you use a different adapter to power the Eee PC. You may damage both your battery pack and the Eee PC with - Asus Eee PC T101MT | User Manual - Page 27
Eee PC, the Windows wizard will launch automatically and lead you through setting up your preferences and some basic information. Follow the wizard instructions to finish the initialization: The actual Windows if you want. Click then click Next to continue. Next to continue. ASUS Eee PC 2-3 - Asus Eee PC T101MT | User Manual - Page 28
5. Read the end user license 6. Click Use recommended agreement and check the settings to get the latest two boxs before I accept the important updates. license terms. Click Next to continue. 7. Specify the time zone you are 8. Connect to a wireless network in and the local date and time. - Asus Eee PC T101MT | User Manual - Page 29
9. Select the network's location. 10. The initialization is finished. Click Next to continue. Desktop There are several shortcuts on the desktop. Double-click would form minimized icons in the Notification area. The actual Desktop screen may vary according to different models. ASUS Eee PC 2-5 - Asus Eee PC T101MT | User Manual - Page 30
Network Connection Configuring a wireless network connection 1. Click the wireless network icon with an orange star Windows® Notification area. in the If the wireless connection icon does not show in the Notification area, activate the wireless LAN function by pressing + ( + ) - Asus Eee PC T101MT | User Manual - Page 31
IP / PPPoE network connection: 1. Click the network icon with a yellow warning triangle in the Windows® Notification area and select Open Network and Sharing Center. 2. Click Change adapter settings in the left blue pane. 3. Right-click Local Area Connection and select Properties. ASUS Eee PC 2-7 - Asus Eee PC T101MT | User Manual - Page 32
4. Click Internet Protocol Version 4(TCP/IPv4) and click Properties. 5. Click Obtain an IP address automatically and click OK. (Continue the following steps if using PPPoE) 6. Return to the Network and Sharing Center and then click Set up a new connection or network. 2-8 Chapter 2: Getting - Asus Eee PC T101MT | User Manual - Page 33
your User name and, Password, and Connection name. Click Connect. 10. Click Close to finish the configuration. 11. Click the network icon in the taskbar and click the connection you just created. 12. Enter your user name and password. Click Connect to connect to the Internet. ASUS Eee PC 2-9 - Asus Eee PC T101MT | User Manual - Page 34
connection. Contact your Internet Service Provider (ISP) if you have problems connecting to the network. Browsing web pages After you finish the network setup, click Internet Explorer on the desktop and start enjoying net surfing. Visit our Eee PC homepage (http://eeepc.asus.com) to obtain the - Asus Eee PC T101MT | User Manual - Page 35
ASUS Update Bluetooth Connection (on selected models) Super Hybrid Engine Eee Docking Touch Tool Bar Boingo (on selected models) Touch Gate Mode Microsoft® Office Trial 3 Using the Eee PC - Asus Eee PC T101MT | User Manual - Page 36
the support DVD that comes with the Eee PC package. ASUS Update requires an Internet connection either through a network or an Internet Service Provider (ISP). Updating the BIOS through the Internet To update the BIOS through the Internet 1. Launch the ASUS Update utility from the Windows® desktop - Asus Eee PC T101MT | User Manual - Page 37
> ASUS > ASUSUpdate for EeePC> ASUSUpdate. The ASUS Update main window appears. 2. Select Update BIOS from file from the drop‑down menu, then click Next. 3. Locate the BIOS file from the Open window, then click Open. 4. Follow the screen instructions to complete the update process. ASUS Eee PC 3-3 - Asus Eee PC T101MT | User Manual - Page 38
ON or WLAN & Bluetooth ON is shown. 2. From Control Panel, go to Network and Internet > Network and Sharing Center and then click Change adapter settings in the left blue pane. 3. Right-click Bluetooth Network Connection and select View Bluetooth Network Devices. 3-4 Chapter 3: Using the Eee PC - Asus Eee PC T101MT | User Manual - Page 39
4. Click Add a device to look for 5. Select a Bluetooth-enabled new devices. device from the list and click Next. 6. Enter the Bluetooth security code into your device and start pairing. 7. The paired relationship is successfully built. Click Close to finish the setting. ASUS Eee PC 3-5 - Asus Eee PC T101MT | User Manual - Page 40
key toggles power savings between various power saving modes. The power saving modes control many aspects of your Eee PC to maximize performance versus battery time.The selected mode is shown on the display. To change the power mode • Click Start > All Programs > ASUS > SuperHybridEngine. • Press - Asus Eee PC T101MT | User Manual - Page 41
Notes / Memos The Windows Sticky Notes / Memos tool allows you to create a digital sticky note and post it to your desktop. While using the Windows Journal / NotePad and Sticky Notes / Memos tools, you may set the PenWrite function to Pen Mode for easy writing on the touch screen. ASUS Eee PC 3-7 - Asus Eee PC T101MT | User Manual - Page 42
. Desktop Gadget Gallery Allows you to put and arrange Windows Gadgets on the Windows desktop. Eee Amuse ASUS @Vibe ASUS @Vibe allows you to enjoy online entertainment contents including Radio, Live TV and Games, etc. The ASUS @Vibe service contents differ for each territory. Game Park Game Park - Asus Eee PC T101MT | User Manual - Page 43
to watch online videos with large control buttons that are convenient for touch screen operation. YouTube XL requires an Internet connection to operate. Eee Tools Live Update Keeps your Eee PC up-to-date by checking the online updates. Personalize Handwriting Recognition / Handwriting/Keyboard The - Asus Eee PC T101MT | User Manual - Page 44
/text size on your Eee PC screen. LocaleMe LocaleMe is a web mapping service application, offering easy search services with a special price via the pre-installed Boingo utility. Use one account at more than 100,000 hotspots around the world, including airports, hotels, cafes and restaurants. 3-10 - Asus Eee PC T101MT | User Manual - Page 45
more functions The screen captures shown in this section are for reference purposes only and may not exactly match what you see on your screen. ASUS Eee PC 3-11 - Asus Eee PC T101MT | User Manual - Page 46
the function icon to an list, simply drag the icon to an empty slot above the function empty desktop space. list. 3-12 Chapter 3: Using the Eee PC - Asus Eee PC T101MT | User Manual - Page 47
can freely switch your desktop to Windows mode and Touch Gate mode back and forth. 1. Slide leftward or rightward on 2. The desktop switches back to any empty area of the Touch Windows mode. Gate main screen. You may also press the Home Key ( / ) to return to Windows Mode. ASUS Eee PC 3-13 - Asus Eee PC T101MT | User Manual - Page 48
can enjoy Microsoft Office Suite free trial for 60 days. Do the following instructions to start the free trial. 1. Ensure that your Eee PC is connected to the Internet and doubleclick Microsoft Office 60 Day Trial - Online on the desktop. 2. Click TRY NOW. 3. Enter your E-mail address and click - Asus Eee PC T101MT | User Manual - Page 49
Support DVD information System Recovery Boot Booster 4 Support DVD & System Recovery - Asus Eee PC T101MT | User Manual - Page 50
can install to avail all the features. Running the support DVD Insert the support DVD in the external optical drive.The DVD automatically displays the Drivers menu if Autorun is enabled in your computer. Click an icon to display support DVD/ Eee PC information Click an item to install If Autorun is - Asus Eee PC T101MT | User Manual - Page 51
when the system detects installed devices. Install the necessary drivers to activate the devices. Utilities menu The Utilities menu shows the applications that the Eee PC supports. Contact Click the Contact tab to display the ASUS contact information. Other information The icons on the top right - Asus Eee PC T101MT | User Manual - Page 52
Partition The Recovery Partition is a space reserved on your hard disk drive used to restore the operating system, drivers, and utilities installed on your Eee PC at the factory. Ensure to connect your Eee PC to the AC power adapter before using F9 recovery to avoid recovery failure. Using the - Asus Eee PC T101MT | User Manual - Page 53
system recovery is completed, restart the computer. 6. Set up your language, time zone, keyboard, computer name, and user name to enter the Windows® OS. This support DVD is for Eee PC only. DO NOT use it on other computers. Visit the ASUS website at www.asus.com for any updates. ASUS Eee PC 4-5 - Asus Eee PC T101MT | User Manual - Page 54
The Boot Booster item in BIOS setup helps shorten your Eee PC bootup time. However, you MUST disable this BIOS item before you change any Eee PC components or perform system recovery (from USB flash disk, external optical drive or hidden partition). Follow the instructions below to disable Boot - Asus Eee PC T101MT | User Manual - Page 55
Declarations and Safety Statements Copyright Information Limitation of Liability Service and Support A Appendix - Asus Eee PC T101MT | User Manual - Page 56
comply with the limits for a class B digital device, pursuant to Part 15 of the Federal installed and used in accordance with the instructions, may cause harmful interference to radio /TV technician for help. The use of a shielded-type power cord is required in order to meet FCC emission limits and - Asus Eee PC T101MT | User Manual - Page 57
co-located or operating in conjunction with any other antenna or transmitter. The measured SAR levels evaluated are incompliance with the FCC RF exposure guidelines. Eee PC T101MT Max. SAR Measurement (1g) AR5B95 (AW-NE785H) 11b: 0.630 W/kg 11g: 0.583 W/kg 11n 20M: 0.617 W/kg 11n 40M: 0.621 W/kg - Asus Eee PC T101MT | User Manual - Page 58
Declaration of Conformity (R&TTE directive 1999/5/EC) The following items were completed and are considered relevant and sufficient: • Essential requirements as in [Article 3] • Protection requirements for health and safety as in [Article 3.1a] • Testing for electric safety according to [EN 60950] • - Asus Eee PC T101MT | User Manual - Page 59
to the licensed service (i.e. co-channel Mobile Satellite systems) this device is intended to be operated indoors and away from windows to provide maximum shielding. Equipment (or its transmit antenna) that is installed outdoors is subject to licensing. Eee PC T101MT Max. SAR Measurement (1g - Asus Eee PC T101MT | User Manual - Page 60
10 through 13 inclusive operate in the band 2446.6 MHz to 2483.5 MHz. There are few possibilities for outdoor use: On private property or on the private property of public persons, use is subject to a preliminary authorization procedure by the Ministry of Defense, with maximum authorized power - Asus Eee PC T101MT | User Manual - Page 61
, for example, near a bath tub, wash bowl, kitchen sink or laundry tub, in a wet basement or near a swimming pool. • DO NOT use the Eee PC during an electrical storm. There may be a remote risk of electric shock from lightning. • DO NOT use the Eee PC in the vicinity of a gas leak. ASUS Eee PC A-7 - Asus Eee PC T101MT | User Manual - Page 62
chemical reaction. • Do not dispose the Eee PC battery pack in a fire, as they may explode. Check with local codes for possible special disposal instructions to reduce the risk of injury to persons due to fire or explosion. • Do not use power adapters or batteries from other devices to reduce the - Asus Eee PC T101MT | User Manual - Page 63
life cycle of ASUS product is in line with global environmental regulations. In addition, ASUS Services ASUS batteries and other components as well as the packaging materials. Please go to http://csr.asus.com/english/Takeback.htm for detail recycling information in different region. ASUS Eee PC - Asus Eee PC T101MT | User Manual - Page 64
batteries) CAUTION! Danger of explosion if battery is incorrectly replaced. Replace only with the same or equivalent type recommended by the manufacturer. Dispose of used batteries according to the manufacturer's instructions batteri af samme fabrikat og type. Levér det brugte batteri batteri enligt - Asus Eee PC T101MT | User Manual - Page 65
aux instructions du fabricant. (French) ADVARSEL! Eksplosjonsfare ved feilaktig skifte av batteri. Benytt samme batteritype eller en tilsvarende type anbefalt av apparatfabrikanten. Brukte batterier kasseres i henhold til fabrikantens instruksjoner. (Norwegian) (Japanese) Russian) ASUS Eee PC - Asus Eee PC T101MT | User Manual - Page 66
or by any means, except documentation kept by the purchaser for backup purposes, without the express written permission of ASUSTeK COMPUTER INC. ("ASUS"). ASUS PROVIDES THIS MANUAL "AS IS"WITHOUT WARRANTY OF ANY KIND, EITHER EXPRESS OR IMPLIED, INCLUDING BUT NOT LIMITED TO THE IMPLIED WARRANTIES OR - Asus Eee PC T101MT | User Manual - Page 67
under this Warranty Statement, up to the listed contract price of each product. ASUS will only be responsible for or indemnify you for ASUS, ITS SUPPLIERS OR YOUR RESELLER IS INFORMED OF THEIR POSSIBILITY. Service and Support Visit our multi-language web site at http://support.asus.com ASUS Eee PC - Asus Eee PC T101MT | User Manual - Page 68
Manufacturer Address, City Country Authorized Representative in Europe Address, City Country ASUSTek COMPUTER INC. No. 150, LI-TE RD., PEITOU, TAIPEI 112, TAIWAN R.O.C TAIWAN ASUS COMPUTER GmbH HARKORT STR. 21-23, 40880 RATINGEN GERMANY A-14 Appendix
-
 1
1 -
 2
2 -
 3
3 -
 4
4 -
 5
5 -
 6
6 -
 7
7 -
8
-
9
-
10
-
11
-
12
-
13
-
14
-
15
-
16
-
17
-
18
-
19
-
20
-
21
-
22
-
23
-
24
-
25
-
26
-
27
-
28
-
29
-
30
-
31
-
32
-
33
-
34
-
35
-
36
-
37
-
38
-
39
-
40
-
41
-
42
-
43
-
44
-
45
-
46
-
47
-
48
-
49
-
50
-
51
-
52
-
53
-
54
-
55
-
56
-
57
-
58
-
59
-
60
-
61
-
62
-
63
-
64
-
65
-
66
-
67
-
68
 |
 |
15G06Q212000
Eee PC
User Manual
Windows
®
7 Edition
Eee PC T101MT
E5119