Asus N10J User Manual - Page 54
Fingerprint Registration on selected models
 |
UPC - 884840316978
View all Asus N10J manuals
Add to My Manuals
Save this manual to your list of manuals |
Page 54 highlights
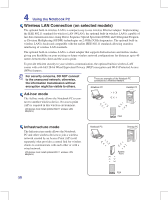
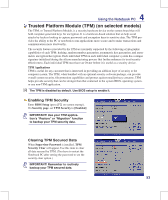
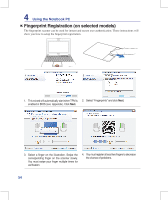
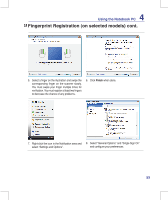
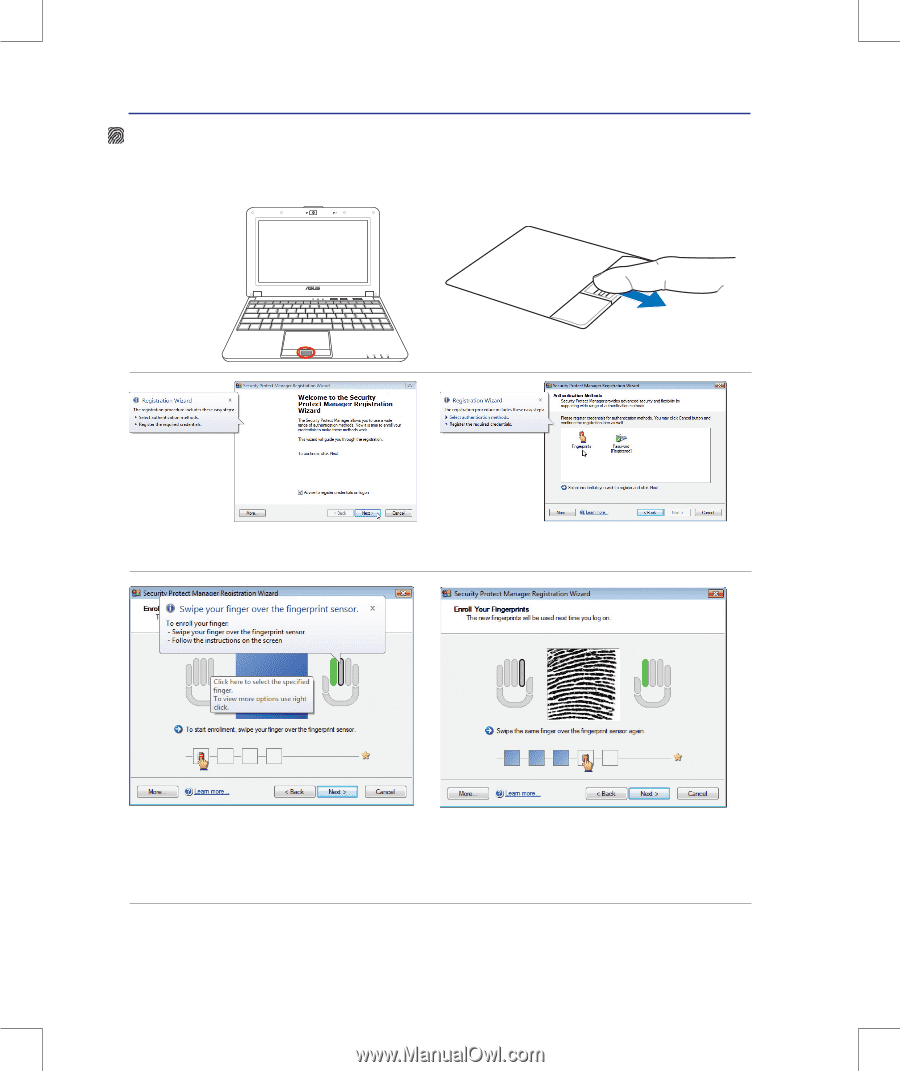
4 Using the Notebook PC Fingerprint Registration (on selected models) The fingerprint scanner can be used for instant and secure user authentication. These instructions will show you how to setup the fingerprint registration. 1. This wizard will automatically start when TPM is 2. Select "Fingerprints" and click Next. enabled in BIOS (see Appendix). Click Next. 3. Select a finger on the illustration. Swipe the corresponding finger on the scanner slowly. You must swipe your finger multiple times for verification. 4. You must register at least two fingers to decrease the chance of problems. 54
-
 1
1 -
2
-
3
-
4
-
5
-
6
-
7
-
8
-
9
-
10
-
11
-
12
-
13
-
14
-
15
-
16
-
17
-
18
-
19
-
20
-
21
-
22
-
23
-
24
-
25
-
26
-
27
-
28
-
29
-
30
-
31
-
32
-
33
-
34
-
35
-
36
-
37
-
38
-
39
-
40
-
41
-
42
-
43
-
44
-
45
-
46
-
47
-
48
-
 49
49 -
 50
50 -
 51
51 -
 52
52 -
 53
53 -
 54
54 -
 55
55 -
 56
56 -
 57
57 -
 58
58 -
 59
59 -
60
-
61
-
62
-
63
-
64
-
65
-
66
-
67
-
68
-
69
-
70
-
71
-
72
-
73
-
74
-
75
-
76
-
77
-
78
-
79
-
80
-
81
-
82
-
83
-
84
-
85
-
86
-
87
-
88
-
89
-
90
-
91
 |
 |
54
4
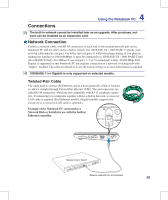
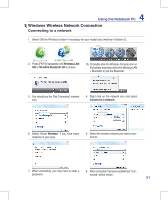
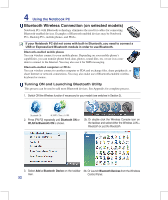
Using the Notebook PC
Fingerprint Registration (on selected models)
The fingerprint scanner can be used for instant and secure user authentication. These instructions will
show you how to setup the fingerprint registration.
1�
This wizard will automatically start when TPM is
enabled in BIOS (see
Appendix)� Click
Next.
2� Select “Fingerprints” and click
Next.
3� Select a finger on the illustration� Swipe the
corresponding finger on the scanner slowly�
You must swipe your finger multiple times for
verification�
4�
You must register at least two fingers to decrease
the chance of problems�