Asus ROG STRIX LC II 240 ARGB ROG STRIX LC II ARGB Series Quick Start Guide Mu - Page 10
Befestigen Sie die Intel Rückplatte an der Unterseite des Motherboards.
 |
View all Asus ROG STRIX LC II 240 ARGB manuals
Add to My Manuals
Save this manual to your list of manuals |
Page 10 highlights
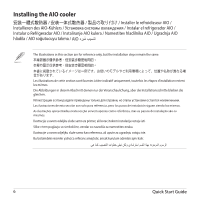
B. Attach the Intel backplate to the bottom of the motherboard. B. 將 Intel B. 將 Intel B. Intel B. Attachez le panneau arrière Intel sur la face inférieure de la carte mère. B. Befestigen Sie die Intel Rückplatte an der Unterseite des Motherboards. B B. Acople la placa posterior de Intel a la parte inferior de la placa base. B. Encaixe a placa de suporte Intel na parte inferior da placa principal. B. Prikačite kliznu ploču Intela za dno matične ploče. B. Intelovo nosilno ploščo pritrdite na spodnji del matične plošče. B. Pričvrstite Intel stražnju ploču na donji dio matične ploče. B. Intel arka plakasını anakartın altına takın. Intel B 10 Quick Start Guide
-
 1
1 -
2
-
3
-
4
-
 5
5 -
 6
6 -
 7
7 -
 8
8 -
 9
9 -
 10
10 -
 11
11 -
 12
12 -
 13
13 -
 14
14 -
 15
15 -
16
-
17
-
18
-
19
-
20
-
21
-
22
-
23
-
24
-
25
-
26
 |
 |

Quick Start Guide
10
B.
Attach the Intel backplate to the bottom of the motherboard.
B.
將 Intel 支架安裝至主機板背面。
B.
將 Intel 支架安裝到主板背面。
B.
Intel 用バックプレートをマザーボードの背面に取り付けます。
B.
Attachez le panneau arrière Intel sur la face inférieure de la carte mère.
B.
Befestigen Sie die Intel Rückplatte an der Unterseite des Motherboards.
B.
Установите усилительную пластину в соответствии с технологическими отверстиями материнской платы.
B.
Acople la placa posterior de Intel a la parte inferior de la placa base.
B.
Encaixe a placa de suporte Intel na parte inferior da placa principal.
B.
Prikačite kliznu ploču Intela za dno matične ploče.
B.
Intelovo nosilno ploščo pritrdite na spodnji del matične plošče.
B.
Pričvrstite Intel stražnju ploču na donji dio matične ploče.
B.
Intel arka plakasını anakartın altına takın.
.»¹
وحة ا
³
ال
²
بأسف
Intel
بـ
Ƹ
الخ
²
الح¸م
Ç
و
³
ال
²
وص
.
B