Audiovox SRSIR001FM Installation Manual - Page 8
System, Installation
 |
UPC - 044476009044
View all Audiovox SRSIR001FM manuals
Add to My Manuals
Save this manual to your list of manuals |
Page 8 highlights
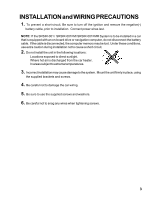
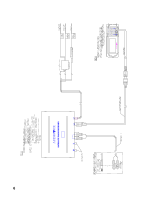
SYSTEM INSTALLATION RADIO RECEIVER UNIT (RRU) PROCEDURE for HORIZONTAL INSTALLATION of the RRU 1. Attach the mounting brackets to each side of the RRU, using the 4 Phillips Round Head Screws (4mm x 8mm). Bracket Phillips Head Screws (4mm x 8mm) used in 4 places 2. Determine the mounting location and drill 4x 1/8" (4mm) mounting holes. WARNING Never mount the unit near the fuel tank. 4x 1/8" (4mm) mounting holes Carpet NOTE:If mounting surface is carpeted, use caution when drilling holes to prevent drill bit from catching on carpet. Cut holes in carpet before drilling into subsurface. 3. Mount the unit in place, using 4 Self-tapping Screws (5mm x 15mm), w/Flat Washers and Lock Washers. Use RTV (silicone sealer) on screw threads or around the holes to prevent moisture intrusion. Self-tapping Screw (5mm x 15mm), w/Flat Washers and Lockwashers used in 4 places Bracket RRU Carpet 8
-
 1
1 -
2
-
 3
3 -
 4
4 -
 5
5 -
 6
6 -
 7
7 -
 8
8 -
 9
9 -
 10
10 -
 11
11 -
 12
12
 |
 |
