Audiovox VBDV56 Owners Manual - Page 7
H. Using External Audio/Video Sources, I. Using Headphones
 |
UPC - 044476013690
View all Audiovox VBDV56 manuals
Add to My Manuals
Save this manual to your list of manuals |
Page 7 highlights
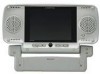
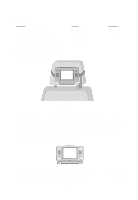
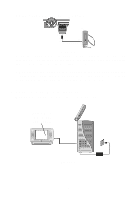
Using the DIN cable supplied with the VBDV56, connect one end of the DIN cable to the Monitor Port (Input) located on the side of the Monitor. Connect the other end of the DIN cable to any Monitor Port (Output) on the VBP5000. When the VBP5000 is operational, audio/video signals, power (12 Volts DC) and Infrared control signals are routed through the DIN cable to the Monitor. Since the Monitor is deriving power from the VBP5000, there is no need for another power source to be connected to DC 12V IN jack located on the Monitor. H. Using External Audio/Video Sources (Refer to Figure 7) With power applied to the Monitor, plug the video output from an auxiliary source such as camcorder, Video Game, DVD Player, Video Cassette Player, etc. into the yellow Video In jack, and the Audio L and Audio R into the applicable jacks on the of the Monitor, which take priority over the Monitor Port. Figure 7 I. Using Headphones (Refer to Figure 7) Optional wired headphones may be used with the "Video In a Bag" System. Simply plug in the headset to either Headphone 1 jack or Headphone 2 jack on the left side of the monitor. NOTE: Using Headphone 1 jack will disconnect the internal speakers. J. Operation (Refer to Figure 3) 1. Press the POWER ON/OFF button to turn the Monitor on. The POWER LED will light. 2. Use the BRIGHTNESS UP/DOWN control to adjust the picture to desired setting. 3. Use the VOLUME UP/DOWN control to decrease or increase volume level. 6
-
 1
1 -
 2
2 -
 3
3 -
 4
4 -
 5
5 -
 6
6 -
 7
7 -
 8
8 -
 9
9 -
 10
10 -
 11
11
 |
 |
