Audiovox VM9311 Instruction Manual
Audiovox VM9311 - In-Dash DVD/CD Receiver Manual
 |
UPC - 043258302991
View all Audiovox VM9311 manuals
Add to My Manuals
Save this manual to your list of manuals |
Audiovox VM9311 manual content summary:
- Audiovox VM9311 | Instruction Manual - Page 1
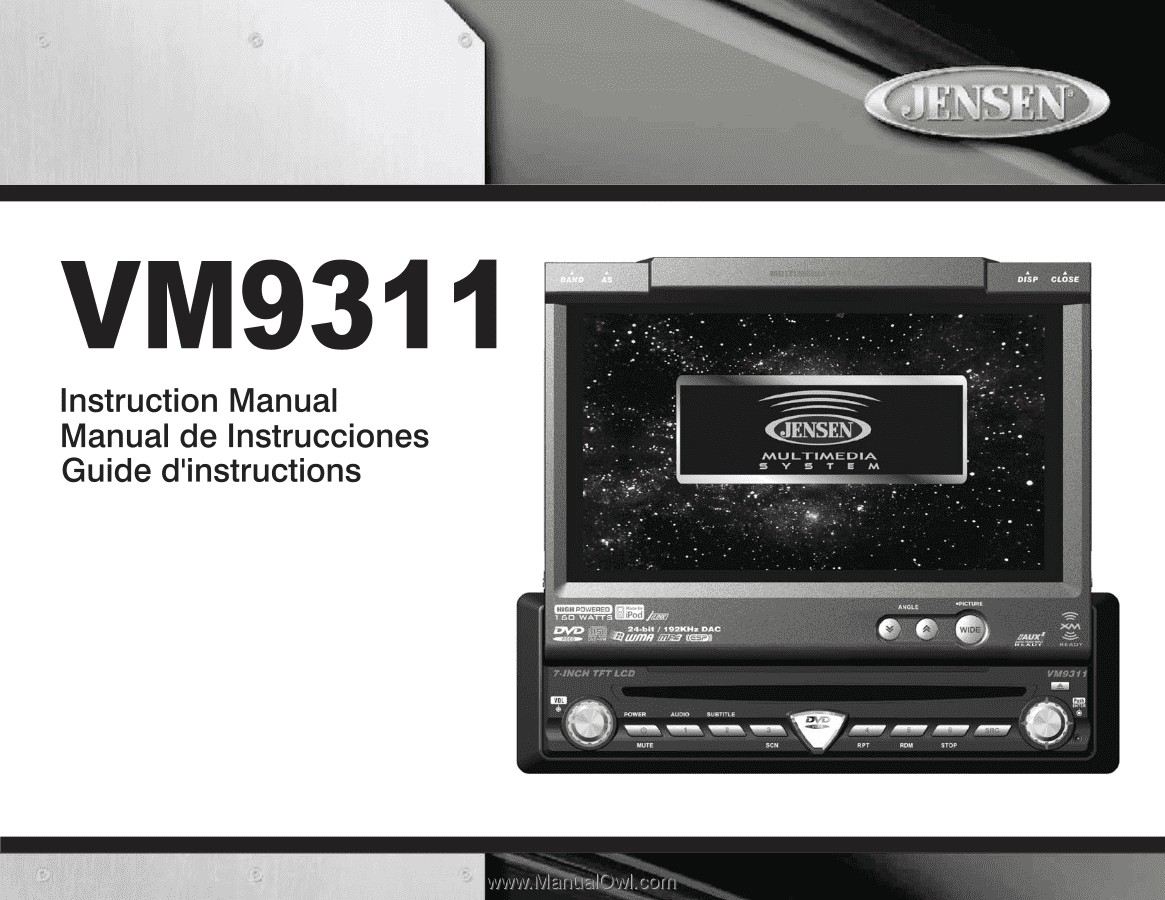
VM9311 Instruction Manual Manual de Instrucciones Guide d'instructions - Audiovox VM9311 | Instruction Manual - Page 2
- Audiovox VM9311 | Instruction Manual - Page 3
product. We hope you will find the instructions in this owner's manual clear and easy to follow. If you take a few minutes to look through it, you'll learn how to use all the features of your new Jensen VM9311 Mobile Multimedia AM/FM/DVD Receiver for maximum enjoyment. Preparation ...1 Features - Audiovox VM9311 | Instruction Manual - Page 4
...45 Capítulo Directo / Selección de Pista 45 Viendo un Ángulo de Imagen Alterno (DVD Solamente 45 Zoom (Acercamiento de imagen 45 Discos con Lenguaje Múltiple (DVD Solamente 45 PBC (Control de Reproducción) (VCD Solamente 45 Información de Reproducción 45 Información de Disco General 46 - Audiovox VM9311 | Instruction Manual - Page 5
instructions dans ce guide de propriétaire claires et faciles à suivre . Prenez quelques minutes à le consulter, vous apprendrez à utiliser toutes les fonctions de votre nouvelle radio Jensen au menu DVD 72 code d'identification 79 Sélectionner une station 79 Mode de pré-réglage 79 Mode de guide - Audiovox VM9311 | Instruction Manual - Page 6
iv - Audiovox VM9311 | Instruction Manual - Page 7
II Outboard Media Module • XM Radio and iPod XM Ready • Requires Optional Terk XMD1000 Tuner Box • Requires Optional Terk XMDJEN100 or Jensen JXMC XM Cables • Advanced display shows the artist, song title, and XM channel and category at a glance • Direct Channel entry Made for iPod • Controls and - Audiovox VM9311 | Instruction Manual - Page 8
a short circuit, be sure to turn off the ignition and remove the negative (-) battery cable prior to installation. NOTE: If the VM9311 is to be installed in a car equipped with an on-board drive or navigation computer, do not disconnect the battery cable. If the cable is disconnected, the computer - Audiovox VM9311 | Instruction Manual - Page 9
VM9311 WIRING DIAGRAM 3 - Audiovox VM9311 | Instruction Manual - Page 10
WIRING DIAGRAM - MULTIMEDIA CONNECTIONS VM9311 *TERK XMDJEN100 cables (sold separately) **TERK XMD1000 Direct Tuner and antenna (sold separately) 4 - Audiovox VM9311 | Instruction Manual - Page 11
the chassis. 1. Connect wiring adaptor to existing wiring harness. 2. Connect antenna lead. 3. Carefully slide the radio into the half-sleeve making sure it is right-side-up until it is fully seated and the spring clips lock it into place. NOTE: For proper operation of the CD/DVD player, the chassis - Audiovox VM9311 | Instruction Manual - Page 12
CONTROLS and hold to turn the unit off. NOTE: The VM9311 features Softmute, which will allow the volume to increase or decrease gradually when the hold to store the current radio station in preset channel 1. 9. 2/SUBTITLE DVD Mode: Press once to select the subtitle language during playback. TUNER Mode: - Audiovox VM9311 | Instruction Manual - Page 13
VM9311 CONTROLS AND INDICATORS 10. 3/SCN DVD Mode: Press once to start scan playback. TUNER Mode: Press once to play preset radio station channel 3. Press and hold to store the current radio station in preset channel 3. 11. 4/REP DVD . TFT Display 25. IR Remote Control Receiver 26. AS (Auto Store) - Audiovox VM9311 | Instruction Manual - Page 14
CONTROLS AND INDICATORS LCD Display/Indicators 1. Disc Indicator Illuminated when disc is loaded 2. DVD Playback Indicators (SCN/RPT/RDM/ALL) The following DVD function is active: • CH: radio is activated • DISC: DVD/CD mode is activated 6. Stereo/Local Indicator The stereo/local indicator - Audiovox VM9311 | Instruction Manual - Page 15
VM9311 REMOTE CONTROL Table 1: Remote Control Functions Button Function Name/Ref # DVD VCD AM/FM CD/MP3 XM iPod MENU 1 TITLE 2 MUTE 3 POWER 4 starts playback NOTE: Your remote control may differ slightly from the one pictured here. The above diagram is for illustrative purposes - Audiovox VM9311 | Instruction Manual - Page 16
tilt angle tilt angle tilt angle tilt angle tilt angle WIDE 28 (For DVD, SD Selects display card with Video, mode: CINEMA, Camera, and AUX disc Ejects disc VM9311 NOTE: Your remote control may differ slightly from the one pictured here. The above diagram is for illustrative purposes only. - Audiovox VM9311 | Instruction Manual - Page 17
the front zone remote control to move the monitor into the viewing position. If "TFT Auto Open" is set to "Manual", the TFT remote or press and hold the WIDE/PICTURE button (2) on the monitor panel. Parking Brake Parking Brake Inhibit When the pink "Parking" wire is connected to the vehicle brake - Audiovox VM9311 | Instruction Manual - Page 18
INSTRUCTIONS , 22) on the remote control or the (/\)/(V) buttons +9 -9 to +9 Off, 1-4 VM9311 NOTE: The Bass and Treble levels DVD is playing, the DVD resumes play once the reset is complete. Line Mute If the "MUTE" wire is connected, audio output mutes when a telephone call is received by the car - Audiovox VM9311 | Instruction Manual - Page 19
VM9311 SYSTEM SETUP MENU In "System Setup" mode, "ASP CONFIG" and "GENERAL SETUP" are available for adjustment. Setup can be performed by pressing the dedicated button on the remote control or on the front panel. For system settings, press the SYS SETUP button (31) on the remote control Off Manual - Audiovox VM9311 | Instruction Manual - Page 20
the System Setup menu, move to press the >/|| button on the remote control. , then ASP (Audio Sound Processing) Config Menu The ASP Config Menu select the Treble Center Frequency to achieve the best Treble effect. VM9311 Table 6: ASP Config Menu Features Setting Options Function Sub Filter - Audiovox VM9311 | Instruction Manual - Page 21
VM9311 AM/FM TUNER OPERATION Tuner TFT Display Switch to Radio Tuner source Press the SRC button (15) on the front panel or remote control Press the | - Audiovox VM9311 | Instruction Manual - Page 22
unless the parking break is applied. If you attempt to play a DVD while the vehicle is moving, the TFT screen displays "PARKING" with a • Press the REPT A-B button (6) on the remote control to set the start point (A) of the repeated section. VM9311 • Press the REPT A-B button again once you reach - Audiovox VM9311 | Instruction Manual - Page 23
VM9311 DVD Search Time - Go to specific time in current title Title/Chapter - Go to specific time in During DVD and VCD playback, press the DISP button (10) on remote control to display playback information on the screen including the media playing and current playback time. DVD Playback Information - Audiovox VM9311 | Instruction Manual - Page 24
layer (DVD-5) Single side double layer (DVD-9) Double side single layer (DVD-10) Double side double layer (DVD-18) left, the 16:9 video can be converted to Letter Box video. Indicates the region code where the disc can be played. • Region 1: USA, Canada, East Pacific • ALL: All regions 18 VM9311 - Audiovox VM9311 | Instruction Manual - Page 25
by pressing the - Audiovox VM9311 | Instruction Manual - Page 26
is unavailable. Some discs restrict only portions of the disc and the appropriate content will play. For details, please refer to the disc description. 20 VM9311 - Audiovox VM9311 | Instruction Manual - Page 27
VM9311 DVD/DISC AUDIO OPERATION Instructions for TFT control and Insert/Eject are the same for DVD, CD and MP3 operation. Please see the DVD/Disc Video Operation section for information about these topics. The VM9311 will play music or other audio files from the following disc media remote control - Audiovox VM9311 | Instruction Manual - Page 28
when an iPod is plugged into the media module. To return to the iPod menu from any other source menu, press the SRC button (15) on the front panel or remote control (8) until the iPod menu appears on the screen. Controlling your iPod The following remote control buttons are used to access the iPod - Audiovox VM9311 | Instruction Manual - Page 29
Code Before you listen to XM® Radio, you must subscribe to the service remote control. Channel Guide is the default search mode. To access Category Guide, press the TITLE button (2) on the remote control. To return to Channel Guide, press the SUBTITLE button (9) on the remote control. Channel Guide - Audiovox VM9311 | Instruction Manual - Page 30
service professionals for troubleshooting. Parental Control By default, this feature is unlocked and all channels can be accessed by anyone listening to the radio. To lock a station, press the > button on the remote control or /\ button (18) on the - Audiovox VM9311 | Instruction Manual - Page 31
VM9311 TROUBLESHOOTING Table 13: Troubleshooting Problem Cause Corrective Action GENERAL Unit will not power on Radio Fuse blown Car battery fuse blown Illegal operation Remote control does not function Battery depleted Battery installed incorrectly No/low audio output Improper audio - Audiovox VM9311 | Instruction Manual - Page 32
13: Troubleshooting Problem Cause code Insert disc with label side up Use original disc Turn PCB off Clean disc or replace Recreate disc with good files Check RCA cables Check XM Data cable or Media Module Cable Check satellite antenna connection Reset Media Module Check jLink and Media Module - Audiovox VM9311 | Instruction Manual - Page 33
VM9311 Error Message Displayed Cause illegal mechanism operation Care and Maintenance If such conditions occur, allow the interior of the vehicle to reach a normal temperature before using player. 7. When the vehicle warms up during cold weather or under damp conditions, condensation may appear - Audiovox VM9311 | Instruction Manual - Page 34
of this Warranty, please contact Jensen at the telephone number provided below. This Warranty does not extend to the elimination of car static or motor noise, to correction of antenna problems, to costs incurred for installation, removal, or reinstallation of the VM9311 product, or damage to tapes - Audiovox VM9311 | Instruction Manual - Page 35
Electronic Skip Protection AM/FM Tuner • Sintonizador del US/Euro/Latin/Asia • 30 precolocaciones de la estación (18FM/12AM) • JENSEN Plus Tuner II Outboard Media Module • Adaptador de entrada para XM radio y iPod XM Listo • Requiere opcional del sintonizador de Terk XMD1000 • Requiere opcional Terk - Audiovox VM9311 | Instruction Manual - Page 36
ía Para prevenir un cortocircuito, asegúrese de apagar la ignición y quitar el cable negativo (-) de la batería antes de la instalación. NOTA: Si el VM9311 se instala en un automóvil equipado con una unidad a bordo o una computadora de navegación, no desconecte el cable de la batería. Si el cable - Audiovox VM9311 | Instruction Manual - Page 37
VM9311 DIGRAMA CABLEADO 31 - Audiovox VM9311 | Instruction Manual - Page 38
DIGRAMA CABLEADO - CONEXIONES MULTIMEDIAS VM9311 *Cables de TERK XMDJEN100 (vendidos por separado) **TERK XMD1000 dirigen el sintonizador y la antena (vendidos por separado) 32 - Audiovox VM9311 | Instruction Manual - Page 39
media manga dentro del adaptador o del tablero (solamente utilice los tornillos provistos). No fuerce la manga al introducirla en la apertura o provoque que se doble. c. Localice la serie de lengüetas para doblar en la parte el radio. El VM9311 utiliza un fusible equipo de CD/ DVD, el chasis debe - Audiovox VM9311 | Instruction Manual - Page 40
CONTROLES E INDICADORES Botones de Operación 1. OPEN Presione el botón OPEN (1) para activar el el canal 1 de la memoria. 9. 2/DISC+ Modo DVD: Presione una vez para seleccionar el lenguaje del subtítulo durante la reproducción. VM9311 Modo TUNER: Presione una vez para reproducir la estación de - Audiovox VM9311 | Instruction Manual - Page 41
VM9311 CONTROLES E INDICADORES 10. 3/SCN Modo DVD: Presione una vez para iniciar la reproducción en escaneo. ón de bloqueo de padres). 23. Pantalla LCD 24. Pantalla TFT 25. Receptor de Control Remoto Infrarrojo 26. AS (Almacenaje Automático) Presione para almacenar automáticamente estaciones de - Audiovox VM9311 | Instruction Manual - Page 42
CONTROLES E INDICADORES Pantalla LCD/Indicadores 1. Indicador de Disco Iluminado cuando un disco está adentro. 2. Indicadores de Reproducción de DVD (SCN/RPT/RDM/ ALL) Los indicadores de reproducción de DVD : • CH: radio activado • DISC: modo DVD/CD activado 6. Indicador Estéreo / Localc El - Audiovox VM9311 | Instruction Manual - Page 43
VM9311 CONTROL REMOTO Tabla 1: Funciones de Control Remoto Botón Función Nombre/ Referencia DVD VCD SINTONIZADOR CD/MP3 XM iPod MENU de radio XM; borra estaciones de radio XM 37 NOTA: Su control remoto puede ser ligeramente distinto del que se exhibe aquí en imagen. - Audiovox VM9311 | Instruction Manual - Page 44
lo que está en memoria DVD SETUP 30 Accede al menú de Configuración de DVD SYS SETUP 31 Accede al menú de Configuración del Sistema SCAN 34 Reproduce los primeros diez segundos de cada pista EJECT 35 Eyecta el disco VM9311 NOTA: Su control remoto puede ser ligeramente distinto del - Audiovox VM9311 | Instruction Manual - Page 45
VM9311 UTILIZACIÓN DEL MONITOR TFT Abrir/Cerrar el Monitor TFT Presione el botón OPEN (1) en el panel delantero o presione el botón ( , 25) en el control ) Modo YUV iPod Modo YUV DVD Modo YUV AUX IN Modo CVBS de Mano Cuando el alambre rosado del "PARKING" está conectado con el interruptor del - Audiovox VM9311 | Instruction Manual - Page 46
de reproducción disponibles en el orden siguiente: TUNER, DVD, AUX IN o CAMERA (cámara de video de presione los botones VOL+/VOL- (15,16) en el control remoto. Cuando el volumen alcanza "0" o "40", +14 -14 a +14 -7 a +7 -9 a +9 VM9311 Tabla 4: Ajustes de Audio Función Audio Sub (Altavoz de graves - Audiovox VM9311 | Instruction Manual - Page 47
VM9311 MENÚ DE CONFIGURACIÓN DE SISTEMA En modo de Configuración de Sistema ("System Setup"), están disponibles para ajustes la Configuración ASP ("ASP CONFIG") y Configuración General ("GENERAL SETUP"). La configuración se puede realizar presionando el botón dedicado en el control ) Manual Ingl - Audiovox VM9311 | Instruction Manual - Page 48
ón de Sistema, muvase hasta , luego presione el botón >/|| en el control remoto. Menú de Configuración de ASP El Menú de Configuración de Frecuencia Central de Agudos para alcanzar el mejor efecto de Agudos. VM9311 Tabla 6: Funciones de Menú de Configuración de ASP Configuración Opciones - Audiovox VM9311 | Instruction Manual - Page 49
VM9311 OPERACIÓN DEL RADIO Pantalla del Sintonizador de TFT 1. Indicador de Banda de botón < (16) en el joystick para buscar la estación siguiente más baja. Sintonía Manual Presione los botones >> o - Audiovox VM9311 | Instruction Manual - Page 50
DVD/VCD VM9311 NOTA: Cuando está adecuadamente instalado, el video en DVD no puede reproducirse en la pantalla TFT principal a menos que el freno de estacionamiento esté puesto. Si usted intenta ver un DVD mientras el vehículo está en movimiento, la pantalla TFT muestra "PARKING el control remoto - Audiovox VM9311 | Instruction Manual - Page 51
salir. La siguiente información se muestra en la parte inferior de la pantalla durante la reproducción de un VCD en modo de 2 Capítulo Directo / Selección de Pista Durante la reproducción del DVD, VCD y CD, usted puede utilizar el teclado numérico en el control remoto (29) para acceder a una pista - Audiovox VM9311 | Instruction Manual - Page 52
cm Tiempo de Repord. Máx. Lado simple capa simple (DVD-5) Lado simple capa doble (DVD-9) Lado doble capa simple (DVD-10) Lado doble capa doble (DVD-18) (Método MPEG 2) 133 minutos 242 minutos 266 , África del Norte, Asia Noroeste. • Región 6: China Continental • ALL: Todas las Regiones 46 VM9311 - Audiovox VM9311 | Instruction Manual - Page 53
DVD Para configuraciones del sistema, presione el botó DVD SETUP (31) en el control remoto para ingresar al menú de Configuración de DVD ("DVD de 16:9, los lados izquierdo y derecho están cortados Con pantalla de 16:9, la parte de arriba y de abajo están cortadas La imagen se presenta en vista ancha - Audiovox VM9311 | Instruction Manual - Page 54
está disponible. Algunos discos restringen solamente porciones del disco y el contenido apropiado se verá. Para detalles, por favor refiérase a la descripción del disco. 48 VM9311 - Audiovox VM9311 | Instruction Manual - Page 55
OPERACIÓN DEL AUDIO DE DVD/DISCO Las instrucciones para el control de TFT e Insertar/Expulsar son las mismas para operar DVD, CD, y MP3. Por favor, vea la sección Operación del Video de DVD/SDISC para obtener información sobre estos temas. El VM9311 jugará música u otros archivos audio de los - Audiovox VM9311 | Instruction Manual - Page 56
las opciones video del aparato de lectura. Presione el botón AUDIO (5) en el mando a distancia para tener acceso al modo del VÍDEO del iPod. El control de lanzamiento de la voluntad VM9311 de nuevo al iPod así que a usted puede seleccionar los medios video para ser exhibido en el monitor de - Audiovox VM9311 | Instruction Manual - Page 57
VM9311 OPERATION DE LA RADIO XM® estaciones almacenadas (XM1-XM6) para la venda actual exhiben en las cajas por la mitad inferior de la pantalla de TFT. Presione el botón >> (14) en el control remoto o el botón /\ (18) en el joystick para vea la página anterior de estaciones. Cada página contiene - Audiovox VM9311 | Instruction Manual - Page 58
XM. Usted debe incorporar un número de 3 dígitos (por ejemplo, 004). 3. Presione el botón >/|| (18) en el control remoto o el botón ENTER (20) en el joystick. XM Menú Setup Mientras que en XM el modo de radio, presione botón del MENÚ (1) dos veces para volver a la página principal XM. 52 VM9311 - Audiovox VM9311 | Instruction Manual - Page 59
VM9311 SOLUCIÓN DE PROBLEMAS Tabla 13: Troubleshooting Problema GENERAL La unidad no se encenderá Control El cable del altavoz está en contacto con una parte de metal del automóvil Disco pirata en uso el freno de estacionamiento no enganchó El DVD no es compatible con la configuración del sistema - Audiovox VM9311 | Instruction Manual - Page 60
VM9311 Tabla 13: Troubleshooting Problema Causa El disco no se reproduce El disco está doblado o rayado Disco sucio o mojado El láser está sucio Se utiliza un disco incompatible La - Audiovox VM9311 | Instruction Manual - Page 61
VM9311 Tabla 14: Mensajes de Errors Mensaje Mostrado Region Error (Error de Región) Error Causa El DVD no es compatible con el código de región de la unidad Operación del mecanismo ilegal Acción Correctiva Presione EJECT por 5 segundos para reiniciar el mecanismo - Audiovox VM9311 | Instruction Manual - Page 62
DVD/CD Formatos compatibles: DVD-R, DVD-RW, DVD+R, DVD Amplificador Remote ( partes de los mismos, que según opinión de la Compañía, hayan sufrido algún daño o fue dañado como VM9311 Audiovox Electronics Corporation Hauppauge, NY 11788 Asistencia Técnica: 1-800-323-4815 www.jensen.com © 2006 Audiovox - Audiovox VM9311 | Instruction Manual - Page 63
instructions avant de commencer l'installation. Nous recommandons que vous installiez votre Jensen VM9311 par une boutique d'installation normale. Fonctions DVD • Des formats compatible : DVD-R, DVD-RW, DVD+R, DVD 18FM/12AM) • Tuner II JENSEN Plus Outboard Media Module • Adaptateur entrée pour Radio - Audiovox VM9311 | Instruction Manual - Page 64
venir un court-circuit, assurez-vous que le commutateur d'allumage est mis en arrêt, et enlevez la câble pile négative avant l'installation. A NOTER : Si le VM9311 est installé dans une voiture qui est équipée d'un lecteur à bord ou un ordinateur de navigation, ne débranchez pas la câble pile. Si le - Audiovox VM9311 | Instruction Manual - Page 65
VM9311 DIAGRAMME DE CÂBLAGE 59 - Audiovox VM9311 | Instruction Manual - Page 66
WIRING DIAGRAM - MULTIMEDIA CONNECTIONS VM9311 *Câbles TERK XMD JEN 100 (vendu séparément) **Tuner Direct et antenne TERK XMD 1000 (vendu séparément) 60 - Audiovox VM9311 | Instruction Manual - Page 67
de sorte que l'appareil soit plus stable. Install support strap to make the unit more stable. INTALLEZ LE érage pour éviter d'endommager la radio. Le VM9311 utilise un fusible à 15 Amp mini-ATM, situ A NOTER : Pour une bonne opération de la platine CD/ DVD, le châssis doit être monté à l'intérieur de - Audiovox VM9311 | Instruction Manual - Page 68
CONTROLES maintenez l'appui pour mettre l'appareil en arrêt. A NOTER : Le VM9311 a Softmute qui permet au volume d'augmenter ou de diminuer au fur et que la fonction MUTE est activée ou désactivée. 8. 1/AUDIO Mode DVD : Appuyez pour sélectionner la langue d'audio pendant la reproduction. Mode Tuner - Audiovox VM9311 | Instruction Manual - Page 69
VM9311 CONTROLES ET INDICATEURS 10. 3/SCN Mode DVD : Appuyez une fois pour commencer le balayage de la pour stocker la station de radio courante dans le chaîne pré-réglée 3. 11. 4/REP Mode DVD : Appuyez une fois pour commencer la répétition de la reproduction. Mode Tuner : Appuyez une fois pour - Audiovox VM9311 | Instruction Manual - Page 70
CONTROLES ET INDICATEURS Affichage/indicateurs LCD 1. Indicateur du disque S'illumine lorsqu'un disque est chargé. 2. Indicateurs de reproduction DVD (SCN/RPT/RDM/ALL) Les indicateurs de reproduction DVD : Radio est activée • DISC : Mode DVD/CD est activé 6. Indicateur stéréo/local L' - Audiovox VM9311 | Instruction Manual - Page 71
VM9311 TELECOMMANDE Table 1: Fonctions de télécommande Bouton Fonction Nom/Ref # DVD VCD AM/FM CD/MP3 XM iPod MENU 1 Entre le menu principal du disque Met en marche le PBC lorsque le VCD est en train - Audiovox VM9311 | Instruction Manual - Page 72
SETUP 30 Accède au menu configuration DVD SYS SETUP 31 Accède au menu configuration système SCAN 34 Joue les dix premières secondes de chaque piste EJECT 35 Ejecte le disque VM9311 A NOTER : Votre télécommande peut différer légèrement de celle décrite ici. Le diagramme cidessus est pour des - Audiovox VM9311 | Instruction Manual - Page 73
VM9311 . Si « TFT Auto Open » est réglée à « Manual », le TFT ne se fermera pas lorsque la clé est de sortie vidéo AM/FM TUNER XM TUNER iPod DVD AUX IN Mode YUV Mode YUV Mode YUV Mode panneau du moniteur. Freins de parking Inhiber freins de parking Lorsque le fil Parking rose est branché à - Audiovox VM9311 | Instruction Manual - Page 74
INSTRUCTIONS commande pour changer entre les sources de reproduction disponible dans l'ordre suivant : Tuner, DVD/CD, XM, iPod, Aux in, Caméra (caméra vidéo à vue 14 à +14 -7 à +7 -9 à +9 -9 à +9 Off (Arrêt), 1-4 VM9311 A NOTER : Les niveaux d'aigu et de basse ne sont ajustables que lorsque le EQ - Audiovox VM9311 | Instruction Manual - Page 75
VM9311 MENU CONFIGURATION SYSTEME Dans la mode configuration système, « ASP CONFIG » c'est un tuner TV NSTC uniquement) Auto NTSC PAL TFT Auto On Open (TFT Ouverture Automatique) Off Manual OSD Language Clock English (HH:MM) Fonction • AM Frequency Spacing - 9kHz • AM Frequency Band - - Audiovox VM9311 | Instruction Manual - Page 76
pour réaliser le meilleur effet basse. Selon la source audio sélectionnez la fréquence aigu centre pour réaliser le meilleur effet aigu. VM9311 Table 6: Fonction du menu configuration ASP Réglages Options Fonction Sub Filter (Filtre caisson de basse) 80Hz 120Hz 160Hz Sub Phase (Phase caisson - Audiovox VM9311 | Instruction Manual - Page 77
VM9311 OPERATION TUNER AM/FM Affichage tuner TFT TUNER. Le TFT Tuner ou l'affichage aux cristaux liquides apparaît. Sélectionner la bande AM/FM Appuyez sur le - Audiovox VM9311 | Instruction Manual - Page 78
VM9311 OPERATION VIDEO DVD/VCD A NOTER : Lorsqu'il est bien installé, le vidéo DVD ne peut pas être affiché sur l'écran TFT principal à moins que les freins de parking soient appliqués. Si vous essayez de jouer un DVD lorsque le véhicule est en motion, l'écran TFT affiche « PARKING » avec un arriè - Audiovox VM9311 | Instruction Manual - Page 79
VM9311 Se déplacer à travers les chapitres Appuyez sur le bouton >>| (19) sur la télécommande ou le bouton > sur la manette (17) pour avancer jusqu'au chapitre prochain du DVD sortir. Chapitre direct/sélection de piste Pendant la reproduction d'un DVD, VCD, ou un CD, vous pouvez utiliser le pavé - Audiovox VM9311 | Instruction Manual - Page 80
DVD-10) Simple côté double couche(DVD-18) MPEG 2 methode 133 minutes 242 minutes 266 minutes 484 minutes Simple côté simple couche VCD (MPEG 1 Methode) 74 minutes Simple côté simple couche 74 minutes Table 8: Symboles du disque Symbole Signification Indique le code îte à Lettres. 74 VM9311 - Audiovox VM9311 | Instruction Manual - Page 81
VM9311 MENU DE CONFIGURATION DVD/DISQUE A NOTER : Un DVD/disque doit être chargé dans le mécanisme et est en train de jouer avant d'accéder au menu configuration DVD. Lorsque le DVD/Disque est en train de jouer, appuyez sur le bouton DVD SETUP sur la télécommande pour accéder au menu configuration - Audiovox VM9311 | Instruction Manual - Page 82
. Certains disque ne restreignent que des sections du disque et le contenu approprié va jouer. Pour des détails, référez-vous à la description du disque. 76 VM9311 - Audiovox VM9311 | Instruction Manual - Page 83
DVD/DISQUE Instructions pour le contrôle du TFT et Insérer/Ejecter sont les mêmes pour l'opération DVD, CD et MP3. Voir la section Opération Vidéo DVD/Disque pour avoir des informations sur ce sujet. Le VM9311 le bouton /BAND (20) on the remote control to stop disc play. Pour reprendre la - Audiovox VM9311 | Instruction Manual - Page 84
changer à la mode iPod, lorsqu'un iPod est branché au module média. Pour revenir au mode iPod à partir de n'importe quelle Reproduction de photos Alors que les photos iPod peuvent être vu sur l'écran du VM9311, vous devez utilisez le iPod pour contrôler les options de reproduction de photos. - Audiovox VM9311 | Instruction Manual - Page 85
XM 4 5 6 Affichage du code d'identification Avant d'écouter à la radio XM, vous devez souscrire au service en utilisant le numéro d' page contient six canaux pour choisir à partir. Lorsque vous êtes en mode de guide chaîne, appuyez sur le bouton - Audiovox VM9311 | Instruction Manual - Page 86
Cette fonction est réservée à l'usage des professionnels de service pour dépannage. Control Parental Par défaut, ce dispositif est ouvert et tous les télécommande ou le bouton de /\ (18) sur le manche et dirigez le support au mot de passe - l'entrée 1264 et la petite serrure jaune clôtureront VM9311 - Audiovox VM9311 | Instruction Manual - Page 87
VM9311 DEPANNAGE Problème GÉNÉRAL L'appareil ne se met pas en marche La télécommande ne Branchement incorrecte Le commutateur de PRK est actionné et le frein de stationnement n'est pas engagé DVD n'est pas compatible avec les réglages du système Télé courant Les branchements vidéo signalement - Audiovox VM9311 | Instruction Manual - Page 88
compatible Changez les réglages de Utilisez le disque avec la bonne code de région Insérez le disque avec l'étiquette en haut Utilisez XM et de Media Module Vérifiez les raccordements satellites d'antenne Remettez Media Module Vérifiez le jLink et les jonctions de câble de module de médias Vé VM9311 - Audiovox VM9311 | Instruction Manual - Page 89
VM9311 Table 14: Messages d'erreur Message d'erreur Unknown disc Erreur Région Erreur Cause Modalité de reprise Le format disque n'est pas compatible avec cet appareil DVD n'est pas compatible avec la code région de l'appareil Opération de mécanisme illégale Appuyez sur le bouton EJECT - Audiovox VM9311 | Instruction Manual - Page 90
: 14.4 VDC Platine DVD/CD Formats compatibles : DVD-R, DVD-RW, DVD+R, DVD+RW, CD-R, CD-RW des problèmes VM9311 d'antenne, les inscriptions ou de l'étiquette code à barres/numéro Audiovox Electronics Corporation Hauppauge, NY 11788 Assistance technique: 1-800-323-4815 www.jensen.com © 2006 Audiovox
-
 1
1 -
 2
2 -
 3
3 -
 4
4 -
 5
5 -
 6
6 -
 7
7 -
8
-
9
-
10
-
11
-
12
-
13
-
14
-
15
-
16
-
17
-
18
-
19
-
20
-
21
-
22
-
23
-
24
-
25
-
26
-
27
-
28
-
29
-
30
-
31
-
32
-
33
-
34
-
35
-
36
-
37
-
38
-
39
-
40
-
41
-
42
-
43
-
44
-
45
-
46
-
47
-
48
-
49
-
50
-
51
-
52
-
53
-
54
-
55
-
56
-
57
-
58
-
59
-
60
-
61
-
62
-
63
-
64
-
65
-
66
-
67
-
68
-
69
-
70
-
71
-
72
-
73
-
74
-
75
-
76
-
77
-
78
-
79
-
80
-
81
-
82
-
83
-
84
-
85
-
86
-
87
-
88
-
89
-
90
 |
 |