Behringer ULTRABASS BXL900A Manual - Page 6
First Steps - ultrabass bass amp
 |
View all Behringer ULTRABASS BXL900A manuals
Add to My Manuals
Save this manual to your list of manuals |
Page 6 highlights
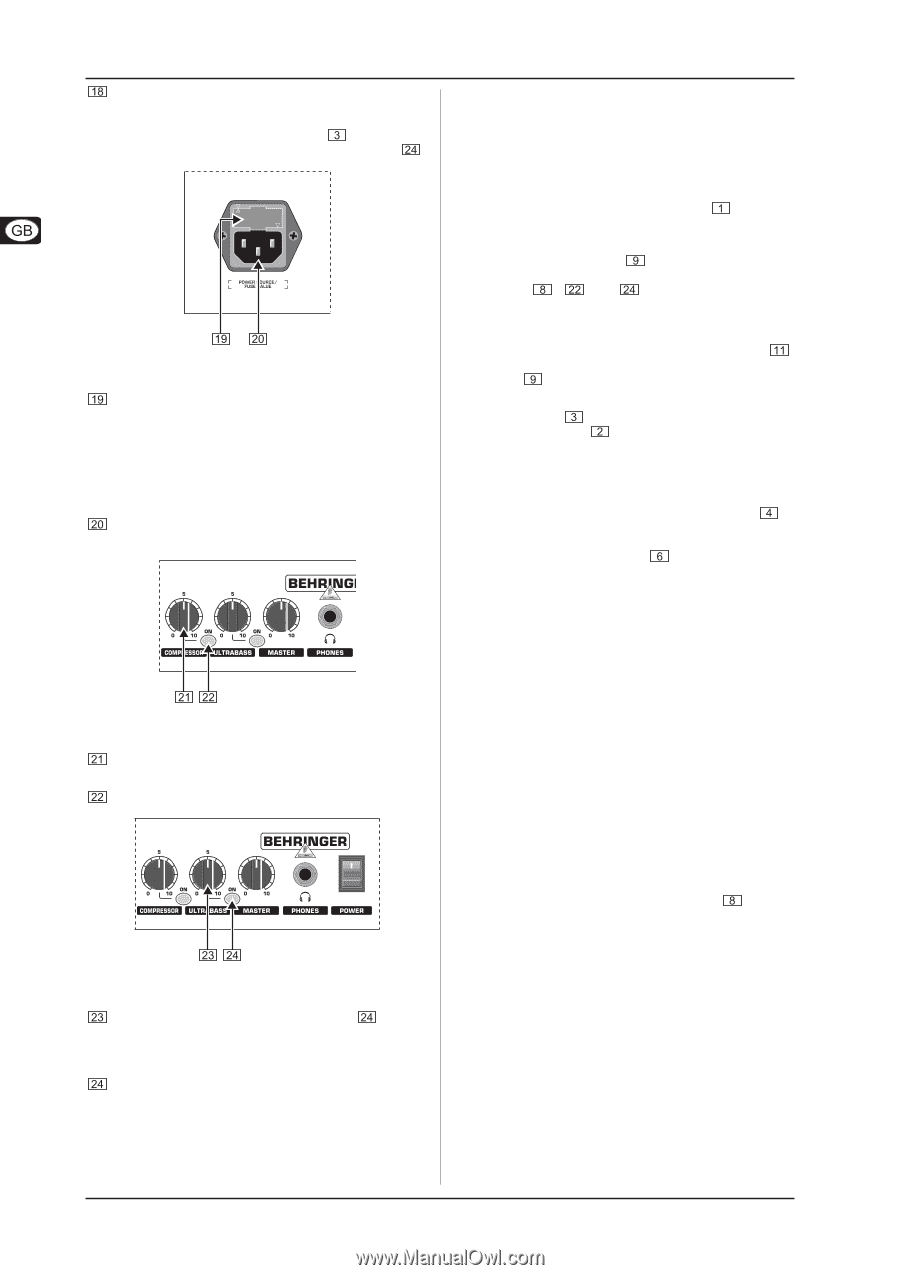
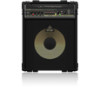
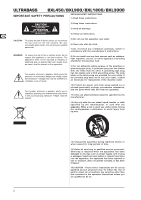
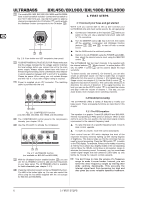
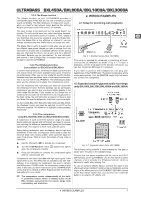
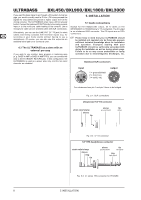
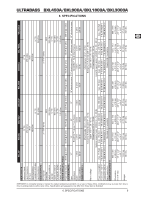
ULTRABASS BXL450/BXL900/BXL1800/BXL3000 The models BXL1800, BXL3000, BXL1800A and BXL3000A have a dual foot switch included. Connect the foot switch to the FOOT SW(ITCH) jack. Use the foot switch to select a channel (corresponds to the CH 2 button ) and to activate the Ultrabass function (corresponds to the ON button ). 3. FIRST STEPS 3.1 Connect your bass and get started We’re sure you cannot wait to set up and connect your ULTRABASS amp and check out its sounds. So, let’s get going! s Connect your instrument to the input jack before you switch on the unit. Use a standard instrument cable with ¼" TS connectors. s Turn the MASTER control fully to the left, then switch off the equalizer, compressor and Ultrabass function (buttons , and ) to start off with a neutral sound. s Set the GAIN control to mid-travel position. Fig. 2.5: Fuse holder and IEC receptacle (rear panel) FUSE RETAINER/VOLTAGE SELECTOR. Please make sure that the voltage indicated by the voltage selector matches the local voltage before you connect the unit to the main power supply. Always replace blown fuses with fuses of the same type and rating. Some units feature a fuse retainer in which a selection between 230 V and 120 V is possible. Please be aware: When using your unit outside Europe and with 120 V, a fuse with a higher rating is required. Power is supplied via an IEC connector. The matching cable is provided with the unit. s Switch on the ULTRABASS using the POWER switch , then adjust the desired volume level using the MASTER control . The ULTRABASS has two input channels to be selected with the channel selector . When channel 1 is active (button LED off), the GAIN 1 control can be used to adjust the input sensitivity. To distort sounds, use channel 2. On channel 2, you can also create an alternative sound: one that is louder than or shaped differently from the sound on channel 2. (For details about the Shape control, see chapter 3.2.) Use the GAIN 2 control to adjust the input level of channel 2. This control also allows you to determine the amount of distortion. If the signal becomes too loud, you can use the LEVEL control to cut back the volume and align it with the volume of channel 1. This way, you can avoid drastic level changes when switching channels. 3.2 Sound processing The ULTRABASS offers a variety of features to modify your bass sound. These processing functions are described in this chapter. Fig. 2.6: COMPRESSOR function (only BXL1800, BXL3000, BXL1800A and BXL3000A) The COMPRESSOR control governs the compression intensity (see chapter 3.2.4). Use the ON switch to activate the compressor. Fig. 2.7: ULTRABASS function (not available on BXL450 and BXL450A) With the Ultrabass function enabled (button ) you can use the ULTRABASS control to add ultra-low frequencies to your bass signal. The ULTRABASS effect is available for both channels (see chapter 3.2.3). Press the ON button to switch on the ULTRABASS function. The LED in the button lights up. You can also control this effect using the foot switch supplied with the unit (except for BXL900 and BXL900A). 3.2.1 The FBQ equalizer The equalizer is a graphic 7-band EQ (BXL450 and BXL450A: 5-band) incorporating an FBQ spectrum analyzer. When a slide control is set to the zero position, the instrument signal remains unprocessed in the relevant frequency band. s To raise the level of a specific frequency band, move its slide control upwards. s To lower its volume, move the control downwards. Each control has an LED which displays the level of the respective frequency band by lighting up with varying degrees of brightness. This feature helps you find the control(s) that you need for sound processing. Press the FBQ switch to switch on the FBQ display. For example, if the sound is muddy or booming at 160 Hz, this is shown by a brightly lit LED in the corresponding control. Move the 160-Hz control down a bit (negative range) to eliminate the booming sound. Conversely, you can accentuate certain signal ranges that lack presence (LED lights up only faintly) by moving the relevant controls upwards. + You don’t have to raise the volume of a frequency range to make it seem louder. Instead, you can lower the other frequency ranges by moving their slide controls downwards. This prevents the internal signal level from becoming too high and also gives you some valuable dynamics headroom. 6 3. FIRST STEPS
-
 1
1 -
 2
2 -
 3
3 -
 4
4 -
 5
5 -
 6
6 -
 7
7 -
 8
8 -
 9
9 -
 10
10
 |
 |