Belkin F1DB104P User Manual - Page 7
Using Your E Series Kvm Switch, Installation - hot key
 |
UPC - 722868391631
View all Belkin F1DB104P manuals
Add to My Manuals
Save this manual to your list of manuals |
Page 7 highlights
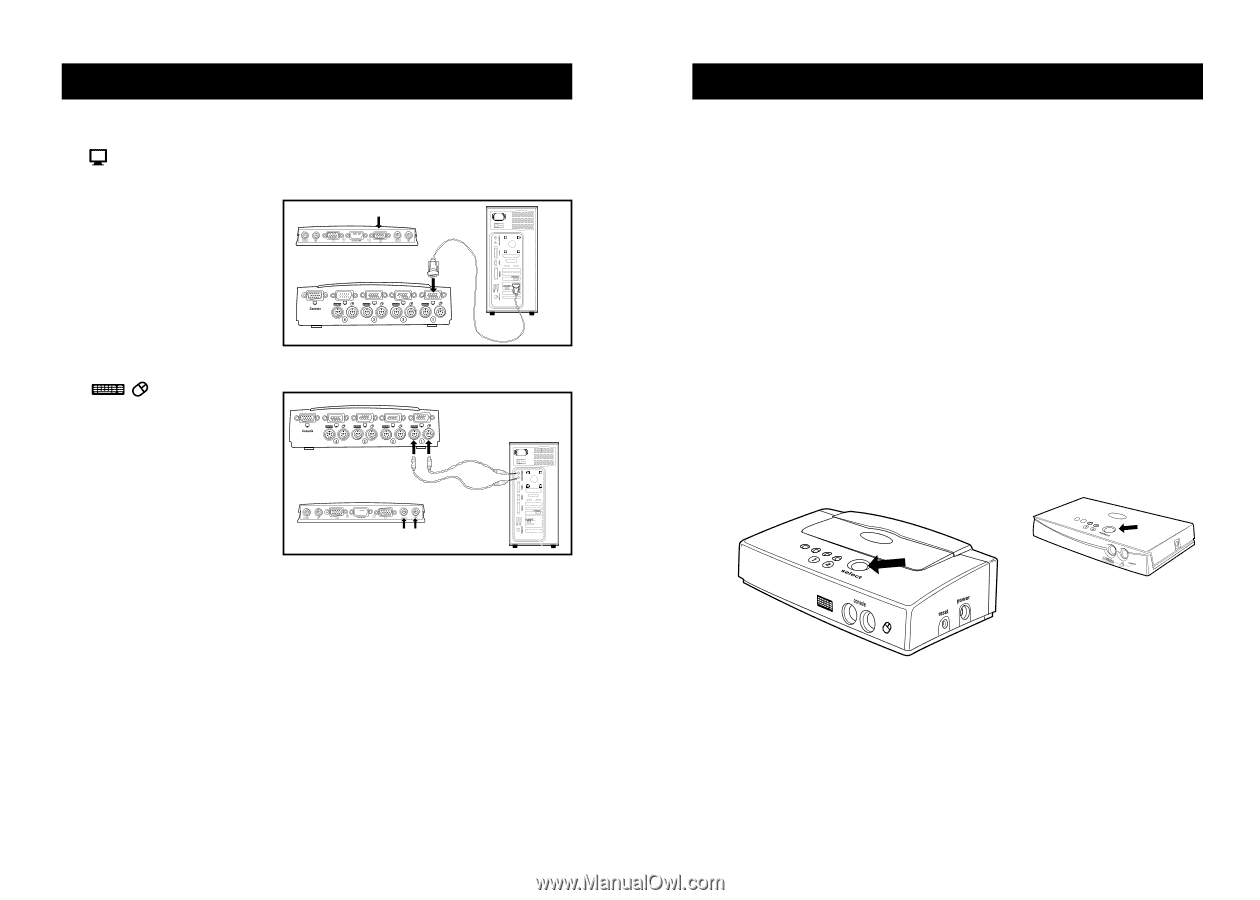
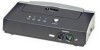
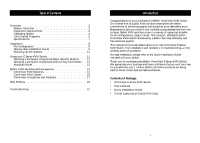
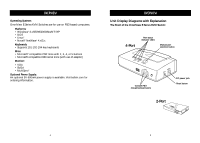
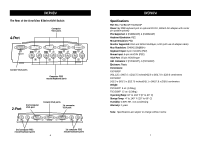
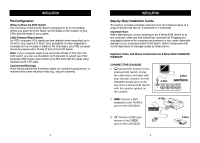
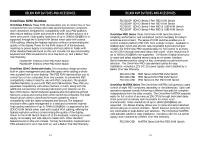
INSTALLATION CONNECT THE COMPUTER: 4. Connect the first computer's VGA cable to the E Series KVM Switch. Using the VGA cable (Belkin Part# F3X1105-XX, F3X1835- XX, or F2N209-XX), connect the male end of 2-Port the cable to the VGA port on the computer, and the female end to 4-Port the VGA port on the rear of the E Series KVM Switch labeled CPU1. 5. Connect the first computer's PS/2 keyboard and PS/2 mouse cable to the appropriate ports on the section labeled CPU1. (Belkin Part# F3X1105-XX, F3X1835-XX, or F2N036-XX). 4-Port 2-Port 6. Repeat steps 4 and 5 for each additional computer you wish to connect. 10 USING YOUR E SERIES KVM SWITCH Powering up the Systems Once all cables have been connected, power up the CPUs that are attached to the E Series KVM Switch. All computers can be powered on simultaneously. The E Series KVM Switch emulates a mouse and keyboard on each port and allows your computer to boot normally. Your Belkin E Series KVM Switch should now be ready for use. You can select which computer to operate by either the push-button Selector Button located on the top panel of the E Series KVM Switch or through keyboard hot key commands. Note that it will take 1 to 2 seconds for the video to display after switching. This is due to the refresh of the video signal. There is also resynchronization of the mouse and keyboard signal that takes place. This is normal operation and ensures that proper synchronization is established. Selecting a Computer Using Front-Panel Selector Buttons 4-Port 2-Port You can directly select a connected computer by pressing the Selector Button on the switch. The LED will be lit above the number to indicate which port is currently selected. 11
-
 1
1 -
 2
2 -
 3
3 -
 4
4 -
 5
5 -
 6
6 -
 7
7 -
 8
8 -
 9
9 -
 10
10 -
 11
11 -
 12
12 -
13
-
14
-
15
 |
 |