Beltronics BEL975R Owners Manual - Page 4
Audio/Visual Alert for Instant-On/Pulsed Radar
 |
UPC - 065789209754
View all Beltronics BEL975R manuals
Add to My Manuals
Save this manual to your list of manuals |
Page 4 highlights
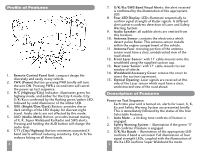
4. Ka Narrow Bands - With Super Wideband Ka turned OFF, any Ka narrow frequency which is engaged is confirmed by rapid flashing of appropriate signal strength LED (see page 10). Pressing PWR anytime during the power up test sequence will suspend the normal power up test sequence; your unit will be ready for operation. Tutorial Mode The tutorial mode allows you to become more familiar with all audible and visual alerts. To engage this mode, press the AUD and the CTY buttons simultaneously while the unit is ON. The audio/visual alerts will be presented slowly in order of Laser, K, X, Ka and SWS. The tutorial mode will cycle the audio/visual alerts continuously. Press the PWR button to exit. Two "beeps" confirm exiting from the tutorial mode. Your unit is now ON and ready for operation. Set and Forget Memory Any time 975R Remote is turned OFF all feature settings you have selected are retained in the unit's memory. Set and Forget Memory eliminates the need to reset your preferred feature settings each time your unit is turned OFF and then back ON. Low Voltage Warning 975R Remote continually checks voltage to ensure proper performance. The unit's operating range is 10.0 to 16.0 volts. If voltage falls below 10.0, the highway (H) or city (C) indicator will flash, coupled with a series of steady audible "beeps." Loss of Antenna Connection In the event the control panel and Radar antenna are not properly connected, the X/K/Ka band indicators will flash, coupled with steady audible "beeps." 6 Audio/Visual Alert for Instant-On/Pulsed Radar This type of signal appears suddenly when a Radar unit is "triggered." The instant-on or pulsed alert consists of an intense, three-second, X, K or Super Wideband Ka audio "burst," coupled with the flashing of the four-LED display. DRK (Bright/Dim/Dark) Button The DRK button allows selection of a dim or dark setting for all LEDS. To engage dim mode, press the DRK button once. A single "beep" confirms your selection. To completely cancel the illumination of all LEDS, press DRK a second time. You'll notice the city/ highway LED remains dim to confirm your unit is receiving power. To return to a full bright setting, press the DRK button a third time; two "beeps" confirm this selection. Use of the DIM button does not affect audio alerts. Important-if you press the DRK button and do not receive audible confirmation, the audio level has been set too low. AUD (Audio Mute/Volume Control) Button Manual Muting of Audio Alerts (Radar and SWS) Whether Auto-Mute is selected ON or OFF in Selectable Features, the audio alerts can be completely muted by pressing the AUD button during an alert. No audible alert will be heard for approximately 12 seconds. If the signal is still present after 12 seconds, the unit will remain in manual mute mode. Volume Control Press and hold AUD button to engage the volume control. Release the AUD button when you have reached your desired audio setting. To reverse direction of the volume, release and press AUD a second time. 7 Note-because Laser alerts are not lengthy or sustained, muting is not required (see page 17).
-
 1
1 -
 2
2 -
 3
3 -
 4
4 -
 5
5 -
 6
6 -
 7
7 -
 8
8 -
 9
9 -
 10
10 -
11
-
12
 |
 |
