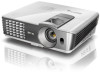
BenQ W1070 W1070 User Manual
BenQ W1070 Manual
 |
View all BenQ W1070 manuals
Add to My Manuals
Save this manual to your list of manuals |
BenQ W1070 manual content summary:
- BenQ W1070 | W1070 User Manual - Page 1
W1070/W1080ST Digital Projector Home Cinema Series User Manual - BenQ W1070 | W1070 User Manual - Page 2
13 Choosing a location 13 Obtaining a preferred projected image size 14 How to determine the position of the projector for a given screen size 14 How to determine the recommended screen size for a given distance 14 Projection dimensions 16 Shifting the projection lens vertically ...... 20 - BenQ W1070 | W1070 User Manual - Page 3
of this quality BenQ video projector! It has been designed to provide you with an enjoyable home theater viewing experience. For the best results, please read this manual through carefully as it is your guide through the control menus and operation. Important safety instructions Your projector is - BenQ W1070 | W1070 User Manual - Page 4
the lamp assembly for replacement. 8. Do not place liquids near or on the projector. 12. This projector is capable of displaying inverted Liquids spilled into the projector will void your images for ceiling mount installation. Use only warranty. If the projector does become wet, BenQ's Ceiling - BenQ W1070 | W1070 User Manual - Page 5
. Disposal 15. Do not attempt to disassemble this projector. There are dangerous high voltages inside which may cause death if you should come into contact with live parts. The only user serviceable part is the lamp which has its own removable cover. See page 49. Under no circumstances should - BenQ W1070 | W1070 User Manual - Page 6
region to region. The warranty card is only supplied in some specific regions. Please consult your dealer for detailed information. W1070 W1080ST Projector Remote control Batteries Warranty card User manual CD Quick start guide Power cable VGA cable Carry bag (W1080ST only) 6 Overview - BenQ W1070 | W1070 User Manual - Page 7
the remote control and the IR sensor(s) on the projector that might obstruct the infra-red beam. • Operating the projector from the front • Operating the projector from the top Approx. +15º Approx. +15º Ceiling mounting the projector We want you to have a pleasant experience using your BenQ - BenQ W1070 | W1070 User Manual - Page 8
an improper attachment through the use of the wrong gauge or length screws. You can purchase a BenQ projector ceiling mount kit from the place you purchased your BenQ projector. BenQ recommends that you also purchase a separate Kensington lock compatible security cable and attach it securely to both - BenQ W1070 | W1070 User Manual - Page 9
Intuitive lens shift (W1070) The intuitive control over lens shift lever provides flexibility in setting-up your projector. • Short throw ratio (W1080ST) The short throw ratio projection provides 1080p picture quality with shorter projection distance. • SmartEco SmartEco™ technology saves lamp power - BenQ W1070 | W1070 User Manual - Page 10
Lamp cover 3. Vent (heated air exhaust) 4. Quick-release button 5. Lens cap 6. Lens shift support Y/PB/PR or Y/CB/CR video signal 15. Mini USB port (Used for service) 16. RGB (PC)/Component video (YPbPr/ YCbCr) signal input jack 17. RS-232 control port Used to interface with a PC or home theater - BenQ W1070 | W1070 User Manual - Page 11
the lamp has developed a problem. 11. AUTO Automatically determines the best picture timings for the displayed image. 12. Keystone/Arrow keys ( / Up, / Down) Manually corrects distorted images resulting from an angled projection. 13. Right/ Increases the projector volume. When the On-Screen Display - BenQ W1070 | W1070 User Manual - Page 12
keys (Brightness, Contrast, Color, Tint) Displays the setting bars for adjustment of the appropriate picture quality values. 12. 3D Setting Enters 3D settings directly. 13. AUTO Automatically determines the best picture timings for the displayed image. 14. Right When the On-Screen Display (OSD) menu - BenQ W1070 | W1070 User Manual - Page 13
the BenQ Projector Ceiling Mount Kit Note that a special rear projection screen and the from your dealer to mount your projector on the BenQ Projector Ceiling Mount Kit are required for ceiling. this installation location. *Set Front Ceiling after you turn the projector *Set Rear Ceiling after - BenQ W1070 | W1070 User Manual - Page 14
". This is the projection distance. 3. Decide the exact position of your projector according to the position of your screen and the adjustable lens shift range. W1070: If you are using a 120-inch, 4:3-aspect-ratio screen, please refer to "The screen aspect ratio is 4:3 and the projected - BenQ W1070 | W1070 User Manual - Page 15
can be adjusted (using the zoom control) to display on these different screen sizes at the projection distance. Be aware that these different screens have different vertical offset values. If you place the projector in a different position (to that recommended), you will have to tilt it down - BenQ W1070 | W1070 User Manual - Page 16
Center of lens : Screen : Center of lens W1070 The screen aspect ratio is 16:9 and the projected picture is 16:9 Screen dimensions Diagonal [inch (mm)] Height [mm] Width [mm] Projection distance [mm] Min distance (with max zoom) Max distance Average (with - BenQ W1070 | W1070 User Manual - Page 17
screen aspect ratio is 16:9 and the projected picture is 16:9 Screen dimensions Projection distance [mm] Diagonal [inch (mm)] Height [mm] Width [mm] Min distance (with max zoom) Max distance lens screen sizes are listed. If your screen size is not in the - BenQ W1070 | W1070 User Manual - Page 18
: Screen W1070 : Center of lens : Screen : Center of lens The screen aspect ratio is 4:3 and the projected picture is 16:9 Screen dimensions Diagonal Height [inch (mm)] [mm] Width [mm] Projection distance [mm] Min distance (with max - BenQ W1070 | W1070 User Manual - Page 19
screen aspect ratio is 4:3 and the projected picture is 16:9 Screen dimensions Projection distance [mm] Diagonal Height [inch (mm)] [mm] Width [mm] Min distance (with max zoom) Average Max distance lens position screen sizes are listed. If your screen size is - BenQ W1070 | W1070 User Manual - Page 20
the lever by turning it clockwise. • When the screen position is fixed Screen DOWNLENS SHIFT UP DOWNLENS SHIFT UP 100% 30% 10% • When the projector position is fixed 130% 120% 110% Projector • Please do not over-tighten the lever. • Lens shift adjustment will not result in a degraded picture - BenQ W1070 | W1070 User Manual - Page 21
projector You need only connect the projector to a source device using both the projector and the Picture quality Best Better S-Video a signal source to the projector, be sure to: 1. Turn with the projector (See "Shipping supports when making connection between the projector and HDMI devices. HDMI - BenQ W1070 | W1070 User Manual - Page 22
-video devices Be sure to match the corresponding colors between the cables and the terminals. The RCA with some analog video cameras). • If the selected video image is not displayed after the projector is turned on and the correct video source has been selected, please check that the video - BenQ W1070 | W1070 User Manual - Page 23
terminal VGA cable Many laptops do not turn on their external video ports when connected to a projector. Usually a key combination like Fn + F3 or CRT/LCD key turns the external display on/off. Locate a function key labeled CRT/LCD or a function key with a monitor symbol on the laptop. Press Fn - BenQ W1070 | W1070 User Manual - Page 24
projector on. As soon as the lamp lights up, a "Power On Tone" will be heard. The POWER indicator light flashes green and stays green when the projector . 3. The fans will start operating, and a start-up image displays on the screen for a few seconds while it warms up. The projector will not respond - BenQ W1070 | W1070 User Manual - Page 25
the projector was last shut down. To select the video source: • Using the remote control or projector 1. Press SOURCE on the projector or remote control. source information will display on the screen for seconds. If there are multiple pieces of equipment connected to the projector, you can go back to - BenQ W1070 | W1070 User Manual - Page 26
Brightness 50 Contrast 50 Color 50 Tint 0 Sharpness 3 Color Temperature Lamp Power Advanced... Reset Picture Settings S-Video Standard Normal SmartEco Exit 2. Use / to highlight the System Setup : Basic menu. System Setup : Basic Language Splash Screen Projector Position Auto Off - BenQ W1070 | W1070 User Manual - Page 27
projector includes an option for setting up password security. The password can be set through the On-Screen Display (OSD) menu. Once the password is set and this function is selected, the projector is password-protected. Users not record the password in this manual, and you absolutely do not - BenQ W1070 | W1070 User Manual - Page 28
screen. Press and hold AUTO on the projector or remote control for 3 seconds. The projector will display a coded number on the screen. 2. Write down the number and turn off your projector. 3. Seek help from the local BenQ service on-screen. Write your selected password down here in this manual in - BenQ W1070 | W1070 User Manual - Page 29
of the center of the screen with the center of the lens level with the screen. 2. If the picture is stilled distorted, or the projector is unable to be positioned as described above, you will need to manually correct the picture. • Using the remote control or projector i. Press one of the Arrow - BenQ W1070 | W1070 User Manual - Page 30
3D: It is optimized to bring up 3D effects when watching 3D contents. This mode is only available when 3D function is enabled. • User 1/User 2/User 3: Recalls the customized settings. See "Setting the User 1/User 2/User , the projector also changes the setting to the one which was last set for that - BenQ W1070 | W1070 User Manual - Page 31
and adjust the values by pressing / on the projector or remote control. The higher the value, the brighter the picture. And the 30 50 70 lower the setting, the darker the picture. Adjust this control so the black areas of the picture appear just as black and that detail in the dark areas is - BenQ W1070 | W1070 User Manual - Page 32
in the Picture menu and select a preferred setting by pressing / on the projector or remote control. There are several color temperature settings available. 1. Lamp Native: With the lamp's original color temperature and higher brightness. This setting is suitable for environments where high - BenQ W1070 | W1070 User Manual - Page 33
on the projector or remote control to display the Clarity Control page. 2. Press to select Noise Reduction and press / to set the desired value. • Noise Reduction: Reduces electrical image noise caused by different media players. The higher the setting, the less the noise. Setting a preferred color - BenQ W1070 | W1070 User Manual - Page 34
Best for viewing movies which are mostly composed of dark scenes. High Brightness Low Contrast Low Brightness High Contrast 1.6 1.8 2.0 2.2 2.4 2.5 2.6 2.8 Adjusting Brilliant Color Highlight Brilliant Color in the Picture > Advanced... menu and select On by pressing / on the projector or remote - BenQ W1070 | W1070 User Manual - Page 35
from a filmsourced DVD or Blu-ray Disc. Setting 3D Comb Filter Highlight 3D Comb Filter in the Display menu and select On by pressing / on the projector or remote control. This feature separates composite signal to Y (brightness) signal and C (color) signal, and can help produce clearer and sharper - BenQ W1070 | W1070 User Manual - Page 36
are best viewed when restretched back to their original width using this setting. 5. Anamorphic: Scales an image so that it is displayed in the center of the screen with a 16:9 aspect ratio. This setting stretches and resizes linearly, except that it treats the vertical and horizontal dimensions - BenQ W1070 | W1070 User Manual - Page 37
black bars on the top and bottom). Letter Box format picture • The black arrows ( , , , ) on the projector or remote control to navigate the picture. 3. To restore noise level because of increased fan speed necessary to improve overall system cooling and performance. If you use this projector - BenQ W1070 | W1070 User Manual - Page 38
in the Display > 3D > 3D Mode menu. If 3D content still cannot be shown correctly, select the supported format in the Display > 3D > 3D Mode menu. After you have connected the 3D video devices to the projector, make sure the power of BenQ 3D glasses is on. Wear the BenQ 3D glasses, and then enjoy - BenQ W1070 | W1070 User Manual - Page 39
hold on the projector or remote control for 3 seconds. Turning the projector off To turn the projector off, press POWER and a warning message appears. Press POWER again. • The Power indicator light flashes orange and the fans run for about two minutes to cool the lamp. The projector will not respond - BenQ W1070 | W1070 User Manual - Page 40
/User 1/User 2/User 3/3D/ISF Night/ISF Day User Mode Management Brightness 0-100 Contrast 0-100 Color 0-100 Tint 0-100 Sharpness 0-15 Color Temperature Normal/Cool/Lamp Native/Warm Lamp Power Normal/Economic/SmartEco Black Level 0 IRE/7.5 IRE Clarity Control Noise Reduction - BenQ W1070 | W1070 User Manual - Page 41
) High Altitude Mode Password Change Password Power On Lock Key Lock Reset All Settings ISF Source Preset Mode Resolution Color System Equivalent Lamp Hour 3D Format Firmware Version BenQ/Black/Blue Front/Front Ceiling/Rear/Rear Ceiling Disable/5 min/10 min/15 min/20 min/25 min/ 30 min - BenQ W1070 | W1070 User Manual - Page 42
are several color temperature settings available. See "Selecting a color temperature*" on page 32 for details. Lamp Power Selects the projector lamp power between Normal, Economic and SmartEco modes. Advanced... Black Level Sets the picture grayscale as 0 IRE or 7.5 IRE. See "Setting Black Level - BenQ W1070 | W1070 User Manual - Page 43
also manually press Overscan Adjustment / to decide how much to be concealed. Setting 0 means 3D Comb Filter See "Magnifying and searching for details" on page 37 for details. See "Setting Film Mode" on page 35 for details. See "Setting 3D Comb Filter" on page 35 for details. Using the projector - BenQ W1070 | W1070 User Manual - Page 44
can choose BenQ logo screen, Blue screen or Black screen. The projector can be installed on a ceiling or behind a screen, or with one or more mirrors. See "Choosing a location" on page 13 for details. Prevents unnecessary projection when no signal is detected for a long time. See "Setting Auto Off - BenQ W1070 | W1070 User Manual - Page 45
the HDMI CEC compatible device. Selects a baud rate that is identical with your computer's so that you can connect the projector using a suitable RS-232 cable and update or download the projector's firmware. This function is intended for qualified service personnel. Press ENTER to display the grid - BenQ W1070 | W1070 User Manual - Page 46
input source. Color System Shows input system format: NTSC, PAL, SECAM, YUV, or RGB. Equivalent Lamp Hour 3D Format Firmware Version Shows the total lamp time used. Shows the current 3D mode. 3D Format is only available when 3D Mode is enabled. Shows the firmware version of your projector. 46 - BenQ W1070 | W1070 User Manual - Page 47
have to do on a regular basis is keep the lens clean. Never remove any parts of the projector except the lamp. Contact your dealer or local customer service center if the projector fails to operate as expected. Cleaning the lens Clean the lens whenever you notice dirt or dust on the surface. Before - BenQ W1070 | W1070 User Manual - Page 48
mode reduces system noise and lamp power consumption by up to 70%. If the Economic or SmartEco mode is selected, the light output will be reduced and result in darker projected pictures Setting the projector in Economic or SmartEco mode also extends the lamp life. To set Economic or SmartEco - BenQ W1070 | W1070 User Manual - Page 49
lamp at lamp.benq.com OK The lamp MUST be replaced before the projector will operate normally. Press MODE/ENTER to dismiss the message. WARNING NOTICE: Replace lamp now Lamp > XXXX hrs Lamp-usage time exceeded Replace lamp (refer to User's Manual) then reset lamp timer. Order a new lamp at lamp - BenQ W1070 | W1070 User Manual - Page 50
broken glass in the projector. • Do not place the lamp in locations where water might splash on it, children can reach it, or near flammable materials. • Do not insert your hands into the projector after the lamp is removed. If you touch the optical components inside, it could cause color unevenness - BenQ W1070 | W1070 User Manual - Page 51
which could result in malfunction. • Do not over tighten the screw. 12. Connect the power and restart the projector. Resetting the lamp timer Do not reset the lamp timer if the lamp has not been replaced as this could cause damage. 13. After the start-up logo, press MENU/EXIT and then press / until - BenQ W1070 | W1070 User Manual - Page 52
damaged. Please contact your local BenQ customer center for purchasing a new lamp. • The lamp is not properly attached. • The lamp has been damaged. Please contact your local BenQ customer center for purchasing a new lamp. The fans are not working. The projector has shut down automatically. If - BenQ W1070 | W1070 User Manual - Page 53
(26.2 feet) of the projector. (See page 7.) The 3D glasses are out of battery. Recharge the 3D glasses. 3D content does not not display correctly The settings in the 3D menu are not set correctly. Your Blu-ray Disc is not in 3D format. Correctly set the settings in the 3D menu. (See page 38 - BenQ W1070 | W1070 User Manual - Page 54
(V) Display system Single-chip DLPTM system Lens F/Number (W1070) F = 2.59 to 2.87, f = 16.88 to 21.88 mm (W1080ST) F = 2.6 to 2.78, f = 10.2 to 12.24 mm Lamp 240 W lamp Electrical Power supply AC100-240V, 3.4 A, 0°C-35°C 1500-3000 m at 0°C-30°C (with High Altitude Mode on) 54 Using the projector - BenQ W1070 | W1070 User Manual - Page 55
Dimensions 311.87 mm x 244.12 mm x 109.26 mm (W x D x H) 244.12 109.26 311.87 46.21 115 80 Ceiling mount installation Ceiling mount screws: 160 M4 (Max L = 25 mm; Min L= 20 mm) Unit: mm 137 43.55 Unit: mm 625.95 577.7 537.9 95.33 163.12 311.95 102.97 244.12 Using the projector 55 - BenQ W1070 | W1070 User Manual - Page 56
Timing chart Supported timing for PC input Format Resolution 720 x 400 640 x 480 800 Reduce Blanking) 1152 x 864_75 BenQ Notebook Timing BenQ Notebook Timing 1280 x 720_60* 1280 x 768_60* WXGA_60* WXGA_75 WXGA_85 WXGA_120** (Reduce Blanking) Refresh rate (Hz) 70.087 59. 56 Using the projector - BenQ W1070 | W1070 User Manual - Page 57
for 3D signal with Frame Sequential format. ***Supported timing for 3D signal with Top-Bottom and Side-by-Side format. • The timings showing above may not be supported due to EDID file and VGA graphic card limitations. It is possible that some timings cannot be chosen. Using the projector 57 - BenQ W1070 | W1070 User Manual - Page 58
Supported timing for HDMI (HDCP) input Format Resolution Refresh rate (Hz) 640 x 480 720 x 400 800 x 600 1024 x XGA_60* XGA_70 XGA_75 XGA_85 XGA_120** (Reduce Blanking) 1152 x 864_75 BenQ Notebook Timing BenQ Notebook Timing 1280 x 720_60* 1280 x 768_60* WXGA_60* WXGA_75 Using the projector - BenQ W1070 | W1070 User Manual - Page 59
x 1080 50 56.25 148.5 16:9 1080/60P 1920 x 1080 60 67.5 148.5 16:9 *Supported timing for 3D signal with Frame Packing and Top-Bottom format. **Supported timing for 3D signal with Frame Sequential format. ***Supported timing for 3D signal with Side-by-Side format. Using the projector 59 - BenQ W1070 | W1070 User Manual - Page 60
74.25 74.25 74.25 148.5 148.5 Supported timing for Video and S-Video inputs Format Resolution Refresh rate (Hz) NTSC* - 60 PAL - 50 SECAM - 50 PAL-M - 60 PAL-N - 50 PAL-60 - 60 NTSC4.43* - 60 *Supported timing for 3D signal with Frame Sequential format. H. Freq. (KHz) 15 - BenQ W1070 | W1070 User Manual - Page 61
replacement of any defective parts (labor included). To obtain warranty service, immediately notify the dealer from which you purchased the product of any defects. Important: The above warranty shall be void if the customer fails to operate the product in accordance with BenQ's written instructions
-
 1
1 -
 2
2 -
 3
3 -
 4
4 -
 5
5 -
 6
6 -
 7
7 -
8
-
9
-
10
-
11
-
12
-
13
-
14
-
15
-
16
-
17
-
18
-
19
-
20
-
21
-
22
-
23
-
24
-
25
-
26
-
27
-
28
-
29
-
30
-
31
-
32
-
33
-
34
-
35
-
36
-
37
-
38
-
39
-
40
-
41
-
42
-
43
-
44
-
45
-
46
-
47
-
48
-
49
-
50
-
51
-
52
-
53
-
54
-
55
-
56
-
57
-
58
-
59
-
60
-
61
 |
 |

W1070/W1080ST
Digital Projector
Home Cinema Series
User Manual