Beretta 1301 Competition User Manual - Page 21
Trigger Plate - 21
 |
View all Beretta 1301 Competition manuals
Add to My Manuals
Save this manual to your list of manuals |
Page 21 highlights
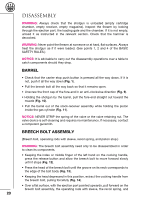
the spring holder, to force the breech bolt out from the receiver (Fig. 15). TRIGGER PLATE NOTICE: The trigger plate only needs to be disassembled in order to clean the trigger mechanism. • Engage the safety (the hammer is cocked) (Fig. 3). • Press the carrier stop push button, if it has not already been pressed (Fig. 1). • Remove the trigger guard retaining pin by pressing with a pin punch or an awl (Fig. 16 and 17). • Keeping the release button pushed all the way down, remove the trigger plate from the receiver using the trigger guard as a lever, first in the direction of the barrel and then outward (Fig. 18, 19 and 20). EN 21
-
 1
1 -
2
-
3
-
4
-
5
-
6
-
7
-
8
-
9
-
10
-
11
-
12
-
13
-
14
-
15
-
 16
16 -
 17
17 -
 18
18 -
 19
19 -
 20
20 -
 21
21 -
 22
22 -
 23
23 -
 24
24 -
 25
25 -
 26
26 -
27
-
28
-
29
-
30
-
31
-
32
-
33
-
34
 |
 |
21
the spring holder, to force the breech bolt out from the receiver (
Fig. 15
).
TRIGGER PLATE
NOTICE:
The trigger plate only needs to be disassembled in order to clean the
trigger mechanism.
• Engage the safety (the hammer is cocked) (
Fig. 3
).
• Press the carrier stop push button, if it has not already been pressed (
Fig. 1
).
• Remove the trigger guard retaining pin by pressing with a pin punch or an awl
(
Fig. 16 and 17
).
• Keeping the release button pushed all the way down, remove the trigger plate
from the receiver using the trigger guard as a lever, first in the direction of the
barrel and then outward (
Fig. 18, 19 and 20
).