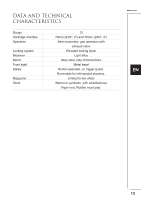
Beretta A300 Outlander Wood Beretta Owner Manual A300 Outlander - Page 18
Fig. 11, Fig. 12, Fig. 13, Fig. 14, Fig. 15 - 12 ga
 |
View all Beretta A300 Outlander Wood manuals
Add to My Manuals
Save this manual to your list of manuals |
Page 18 highlights
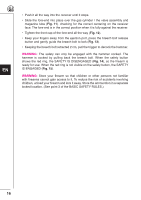
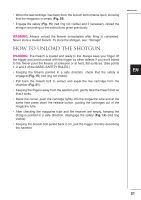
EN • Push it all the way into the receiver until it stops. • Slide the fore-end into place over the gas cylinder / the valve assembly and magazine tube (Fig. 11). checking for the correct centering on the receiver face. The fore-end is in the correct position when it is fully against the receiver. • Tighten the front cap of the fore-end all the way (Fig. 12). • Keep your fingers away from the ejection port, press the breech bolt release button and gently guide the breech bolt to lock (Fig. 13). • Keeping the breech bolt retracted 2 cm, pull the trigger to decock the hammer. WARNING: The safety can only be engaged with the hammer cocked. The hammer is cocked by pulling back the breech bolt. When the safety button shows the red ring, the SAFETY IS DISENGAGED (Fig. 14), so the firearm is ready for use. When the red ring is not visible on the safety button, the SAFETY IS ENGAGED (Fig. 15). WARNING: Store your firearm so that children or other persons not familiar with firearms cannot gain access to it. To reduce the risk of accidents involving children, unload your firearm and lock it away. Store the ammunition in a separate locked location. (See point 3 of the BASIC SAFETY RULES.) 16
-
 1
1 -
2
-
3
-
4
-
5
-
6
-
7
-
8
-
9
-
10
-
11
-
12
-
 13
13 -
 14
14 -
 15
15 -
 16
16 -
 17
17 -
 18
18 -
 19
19 -
 20
20 -
 21
21 -
 22
22 -
 23
23 -
24
-
25
-
26
-
27
-
28
-
29
-
30
-
31
-
32
-
33
-
34
-
35
-
36
-
37
 |
 |