Bernina 2000 Manual
Bernina 2000 Manual
 |
View all Bernina 2000 manuals
Add to My Manuals
Save this manual to your list of manuals |
Bernina 2000 manual content summary:
- Bernina 2000 | Manual - Page 1
2 BERNINA' 2 rl nl a ~I IfI rub BERNINA' ` • -t••• • 1Ni- • BERNINA 2000 say - Bernina 2000 | Manual - Page 2
required around the sewing needle and knife. 6. Always use the proper needle plate. The wrong plate can cause the needle to break. 7. Do no use bent needles. 8. Do not pull or push fabric while stitching. It may deflect the needle causing it to break «GROUNDING INSTRUCTIONS» (Model 2000 D, USA only - Bernina 2000 | Manual - Page 3
knob 2 Selection lever for overlock or roll hem 3 Removable cloth plate/free arm 4 Stitch plate 5 Presser foot 6 Needle clamp 7 Sewing light 8 Left needle fine tuning (yellow) 9 Needle stop* 10 Safety control light* 11 Carrying handle 12 Thread guide 13 Thread guide support 14 Support rod 15 Stitch - Bernina 2000 | Manual - Page 4
and needles 15 2 Overlock stitches 3 stitch selection 17 Threading 17 Test sewing and fine tuning 17 Adjustments and 4 settings 27 Stitch chart 31 5 Practical sewing 35 6 Maintenance 7 Trouble-shooting 43 Index 8 Technical Data 47 Note: The model Bernina 2000 DE is - Bernina 2000 | Manual - Page 5
E xa h 0 ci E E- Setting up the machine Attaching the foot control 10 Thread stand 10 Threads, cones, spools 11 Waste collector 11 Operating controls Power switch 12 Light switch 12 Electronics*/safety 12 Handwheel 12 Looper cover 12 Cloth plate/free arm 13 2-step presser foot - Bernina 2000 | Manual - Page 6
positioning catches engage. Position the thread guide (2) on the thread stand so that it is parallel to the machine. = Setting up the machine 0 0 Thread cones/spools Cones or domestic spools in all sizes can be used on your Bernina overlocker. When sewing with cones, first place the stabilizing - Bernina 2000 | Manual - Page 7
switch is placed on the rear left side of the machine, above the presser t foot lifter. E 1 = ON 2 2 = OFF E Electronics/safety Your Bernina overlocker is equipped with electronic operating and safety features. Needle stop*: To lower the needle, press foot control and the presser The - Bernina 2000 | Manual - Page 8
Open the looper cover. ?2Press the upper knife holder (1) to the right. Turn the knob (2) clockwise until the knife locks. 14 Needles and thread Needles and machine 16 Needles and fabric 16 Needles and thread 16 Thread, needle, applications table 16 Threads, decorative threads 16 15 - Bernina 2000 | Manual - Page 9
selection Bernina 2000 stitches 18 Upper looper converter 18 Stich selection lever/ roll hem 18 Overlock stitch width 19 Stitch selection dial 19 Sewing positions 19 Stitch selection display 19 Threading General instructions 20 Preparation 20 Needle/looper threader 20 First machine - Bernina 2000 | Manual - Page 10
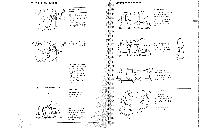
with the left or right and left needles: 5-7 mm (overlock) I O• • 2 • A 3 O• A 4 • • 5 O • 6 • 1 'I • v O A 1-6 DECO O B 7 • uo • vO C 8 (! io • •O 9 a i -§ • •O E Stitch display/stitch selection dial Sewing position/stitch display The Bernina 2000 is equipped with a unique stitch - Bernina 2000 | Manual - Page 11
Bernina overlocker is equipped with practical threading aids. - Stitch display with threading information - Coloured threading diagram - Colour coded threading path - Lay-in thread guides - Threading accessories in the looper cover Preparation - Raise the support rod fully. - Raise the needles - Bernina 2000 | Manual - Page 12
it under the presser foot. Tip: When sewing with the up-. per looper converter, take. guide. 0 2 Thread the first machine guide. 3 0 3 Slip the thread through 0 0 the groove. 4, 5 Take the thread under the thread guide plate and through the take- 4 up. 6 Thread the guide on the needle - Bernina 2000 | Manual - Page 13
guide plate t and 5 through the take-up. E 6 Thread the guide on the needle clamp. 7 Swing the presser foot E 4 out. Thread the needle Fine tuning Compare your sewing test with the overlock 1 Upper looper thread (blue) 2 Lower looper thread (red) 3 Right needle thread (green) 4 left needle - Bernina 2000 | Manual - Page 14
Sewing test and fine tuning k"int,st3)t: • 116 Fine tuning for 3/4 thread overlock and 3 thread narrow seam: The loops thread super stretch 2 thread wrapped overlock 2 thread roll hem The left needle forms loops on the underside. Increase the left needle thread tension (yellow). Reduce the lower - Bernina 2000 | Manual - Page 15
and can be adjusted while sewing. Simply turn the stitch length dial in the direction desired. Most overlock work is done with a the upper knife. It right or left needle. adjusts itself automatically Raise the upper knife. are two feed dogs on your Bernina overlockerone front (A) and one rear - Bernina 2000 | Manual - Page 16
in the direction desired for stepfree adjustments while sewing. Always test sew. Setting Effect Fabric 2 Pushing effect, no knit. Stitch chart 4 thread overlock with integrated safety seams 32 3 thread super stretch 32 3 thread overlock 32 2 thread overlock 32 3 thread narrow seam 32 - Bernina 2000 | Manual - Page 17
glossy Differential. ll embrodery thread 5-7 nen, Loner toper, needle. left ad-purpose overlock Thread. polyester thread neede 4, sxi. -N•-,,'"44.16 . The basic settings for position A. C. 0 and E are suable for normal sewing thread. t The stitches do possum B are the save as position A - Bernina 2000 | Manual - Page 18
37 Seam allowance markings 37 Seam guide right* 38 Seam guide left 38 Deco guide 39 Seam begin, sewing in the thread chain 39 Seam end, sewing in the thread chain 40 Securing the thread chain 40 Sewing curves 40 Sewing corners 41 6 Sewing circular or turbular items 42 - Bernina 2000 | Manual - Page 19
: 4 thread overlock Position A/B - Differential feed: 2 - Stitch length: 3-4 - Cutting width: 2 Note: A tighter gather can be obtained by increasing the needle tensions. f. tiP pirJ Ifi rxa lip Tip: After sewing, loosen the needle threads from the thread chain with a pin or the Bernina seam ripper - Bernina 2000 | Manual - Page 20
heavy thread: position the guide over the lower looper tension. 3 thread overlock with fine rayon embroidery thread, e.g. Rayon No. 40: take threads through the deco guide to the needles. Test sew. Seam begin-sewing in the thread chain Sew a 3-4 cm thread chain. - Sew 2-3 stitches on the fabric - Bernina 2000 | Manual - Page 21
stitches with a darning needle. Sewing curves Sewing both outside and inside curves is very easy with an overlocker. Guide fabric in as straight Lower the needles (Needle stop down*). - If necessary, pull all the threads taut above the first machine guide. - Continue sewing. Sewing inside corners - Bernina 2000 | Manual - Page 22
needle threads with a pin or your Bernina seam E ripper. Pull first on the needle and then on the looper threads and the seam will come undone. Maintenance Replacing the upper knife 44 Replacing the lower knife 44 Replacing the bulb 44 Cleaning and oiling 44 Trouble shooting guide - Bernina 2000 | Manual - Page 23
be removed regularly. CID C Your Bernina overlocker requires very little lubrication as the main components are made of special materials. Occasionally lubricate the points illustrated. 44 Trouble shooting guide 41 Problem Cause zl The machine does not sew. The presser foot is up or - Bernina 2000 | Manual - Page 24
Index Technical data 8 - Bernina 2000 | Manual - Page 25
Index A Accessories - Seam guide left - Seam guide right B Bernina Publications Bulb - holder - replacing C Cleaning and lubricating Cloth plate Cones, positioning Corners, sewing Correct stitch formation Cutting width D Deco guide Decorative finishes Decorative thread Differential feed Domestic - Bernina 2000 | Manual - Page 26
is not possible to cover more than the basics of sewing in an instruction manual. However, to help you use the creative potential of your Bernina overlocker or sewing machine to the full, Bernina regularly publishes sewing literature which covers everything from simple techniques to advanced fashion
-
 1
1 -
 2
2 -
 3
3 -
 4
4 -
 5
5 -
 6
6 -
 7
7 -
8
-
9
-
10
-
11
-
12
-
13
-
14
-
15
-
16
-
17
-
18
-
19
-
20
-
21
-
22
-
23
-
24
-
25
-
26
 |
 |

rl
a
nl
2
2
BERNINA'
BERNINA'
BERNINA
2000
say
•
`
•
-
t•
••
•
1Ni
-
~I IfI
rub