Bernina 2000 Manual - Page 7
Electronics/safety
 |
View all Bernina 2000 manuals
Add to My Manuals
Save this manual to your list of manuals |
Page 7 highlights
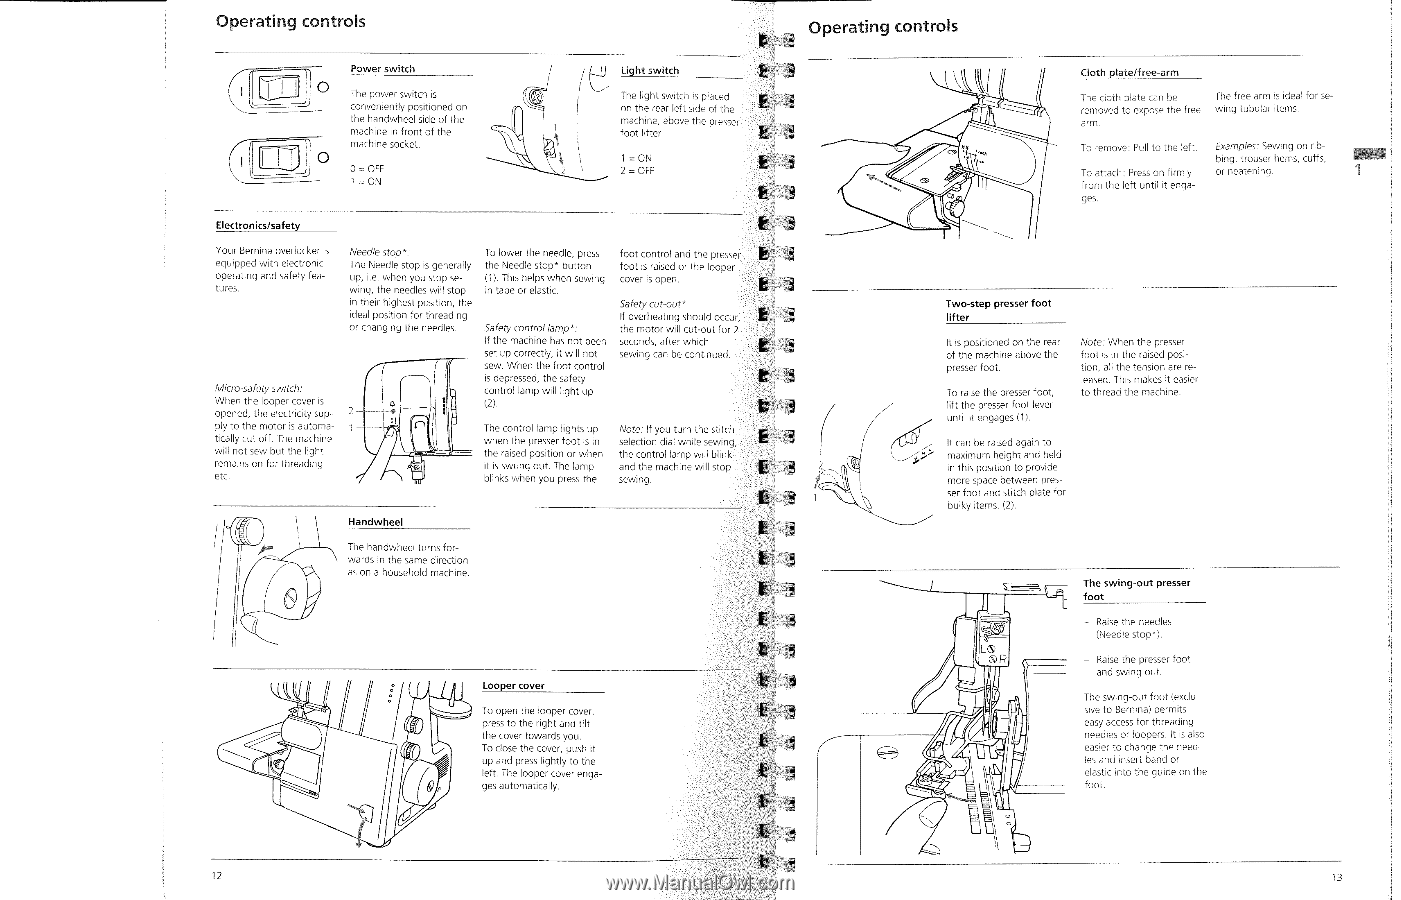
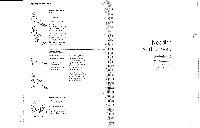
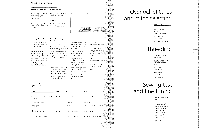
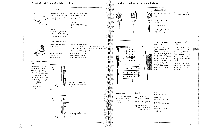
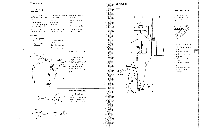
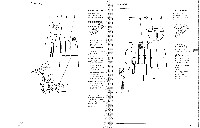
Operating controls Operating controls Power switch O The power switch is conveniently positioned on the handwheel side of the machine in front of the machine socket. 0= OFF 1 = ON Light switch E E ,3 The light switch is placed on the rear left side of the machine, above the presser t foot lifter. E 1 = ON 2 2 = OFF E Electronics/safety Your Bernina overlocker is equipped with electronic operating and safety features. Needle stop*: To lower the needle, press foot control and the presser The Needle stop is generally the Needle stop* button foot is raised or the looper up, i.e. when you stop se- (1). This helps when sewing cover is open. wing, the needles will stop in tape or elastic. E in their highest position, the Safety cut-out* ideal position for threading or changing the needles. Safety control lamp*: If overheating should occur, the motor will cut-out for If the machine has not been seconds, after which set up correctly, it will not sewing can be continued. sew. When the foot control is depressed, the safety Micro-safety switch: When the looper cover is opened, the electricity sup- 2 control lamp will light up (2). ply to the motor is automatically cut off. The machine will not sew but the light remains on for threading etc. in E 3 The control lamp lights up Note: If you turn the stitch when the presser foot is in selection dial while sewing. the raised position or when the control lamp will blink it is swung out. The lamp and the machine will stop blinks when you press the sewing. Handwheel The handwheel turns forwards in the same direction as on a household machine. F I 3 F (6) Looper cover To open the looper cover, press to the right and tilt the cover towards you. To close the cover, push it up and press lightly to the left. The looper cover engages automatically. L 1 U g L a1 CS do es Cloth plate/free-arm The cloth plate can be The free arm is ideal for se- removed to expose the free wing tubular items. arm. To remove: Pull to the left. To attach: Press on firmly from the left until it engages. Examples: Sewing on ribbing, trouser hems, cuffs, or neatening. Two-step presser foot lifter It is positioned on the rear of the machine above the presser foot. To raise the presser foot, lift the presser foot lever until it engages (1). Note: When the pressefoot is in the raised position, all the tension are released. This makes it easier to thread the machine. It can be raised again to Y maximum height and held in this position to provide more space between presser foot and stitch plate for bulky items. (2). The swing-out presser foot - Raise the needles (Needle stop*). Raise the presser foot and swing out. The swing-out foot (exclusive to Bernina) permits easy access for threading needles or loopers. It is also easier to change the needles and insert band or elastic into the guide on the foot. 12 13
-
 1
1 -
 2
2 -
 3
3 -
 4
4 -
 5
5 -
 6
6 -
 7
7 -
 8
8 -
 9
9 -
 10
10 -
 11
11 -
 12
12 -
13
-
14
-
15
-
16
-
17
-
18
-
19
-
20
-
21
-
22
-
23
-
24
-
25
-
26
 |
 |