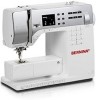
Bernina 350PE User Guide
Bernina 350PE Manual
 |
View all Bernina 350PE manuals
Add to My Manuals
Save this manual to your list of manuals |
Bernina 350PE manual content summary:
- Bernina 350PE | User Guide - Page 1
on your journey to even greater sewing pleasure and perfect results. Enjoy creative sewing with BERNINA: Find out about our varied range of accessory and let yourself be inspired by new sewing projects at www.bernina.com. And don't forget to make use of service and maintenance offers from our highly - Bernina 350PE | User Guide - Page 2
such as changing the needle or the presser foot, etc. 14. Always unplug the sewing computer from the electrical outlet when carrying out cleaning or maintenance work or any other user servicing adjustments mentioned in this manual. 15. This sewing computer is provided with double insulation (except - Bernina 350PE | User Guide - Page 3
computer 24 █ Details of the screen 26 Sewing stitches █ Practical stitches 30 █ Examples of application 31 Cleaning, maintenance █ Sewing computer and screen 44 █ Lubricating 44 Troubleshooting █ Memory █ Buttonholes █ Practical-/Quiltstitch Stitch patterns Index 5-7 8-23 24-29 27 - Bernina 350PE | User Guide - Page 4
the BERNINA 350 *** Not supplied as standard with the BERNINA 380 Glossary Balance clr LED FHS mem Bartack Satin stitching Fabric fold Hook Correcting abnormalities in stitch formation due to the fabric Deleting settings or data Sewing light system Free-Hand System = Knee-operated presser-foot - Bernina 350PE | User Guide - Page 5
Standard Accessory Accessory 5 █ Fabric cover █ Accessory box */** █ Accessory case *** █ Foot control █ Power cable █ Slide-on table* █ Stitch pattern summary card █ Free-Hand System FHS */** 1 5 bobbins (one of them in the bobbin case) 2 Selection of needles 5 3 Seam guide, right 4 Height - Bernina 350PE | User Guide - Page 6
slide 4 No. 4 Zipper foot 5 No. 5 Blindstitch foot 6 No. 8 Jeans foot **/(without 350 PE) 7 No. 20 Open embroidery foot 8 No. 37 Patchwork foot (only 350 PE) Presser Feet: can vary from country to country (Snap-On Soles or Standard). More accessories you can found on www.bernina.com 033301.70 - Bernina 350PE | User Guide - Page 7
Accessory Box */** Accessory 7 Storing Accessory Standard accessory are supplied in a plastic bag. They can be stored as shown in the picture. Accessory Case *** Standard accessory for the models B330/350 can be carefully stored in the case. Buttonhole foot 3A is stored inside in a separate - Bernina 350PE | User Guide - Page 8
8 Preparation - Details of the sewing computer Front View 9 8 10 11 7 18 19 20 17 16 21 15 33 12 13 14 22 6 5 4 23 24 2 3 25 1 26 Detail View 44 40 39 41 43 42 033301.70.04_1007_B330_B350_B380_EN - Bernina 350PE | User Guide - Page 9
34 35 36 Preparation - Details of the sewing computer 9 30 37 38 1 Bobbin cover 2 Stitch plate 3 Attachment base for special accessory 4 LED sewing light 5 Quick reverse button 6 Start/Stop button 7 Thread take-up cover 8 Thread take-up lever 9 Bobbin winder pre-tension 10 Speed control 11 Screen - Bernina 350PE | User Guide - Page 10
light must ONLY be replaced by an authorized technician. The sewing computer must be taken to an authorized BERNINA dealer! The slide-on table increases the sewing surface. Attaching the slide-on table █ raise needle and presser foot █ slide over free-arm to the right until it engages Removing - Bernina 350PE | User Guide - Page 11
your normal sitting position Raising and lowering the presser foot █ with your knee push lever to the right █ the presser foot is raised; the feed dog is lowered simultaneously. The thread tension is released █ the feed dog is raised as soon as the first stitch is sewn Your dealer can adjust the FHS - Bernina 350PE | User Guide - Page 12
automatically when the bobbin is full Inserting a Bobbin Thread cutter █ pull thread over thread cutter when removing the bobbin Bobbin winding while sewing █ place thread spool on vertical spool pin then, following the direction of the arrow, take thread through the thread guide and around the - Bernina 350PE | User Guide - Page 13
the finger on the case should point upwards █ insert the case so that it clicks into place The bobbin thread does not have to be brought up as the loose end is just the right length to start sewing. Bobbin thread cutter █ insert the bobbin case █ take the thread over cutter A and cut it █ close the - Bernina 350PE | User Guide - Page 14
- Sewing Needle Threader A B 1 2 A 1 Press lever down █ raise needle █ lower the presser foot █ hold thread to the left and back █ press lever A down and simultaneously guide the thread around hook B to the right to the needle 2 Guide thread to front of the needle █ put the thread from - Bernina 350PE | User Guide - Page 15
the front in the slit and past the tension disc A on the right side █ thread sewing computer as usual and thread the right needle Threading the Second Thread █ place thread spool on the vertical spool pin and thread █ guide the thread to the front in the slit and past the tension disc A on the left - Bernina 350PE | User Guide - Page 16
- Sewing Thread Cutter On the left of the head frame █ pull both threads from front to back over the cutter █ the threads release automatically as soon as the first stitch is sewn Changing the Needle Removing the needle █ raise needle █ power switch to «0» (off) █ lower the presser foot █ loosen - Bernina 350PE | User Guide - Page 17
sole will click into position Changing the Presser Foot Changing the Presser Foot █ raise the needle and presser foot █ power switch to «0» (off) Raising the Lever █ raise the clamping lever █ remove the presser foot Attaching the Presser Foot █ guide the foot upwards over the cone █ press the - Bernina 350PE | User Guide - Page 18
- Sewing Stitch Plate Thread Tension A B Stitch Plate Markings █ the stitch plate is marked with vertical, horizontal and diagonal lines in mm and inches █ the lines help to guide the fabric for sewing seams and precise topstitching, etc. █ the horizontal markings are helpful for sewing - Bernina 350PE | User Guide - Page 19
Different fabrics, threads and stabilizers can naturally affect the stitch balance so that the stitch patterns are sewn too close together or not close enough. This can be remedied with Balance to suit the fabric and produce perfect results. Test-sewing When using decorative stitches, we recommend - Bernina 350PE | User Guide - Page 20
length, the steps are also very short. The fabric moves under the foot quite slowly, even at full sewing speed. e.g. buttonholes, satin stitch and decorative stitches are all sewn with a very short stitch length. Let the fabric feed evenly. Pulling, pushing or holding back the fabric will result - Bernina 350PE | User Guide - Page 21
Layers The feed dog works accurately when the foot is level. If the foot is at an angle, e.g. when sewing over thick to thin or vice-versa, the feed dog cannot grip and feed the fabric. The fabric might jam. 1 Sewing Corners 1 To solve this problem, place one, two or three compensating plates as - Bernina 350PE | User Guide - Page 22
when starting a new sewing project. Needles, Threads Correct needle/thread combination When sewing, the thread should travel smoothly down the long groove on the front of the needle. Too thin thread or too thick needle The thread has too much clearance in the groove. Skipped stitches and damage to - Bernina 350PE | User Guide - Page 23
(woven and knitted) Jersey/Stretch 130/705 H-S, H-SES, H-SUK/70-90 Ball point Jersey, knits, stretch fabrics Preparation - Sewing 23 Metafil 130/705 H-MET/75-90 Large eye Sewing with metallic threads Cordonnet (Topstitching) 130/705 H-N/80-100 Small ball point, long eye Topstitching with thick - Bernina 350PE | User Guide - Page 24
Functions Function Buttons on the Sewing Computer Stitch Selection █ for stitch patterns 1-10: press the number button of your choice; stitch number and default width and length settings appear █ press «0» to select stitch number 10 (standard buttonhole) █ for stitch patterns 11-99: press #-button - Bernina 350PE | User Guide - Page 25
program █ manual securing (seam begin and end) continous reverse: █ press button quickly twice █ the sewing computer sews the chosen stitch in reverse █ press button once to cancel Start/Stop button █ starts and stops the sewing computer when operating it without foot control - the connected foot - Bernina 350PE | User Guide - Page 26
setting always visible - blinks) 2 Stitch length (basic setting always visible - blinks) 2 3 Needle position (9 possibilities) 4 Needle stop up/down 5 Number of stitch pattern 6 Number of presser foot (for selected stitch pattern) 7 Satin stitch: dense, short zig-zag stitch 7 033301.70 - Bernina 350PE | User Guide - Page 27
of 30 spaces). It's a long-term memory. The contents remain saved until deleted by the user. Power cuts or switching off («0») the sewing computer for a longer time will not 3 affect the saved program. The stitch lengths or widths and the needle position can be changed at any time. Individual - Bernina 350PE | User Guide - Page 28
5 No. 10 No. 11 No. 16 Securing program Buttonhole Button sewing-on program Darning program 350: No. 5 Securing program No. 10-11 Buttonholes No. 12 Button sewing-on program No. 13 Eyelet No. 20 Darning program No. 21 Basting stitch 380: No. 5 Securing program No. 10-13 Buttonholes No. 14 Button - Bernina 350PE | User Guide - Page 29
supply. They can be recalled at any time. The contents of the memory will be lost if the sewing computer is switched off without pressing the button 2 before closing the memory. Overwriting individual stitch patterns, letters and numbers █ scroll with the right 3 or left 1 button to find the - Bernina 350PE | User Guide - Page 30
stretch fabrics, flat joining seams and hems, reinforced seaming on underwear Stretch stitch All stretch fabrics; open seam in sportswear Darning program Automatic darning for fine and mediumweight fabrics Honeycomb stitch Most types of interlock and smooth fabrics; visible seams and hems 033301 - Bernina 350PE | User Guide - Page 31
with the needle down in the fabric, raise the presser foot. Open zipper, pulling the tab below the needle; lower presser foot and continue to sew Seam begin Hold thread firmly when starting to sew = pull fabric slightly to the back (fewer stitches). Zipper or fabric is thick or densely woven For - Bernina 350PE | User Guide - Page 32
foot/sole No. 1 Automatic Buttonhole foot with slide No. 3A Darning program Quick darning of holes or worn areas Replaces threads along the lengthwise grain in all fabrics. Darning with Reverse pattern foot/sole No. 1 (auto stitch counter) █ insert the needle in the top left of the worn area █ sew - Bernina 350PE | User Guide - Page 33
/sole No. 2 is specifically designed for overlock stitching. The pin on the foot allows for more thread in each stitch so that the elasticity of the seam is maintained. Closed seam Stretchy seam in fine, soft knits such as silk jersey and interlock. Sewing █ guide the open edge along the pin on the - Bernina 350PE | User Guide - Page 34
█ fold ribbing in half and press █ with right sides together, pin and baste ribbing to neckline Sewing █ sew Vari-overlock over the raw edge █ guide the open edge along the pin on the foot/sole █ the stitch will form over the pin and over the edge of the fabric Needle stop down Needle stays in - Bernina 350PE | User Guide - Page 35
by turning the screw on the right Fine stitch-width adjustment Guide the folded edge evenly along the metal guide on the foot = even depth. Reverse pattern foot/sole No. 1 Securing program █ for all fabrics █ secures beginning and end of seam Sewing long seams █ quicker securing at beginning and end - Bernina 350PE | User Guide - Page 36
-stitch buttonhole Stay-stitch program for bound buttonholes (foot no. 3A) or pocket openings (foot no. 3) Button sewing-on program For foot indicator 1 3 A Thread tension for sewing buttonholes █ thread the bobbin thread through the finger A of the bobbin case = the bobbin thread tension - Bernina 350PE | User Guide - Page 37
Sewing stitches - Buttonholes 37 Marking the length of manual buttonholes █ mark the buttonhole length in the desired position █ use Buttonhole foot/sole no. 3 */**/*** Marking the length of automatic buttonholes █ mark the length of just one buttonhole █ after sewing the first buttonhole, the - Bernina 350PE | User Guide - Page 38
accordingly Ideal cords █ Perle cotton no. 8 █ strong hand-sewing thread █ fine crochet yarn Hooking the cord in the buttonhole foot with slide no. 3A █ insert the needle at the beginning of the buttonhole █ raise the presser foot █ guide the cord under the foot to the right █ hook the cord over the - Bernina 350PE | User Guide - Page 39
flat on the fabric! If the slide foot rests on a seam allowance, the length cannot be measured accurately. 1 2 34 Programming the standard buttonhole 1. sew the first bead forwards, stop the sewing computer █ press the Quick reverse button «auto» and the presser foot no. 3A appear on the display - Bernina 350PE | User Guide - Page 40
Keyhole Buttonhole with Auto-Length Automatic buttonhole foot with slide No. 3A Automatic keyhole buttonhole Programming the buttonhole 1. sew the straight stitch forward, stop the sewing computer █ press the Quick reverse button «auto» and presser foot no. 3A appear on the screen = buttonhole - Bernina 350PE | User Guide - Page 41
lower thread in the finger of the bobbin case 1 3 1 3 2 4 2 4 5 Sewing a manual standard buttonhole 1. sew the bead up to the end of the length marking █ stop the sewing computer █ press the Quick reverse button 2. sew reverse straight-stitch, stop the sewing computer at the first stitch of - Bernina 350PE | User Guide - Page 42
as required with foot no. 18 Sewing on buttons with Darning foot no. 9 █ select Button sew-on program █ check distances between holes with the handwheel and adjust stitch width if necessary █ sew the securing stitches; hold the threads when starting to sew █ sew program █ sewing computer stops - Bernina 350PE | User Guide - Page 43
is easier to remove. Reverse pattern foot/sole No. 1 Handlook quilting stitch Suitable for all fabrics and work which should look «hand sewn». Test sewing █ the bobbin thread must come through to the right side █ 1 stitch is visible (bobbin thread) █ 1 stitch is invisible (monofilament) = hand-look - Bernina 350PE | User Guide - Page 44
engage █ check by turning the handwheel █ insert the bobbin case Lubricating █ power switch to «0» (off) █ pull out plug from electrical outlet █ squeeze 1 or 2 drops of oil into the hook race █ run the sewing computer for a short time without thread to prevent oil soiling your work Disconnect plug - Bernina 350PE | User Guide - Page 45
breaks Faulty stitching Sewing computer █ Remnants of thread between the tension discs █ Incorrect threading █ Remnants of thread under the bobbin case spring █ Sewing computer fails to run or runs slowly Repair █ Reduce/increase upper thread tension █ Use new, high-quality needle (BERNINA) █ The - Bernina 350PE | User Guide - Page 46
330 11 12 13 14 15 16 17 18-37 38-40 Button sewing-on program Gathering stitch Stretch overlock Universal stitch Lycra stitch Darning program Honeycomb stitch Decorative stitches Quilting stitches BERNINA 350/350 Patchwork Edition BERNINA 380 11 12 13 14 15 16 17 18 19 20 21 22 23-74 75-85 - Bernina 350PE | User Guide - Page 47
Blind stitch █ Practical stitch █ Presser foot Bobbin █ Removing/inserting the bobbin █ Winding Bobbin case █ Removing/inserting Button sew-on program Buttonhole █ 4-steps █ 5-steps █ Automatic █ Balance █ Buttonhole type █ Cutting open █ Important information █ In long-term █ Manual █ Presser - Bernina 350PE | User Guide - Page 48
a bobbin L LED sewing light Lettering size Long Term Memory Lubricating M Main power switch Maintenance and troubleshooting █ Cleaning █ Maintenance █ Troubleshooting Manual threading █ Double and triple needles █ Lower thread █ Upper thread Memory █ Modifications █ Opening █ Stitch combinations - Bernina 350PE | User Guide - Page 49
For bobbin winder █ On Head Frame Thread path/Thread guides Thread take up cover Thread tension Triple Needle Triple Straight Stitch Troubleshooting U Upper thread █ Breaks █ Tension █ Threading W Winder █ Pre-tension █ Switching on/off Z Zig-zag stitch Zipper █ Inserting a zipper █ Zipper foot 22 - Bernina 350PE | User Guide - Page 50
Typesetting, Layout Susanne Ribi/Erika Vollenweider-Czibulya Copyright 2009 BERNINA International AG, CH-Steckborn All rights reserved For technical and product improvement reasons, the sewing computer's features, parts and accessory are subject to unannounced changes and alterations at any time
-
 1
1 -
 2
2 -
 3
3 -
 4
4 -
 5
5 -
 6
6 -
 7
7 -
8
-
9
-
10
-
11
-
12
-
13
-
14
-
15
-
16
-
17
-
18
-
19
-
20
-
21
-
22
-
23
-
24
-
25
-
26
-
27
-
28
-
29
-
30
-
31
-
32
-
33
-
34
-
35
-
36
-
37
-
38
-
39
-
40
-
41
-
42
-
43
-
44
-
45
-
46
-
47
-
48
-
49
-
50
 |
 |
1
Dear Bernina Customer,
Congratulations!
You’ve decided on BERNINA, a reliable choice that will delight you for years to come.
For over 100 years, our family has placed the highest value on satisfied customers. For
myself, it is a matter of personal pride to offer you Swiss precision at the height of
perfection, future-oriented sewing technology, and a comprehensive customer service.
The BERNINA 330, 350 and 380 are primarily aimed at the occasional sewer who puts
great stock in design and customer benefit. These sewing computers are very ergonomi-
cally built and therefore even easier to operate, to help you, our esteemed customers,
on your journey to even greater sewing pleasure and perfect results.
Enjoy creative sewing with BERNINA:
Find out about our varied range of accessory and let yourself be inspired by new sewing
projects at www.bernina.com.
And don’t forget to make use of service and maintenance offers from our highly trained
BERNINA dealers.
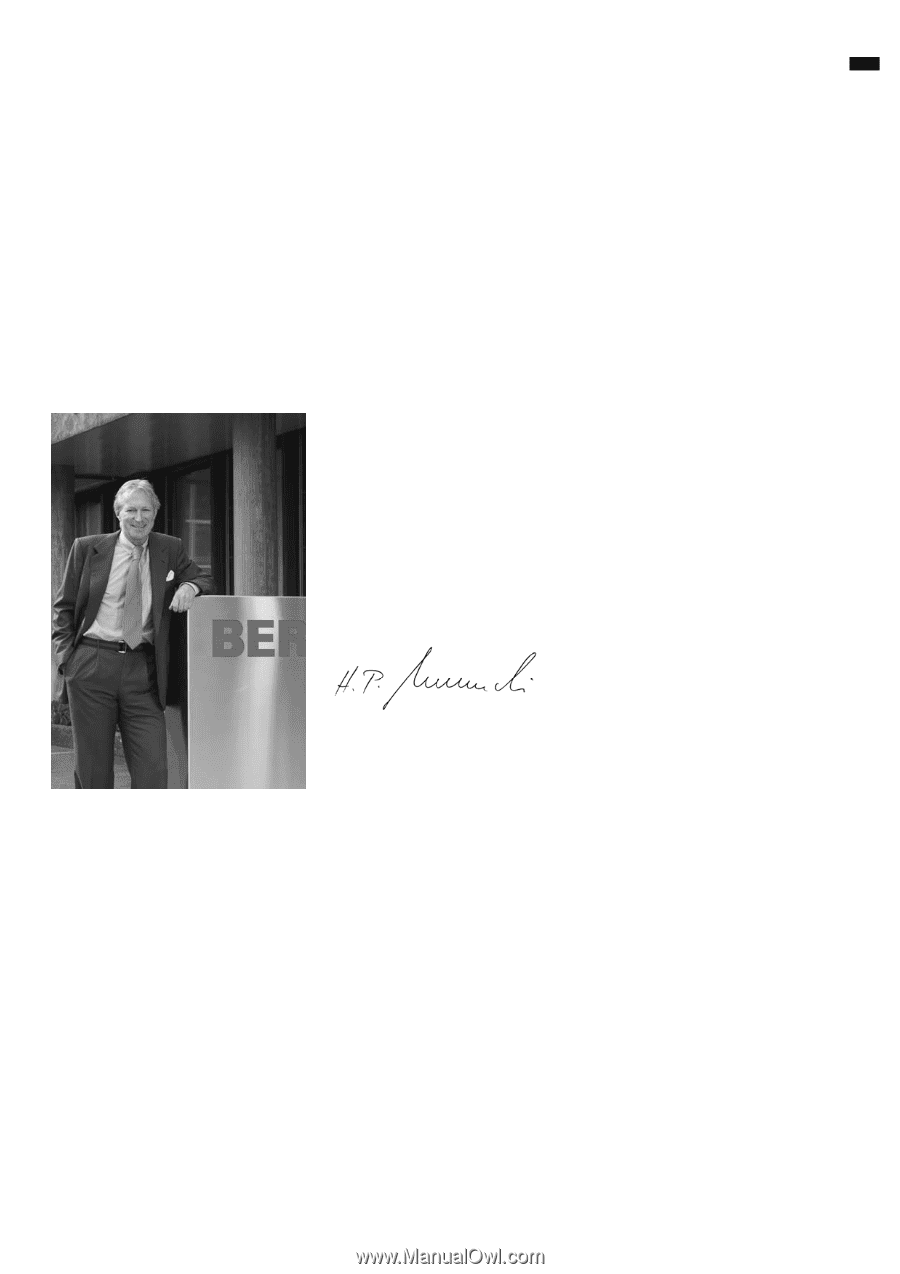
H.P. Ueltschi
Owner
BERNINA International AG
CH-8266 Steckborn
www.bernina.com
HP U l
hi
Introduction
033301.70.04_1007_B330_B350_B380_EN